

This Is The Way …to make an easy Baby Yoda cake for a Mandalorian Star Wars birthday party! The key to this simple Mandalorian cake idea is my free printable Baby Yoda ears cake toppers. Make the sphere cake with a ball cake pan, buttercream icing, and fondant accents, and then add my printable Yoda ears sort of like a cake topper. It’s much easier to make Baby Yoda cake than make a Mandalorian helmet cake.
I’ll also show you how to decorate the cake stand with the birthday boy or girl’s name and age using The Mandalorian font, plus the ancient Mandalorian skull symbol on tiny triangle-shaped bunting that coordinates with Liam’s “The Child Is 8” printable birthday banner.


You can make most of this Mandalorian birthday cake in advance of the party. I’ll share below what you can make ahead of time and when for stress-free cake decorating.
See also: ‘Easy BB-8 Star Wars Birthday cake idea’ »
Remember the cute scene in The Mandalorian when Baby Yoda tried to eat a frog? My daughter made a cute green fondant frog to go along with my Baby Yoda cake. Spit out the frog, Baby Yoda! And happy birthday to Liam — The Child Is 8!!


Merriment Design is supported by readers like you. If you buy products that I recommend, I may earn an affiliate commission at no additional cost to you. Thanks – your clicks help me make more free DIYs!


Supplies for making an easy Baby Yoda cake for a Mandalorian birthday party:
- Kathy’s Baby Yoda cake free printable template (PDF)
- 3-D Ball Cake Pan
- White fondant (this brand tastes the best)
- Fondant rolling pin with guide rings
- Set of 12 icing colors, gel-based food color
- Freezer paper and blue painter’s tape
- Metal icing spatula
- Cardstock paper in orange, green, and tan
- Wooden coffee stir sticks or lollipop sticks
How to make a DIY The Child Mandalorian birthday cake:
Step 1: Bake your ball sphere cakes + buttercream icing
Use the 3-D Ball Cake Pan for this Baby Yoda cake. I like to bake my birthday cakes 2-3 weeks in advance and freeze them until ready to decorate. My favorite recipe is the Cakegirls vanilla cake recipe because it tastes like a bakery. Make the buttercream a couple of days before you plan to decorate The Child cake. Make the Cakegirls bakery buttercream recipe, color it green using food coloring, and store in the fridge for up to 1 week, just bring the buttercream up to room temperature first per the recipe directions.
As a side note: I like to make my own DIY cake boards. For my Baby Yoda cake, I cut a piece of foam core into a circle and covered it with clear contact paper. This makes it easier to put the cake in and out of the refrigerator without needing to fit the entire cake stand into the fridge.
Step 2: Make fondant accents
Color some white fondant black using gel-based food color and my favorite “taffy pull” method of coloring fondant that keeps your hands dye-free. Roll the fondant using a fondant rolling pin with guide rings. I like to roll fondant on freezer paper that I’ve taped down with blue painter’s tape because it keeps the fondant fuzz-free and it’s easy to lift the fondant off the surface. Print my free Baby Yoda cake template and cut out the eyes as a pattern, then lay them onto the fondant and cut around using a knife.


Roll out a tiny it of white fondant. Cut out white circles and add accents onto Baby Yoda’s black eyes. I like to place my finished fondant pieces onto freezer paper. Cover the eyes with plastic wrap until you need them. You can make the Baby Yoda eyes a day or two in advance and keep covered.


Step 3: Assemble the ball cake (Baby Yoda’s head) into a sphere
Cut a little bit of cake off of the bottom of one of the cake layers so it won’t roll once on the cake board. Save the cake bits in a freezer bag to make future cake pops. Then secure the cake to the cake board by putting a little bit of buttercream icing onto the cake board, then placing the cake onto the buttercreamed board.


Add a layer of buttercream icing on top of the cake semicircle. The stack the other semicircle on top to form a ball shape.


Step 4: Ice the Baby Yoda cake with buttercream icing
Spread buttercream icing onto the Baby Yoda cake. I like to do a crumb coat first with my metal icing spatula and then add a second layer of buttercream on top, then pop it into the refrigerator to chill for like 15-20 minutes, just long enough to firm up the icing.


Once chilled, here’s how to smooth out the buttercream icing: Boil water in a mug. Put your metal icing spatula into the mug to warm the spatula. Shake off the water and smooth the hot metal icing spatula over the icing to smooth it out. Repeat the process as needed, remembering that it doesn’t need to be perfect …this is a handmade cake! You can see my smooth-ish cake below.
Step 5: Add fondant eyes to The Child cake
Put a little bit of buttercream icing on the back of each fondant eye. Use my free Baby Yoda printable template to eyeball where to place it onto the birthday cake. I think it actually kind of looks like a space alien cake now, doesn’t it?


Step 6: Add fondant facial accents and mouth to the Mandalorian cake
Now you’ll make Baby Yoda’s eyebrows, cheeks, chin, and mouth. Color some white fondant green using gel-based food coloring. Roll into long ropes and cut to fit my free Baby Yoda printable template. My baking assistant, Elise, was in charge of rolling:


Place the fondant rolls on top of my Baby Yoda free printable template to gauge their sizes. Repeat with pink fondant to roll and make The Child’s mouth. When all the pieces are ready, then put a little bit of fondant on the back of each roll and adhere it to the cake. In hindsight, his nose and cheeks could have been a bit higher.


Step 7: Make Baby Yoda’s robes using tan fondant
Color some white fondant tan using my favorite “taffy pull” method of coloring fondant that keeps your hands dye-free. Roll the fondant using a fondant rolling pin with guide rings into a long, skinny oval of fondant. It doesn’t have to be perfect, just long enough to go around the base of The Child’s head. Then fold it in half to make it look like the top folded part of Baby Yoda’s robe.


Wrap the fondant robe around the bottom of the Baby Yoda cake and overlap a bit in the front.


Chill the Mandalorian cake in your refrigerator. My cake box was too short, so I just put The Child into the fridge like this overnight and he was fine.


Step 8: Make printable Yoda ears
Print my Baby Yoda ears printable template onto green and pink cardstock paper. Cut out the full ear in green, and just the inside in pink. Glue the pink inside on top of the green ear. Then glue a wooden coffee stirrer or lollipop stick onto the back.


Step 9: Decorate cake stand with name, age, and Mandalorian symbol (optional)
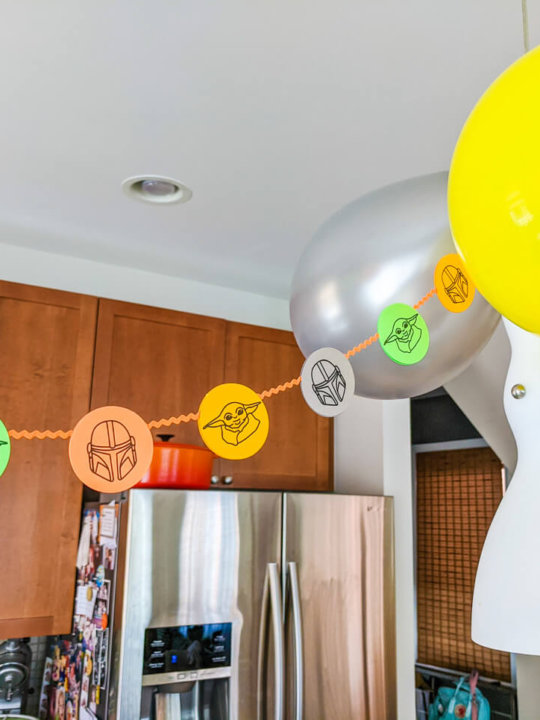
You can choose to decorate your cake stand with paper bunting that spells the birthday boy’s or girl’s name, age, and ancient Mandalorian symbol. Want a custom name and age? Please see my Etsy listing for personalizing printables if you’d like me to customize a printable file for with your child’s name and age, plus Mandalorian symbols, that you can print on any color cardstock paper.


Step 10: Add printable ears to the Baby Yoda cake
On the morning of the party, bring the cake out of the refrigerator and pop into a cake box (I put an Amazon delivery box on top of it as a makeshift cake box) to bring it up to room temperature. Putting a chilled cake into a cake box is important because otherwise, condensation may settle onto your cake. I’ve made this mistake before, and it’s not good. Lesson learned: Be sure to put your cake into a box to bring it up to room temp to avoid condensation.
Once the cake is at room temperature, and just before serving at the birthday party, slip the paper Baby Yoda ears into the sides of the cake. Putting the paper ears on too early could mean the oils from the buttercream could seep into the paper. I put my Baby Yoda ears on a bit early and then pressed them close to the icing just before lighting the candles.


Light the candles and make a wish! This was Liam’s quarantine birthday at home, so we had his relatives sing happy birthday to him via Zoom.


Loving The Mandalorian? Check out more Star Wars birthday party ideas:
- The Mandalorian printable birthday banner
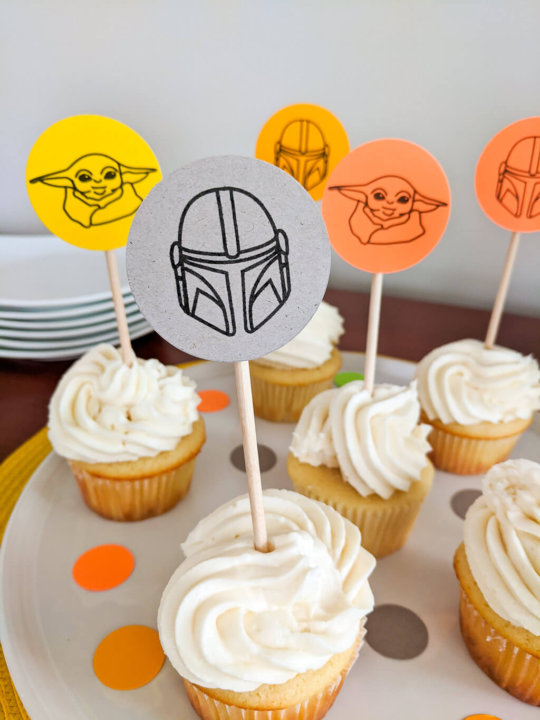
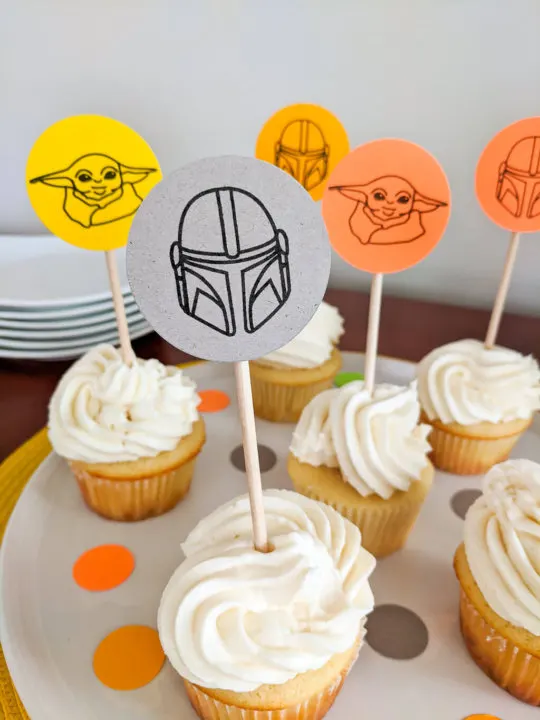
- The Mandalorian printable cupcake toppers
- Star Wars crawl parody on stairs
- Star Wars printable birthday banner
- Sarlacc pit Star Wars party game
- Star Wars printable Long, long ago… sign
- BB-8 birthday cake tutorial
- Star Wars birthday party theme – in Lightsaber colors!
- Free Han Solo from carbonite Star Wars party game
Be sure to pin this Baby Yoda cake idea for a Mandalorian birthday party:


Be sure to see more easy birthday cakes like my Ice Skating Birthday Cake, Mermaid Birthday Cake, Magic Treehouse Birthday Cake, and easy Minecraft birthday cake.
++++++
Like it? Share it!
The nicest way to say you like it is to pin it on Pinterest, post a comment, follow Merriment Design on Facebook, Pinterest, Instagram or sign up for monthly emails. Enjoy! 🙂