

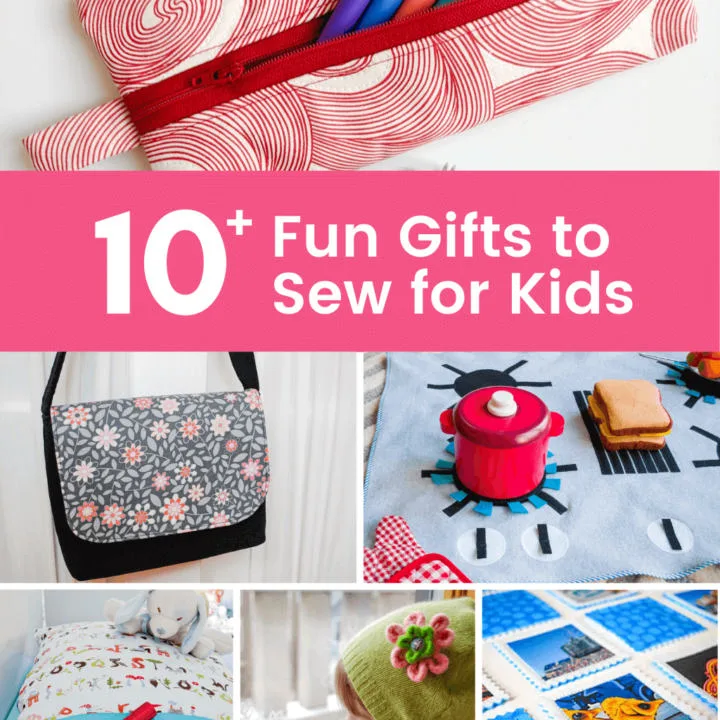
See how to make mya easy pencil case with my free pencil case sewing pattern and tutorial! This useful and quick beginner sewing project is a perfect DIY back-to-school project and also makes a great DIY gifts idea for kids.
Easy and free pencil case sewing pattern with a zipper
This zipper pencil case can hold pencils, markers, gel pens, and more. Yes, there’s a zipper. Don’t worry! I’ll show you how to easily sew a zipper into your pencil case. And there’s no need for you to change your presser foot.
Our kids take pens and pencils to restaurants instead of electronics. Just zip this handmade zipper pouch shut to keep all your pens tucked inside.
See also: ‘How to sew reusable fabric sandwich and snack bags free tutorial’ »


Great scrap buster sewing project
This pencil case DIY free sewing pattern is a great scrap buster project. And it lets you try your hand at a little bit of quilting, too.
I’ve been sewing a lot of pencil cases lately. I made a Star Wars version for my son who is super into Rainbow Looms.


Merriment Design is supported by readers like you. If you buy products that I recommend, I may earn an affiliate commission at no additional cost to you. Thanks – your clicks help me make more free DIYs!


Supplies for making a pencil case with a zipper:
- Scrap fabric large enough to cut a 9″ x 10″ rectangle and optional tab
- 1 piece of 9″ x 12″ craft felt, or you can use my favorite secret interfacing weapon: Drapery liner
- 12″ zipper
- Thread
- Good fabric scissors
- Rotary cutter, clear plastic ruler, and self-healing mat
How to make my easy pencil case holder with zipper:
Step 1: Cut pencil case holder pattern pieces
Cut the following pieces for your pencil case holder:
- One 9″ x 10″ fabric rectangle for a wide pencil case like mine, or alternatively if you want to make a more narrow pencil case, cut it 7″ x 10″ instead.
- Optional tab: cut 2″ x 4″ fabric rectangle to make a skinny 1/2″ wide tab, or cut 4″ x 4″ fabric rectangle to make a wider 1″ wide tab. It’s your choice! Or you can just leave the tab off if you like.
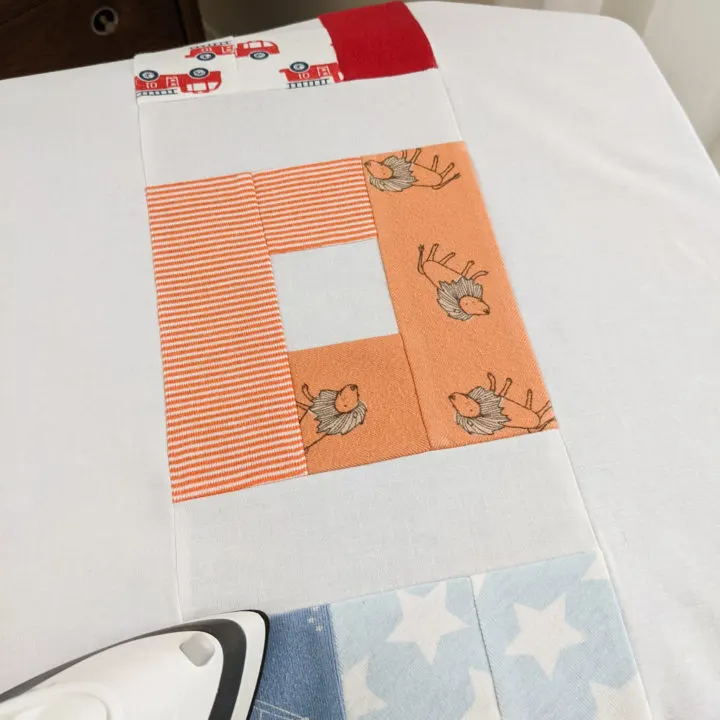
IMPORTANT NOTE: If you have fabric that you’d prefer to line up differently, then instead of cutting one 9″ x 10″ fabric rectangle, you’ll instead cut two fabric rectangles 4.75″ x 10″ and later join them together. Let me show you what I mean: See my Star Wars design below? I wanted the faces to both be turned away from the middle zipper. So, I cut two rectangles instead of one and later joined them in the middle (which I’ll show you in a bit).


Had I cut just one rectangle, then the left side faces would be turned away from the zipper, but the right side faces would be turned towards the zipper. Make sense?
Step 2: Quilt the felt onto the fabric
Place the craft felt on your table, and the fabric square on top with right side facing up. Quilt the felt to the fabric any way that you like — you can stitch straight lines 1/2″ or 1″ wide, or free-form along curves, whatever you’d like to attach the felt to the fabric.
I quilted free form lines for my pink pencil case.


And I quilted squares for my Star Wars pencil case (using the two-piece technique that I mentioned above). You’ll notice that I waited to cut the felt pieces out until after I quilted the fabric to the felt. I think it’s much easier to quilt before cutting because then you don’t have to worry so much about fabric shifting and things not lining up. So for my Star Wars pencil case, I quilted it first and then cut out the two pieces. Make sense?


Often when quilting, the edges will get a little bit wiggly. So it’s common when you’re finished quilting to need to ‘square off’ the rectangle by straightening up the edges a bit. Square off the quilted rectangle by cutting a straight line along the fabric edge like so to make it more rectangular again. Don’t worry if it’s the size is not exactly 9″ x 10″ anymore. The great thing about my free pencil case pattern is that it’s very forgiving, and if your rectangle is a bit off after quilting it’s not a problem — your pencil case will still turn out great.
Step 3: Attach the zipper to one side of the fabric and topstitch
Place your quilted fabric right side up on a table. Place the 12″ zipper face down on top and line it up to the right 10″ long edge like this:


Pin the zipper to the fabric with a couple pins. No need to change to a zipper foot — just leave your regular presser foot on for this step — because you actually want to be able to really see the zipper down the middle of your finished pencil case. Sew at 1/4″ along the zipper side.


Iron the seam that you just sewed flat.


Then topstitch your pencil pouch by sewing close to the top edge of the fabric by the zipper.


Your finished topstitched seam will look nice and pretty like this.


Step 4: Fold and attach the zipper to the other side of the pencil case
Now you’ll attach the zipper to the other side of the rectangle. Fold the quilted rectangle — right sides together — until the rectangle reaches the zipper. Pin the zipper along the edge of the fabric. I prefer to have the zipper on top like the photo below.


Sew 1/4″ along the zipper side.


Open the zipper and turn the pencil case right side out.


Iron the seam that you just sewed, then topstitch along the top edge of the fabric by the zipper like you did on the other side.


Step 5 (optional): Attach loop tab to the side of the pencil case
This step is optional, but it’s a nice option to have a looped tab on the side of the pencil case. Cut a piece of fabric 2″ x 4″ for a thin tab (the thin tab will be 1/2″ when it’s finished), or cut a piece of fabric 4″ x 4″ for a wider tab (the wider tab will be 1″ when it’s finished). Fold the tab piece in half lengthwise, right sides together, and iron. Bring each raw edge to the folded middle and iron. Sew 1/4″ on the left and right sides of the tab. Fold the finished tab in half and sew along the raw edge to secure.
Now we’ll figure out tab placement. Fold the pencil case in half and put a straight pin in the middle like so.


Place your folded tab where the pin was marking the middle point. Pin the tab to the pencil pouch, raw edges together. Sew back and forth a few times close to the edge to secure the tab to the pencil case.


You’ll sew the tab on a bit differently if you started with two 4.5″ x 10″ rectangles: Place the folded tab the base of the zipper so that right sides are together. Sew to baste the tab to the side of the pencil case.


Step 6: Sew the pencil case bottoms — only if you started with two 4.5″ x 10″ rectangles rather than one 9″ x 10″ rectangle
This step is only needed if you started with two 4.5″ x 10″ rectangles rather than one 9″ x 10″ rectangle, like I did when I sewed my Star Wars pencil case and wanted the faces to face away from the zipper on both sides. Skip this step if you started with one 9″ x 10″ rectangle. Stack the 4.5″ x 10″ rectangles, right sides together, and pin. Sew 1/4″ seam along the bottom to join these two pieces together.


Again, if you started with one 9″ x 10″ rectangle, there is no need to do Step 6 because the bottom is already joined. See what I mean?
Step 7: Sew the pencil pouch sides
First, be sure that the zipper is unzipped halfway. Fold the pencil case sides so that the zipper is in the center of the fold.


Then sew 1/4″ seams along both sides, making sure to sew back and forth over the zipper ends a few times to reinforce the stitching on the zipper.


Step 8: Trim the zipper top and bottom
Trim the zipper top and bottom.


Turn the DIY pencil case rightside out, poking your fingers into the corners.


Be sure to pin my easy pencil case sewing pattern for later:


And be sure to see more free sewing projects for kids and back-to-school DIY projects.
++++++
Like it? Share it!
The nicest way to say you like it is to pin it on Pinterest, post a comment, follow Merriment Design on Facebook, Pinterest, Instagram or sign up for monthly emails. Enjoy! 🙂
Copyright stuff: You’re more than welcome to use my free project, printable templates, and tutorials for personal use. Contact me for commercial use and Etsy sales. Momma’s gotta pay the bills.