
Sew up a set of my cute modern quilted potholders to brighten up your kitchen. My free quilted potholder sewing pattern makes both square and round potholders so you can choose whichever shape you like. I’ll show you how to piece the front together with fabric scraps and how to add Insul-Bright insulated batting to your handmade potholder to protect your hands from heat.
See also: Easy round potholder free sewing pattern »
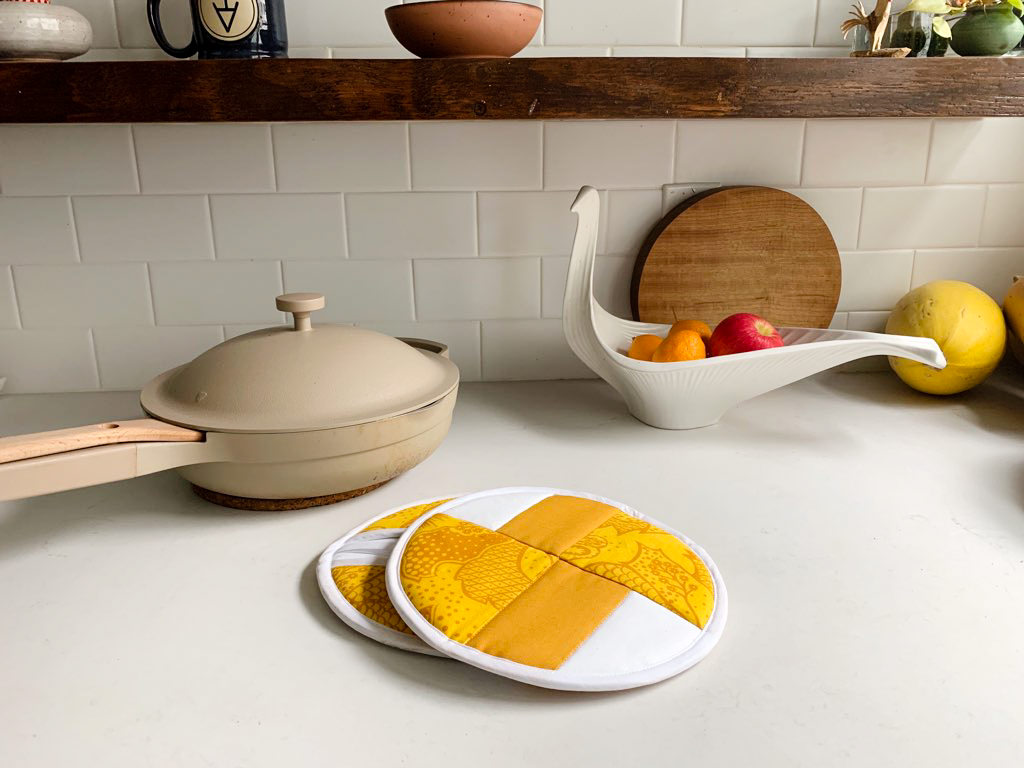
Taco-shaped potholders pattern
My modern quilted potholders sewing pattern has a hand pocket on the back. Just slip your hand inside and fold the hot pad like a taco around pans and cookie sheets to help protect your hand from heat. Neat, yes?


Modern quilted patchwork hot pad
I like modern sewing projects so I came up with an easy quilt block that looks great with solid and pattern fabrics. The simple “stitch in the ditch” quilting on the fronts of the hot pads also adds a modern feel. My modern quilted potholder pattern is based off of my simple round potholder free sewing pattern.
I made these cheery yellow modern quilted hot pads for my friend, Heather Crosby from Good Food Cooking School. Heather is an amazing plant-based cookbook author and teacher. I’ve learned so much from Heather’s plant-based cookbooks, especially Pantry to Plate, my favorite plant-based and gluten-free cookbook. I’ve taken three of Heather’s online plant-based cooking and baking courses: her Gluten-Free Bread Baking course, Good Food Cooking Basics course, and her Gluten-Free Classic Cookies course, and I really like her plant-based recipes for meals, baked goods, and treats.
And here’s a confession: I wanted to pop these yellow potholders into the mail for Heather which meant that I didn’t have time to bake so instead I tossed some store-bought crackers onto the cookie sheet for these next two photos. Don’t tell anyone.


Merriment Design is supported by readers like you. If you buy products that I recommend, I may earn an affiliate commission at no additional cost to you. Thanks – your clicks help me make more free DIYs!


Supplies for making my DIY modern quilted potholders sewing pattern:
- Kathy’s modern quilted potholder free printable sewing pattern (PDF)
- Fabric yardage or fabric scraps for the potholder front and back
- 1/2″ Double-Fold Bias Tape (3 yards for two potholders)
- Insul-Bright Insulated Batting
- Warm & Natural Cotton Batting
- Cotton thread – not polyester which could melt
- Pins
- Rotary fabric cutter, self-healing cutting mat and 6-1/2″ x 6-1/2″ square quilt ruler or 2-1/2″ x 8″ quilting ruler (optional but makes things go much faster)
- Good fabric scissors
- Good iron and wool pressing mat for quilting
+++
How to sew modern quilted potholders:
Step 1: Cut patchwork pieces for the front of the potholder
For each round oven mitt potholder cut out these pattern pieces from my free quilted potholder sewing pattern:
Front quilt patchwork piecing (per potholder):
- Two (2) 4-1/2″ x 4-1/2″ – I used a yellow and gold patterned cotton fabric
- Two (2) 2-1/2″ x 4-1/2″ – I used solid gold (cute the TV music) cotton fabric
- Two (2) 2-1/2″ x 4-1/2″ – I used white quilting cotton fabric
- One (1) 8-1/2″ x 8-1/2″ square of inside lining fabric
- One (1) square of 8-1/2″ x 8-1/2″ of Insul-Bright Insulated Batting
- Two (2) squares of 8-1/2″ x 8-1/2″ of Warm & Natural Cotton Batting
Two hand pockets (per potholder):
- Two (2) 8-1/2″ x 3-1/2″ rectangles of back fabric for the hand pocket
- Two (2) 8.5″ x 3-1/2″ rectangles of inside lining fabric for the hand pocket
- Two (2) 8-1/2″ x 3-1/2″ rectangles of Insul-Bright Insulated Batting for the hand pocket
- Four (4) 8-1/2″ x 3-1/2″ rectangles of Warm & Natural Cotton Batting for the hand pocket
Use a rotary fabric cutter, self-healing cutting mat and 6-1/2″ x 6-1/2″ square quilt ruler or 2-1/2″ x 8″ quilting ruler (optional but makes things go much faster) or good fabric scissors.


Step 2: Sew two rectangle front pieces together
Use 1/4″ seams and 100% cotton thread (not polyester which could melt) to sew the two 2-1/2″ x 4-1/2″ rectangles together to make a square. Using a good iron and wool pressing mat for quilting, press the seams towards the colored side if using white quilting cotton fabric to hide the seams.


Step 3: Add a square piece to the rectangles
Next, sew the piece you just sewed onto a 4-1/2″ x 4-1/2″ squares piece again using 1/4″ seams and 100% cotton thread (not polyester which could melt). Press your seams towards the darker fabric. You’ll have two strips that look like this:


Step 4: Sew front pieces of your DIY quilted potholder together
Now sew the two strips together using 1/4″ seams. Now you’ve finished the quilted patchwork front of the potholder. Cute, yes? You can decide at this point if you’d like to keep it a square or turn it into a round potholder as I did.


Step 3: Make the quilt sandwiches for the hot pads
Make a quilt stack in this order:
- Lining fabric, wrong side up
- One (1) layer of Warm & Natural Cotton Batting
- One (1) layer of Insul-Bright Insulated Batting
- One (1) layer of Warm & Natural Cotton Batting
- Front fabric, right side up
If you’d like more explanation on why this is the best way to insulate DIY hot pads then see my oven mitts sewing tutorial. Pin the layers together using glass-head pins or use quilt-basting safety pins if you have them. You should have one 8-1/2″ x 8-1/2″ quilt sandwich for the hot pad front and two 3-1/2″ x 8-1/2″ quilt sandwiches for the back hand pocket.
Quilt the layers together however you like. Use 100% cotton thread – not polyester which can melt at high temperatures. I sewed along the seams (stitch in the ditch) of my quilt piecing but it’s dealer’s choice so have fun with your quilting stitches. I like to remove the pins as I sew.


Step 4: Trace the circle hot pad front (optional) if making a round hot pad
You can make either a square hot pad or a round hot pad with my free sewing pattern. If you’d like to make a round hot pad then trace my circle pattern onto the quilted front.


Sew slightly inside the circle to hold the layers together around the entire circle.


Then cut out the circle on your traced pattern line using good fabric scissors. See how this sewing technique holds your quilted potholder together? It’s going to be much easier now to add the back pot holder pieces and bias tape binding.


Step 5: Make the hand pocket for the back of the quilted hot pads
Now repeat this process for the two back hand pocket pieces. Once again, you can choose to keep these as rectangles to make a square quilted potholder or cut two semicircle pieces to make a round potholder. Make the quilt sandwich like in step 3 above. I quilted straight lines for my hand pockets. After these two pieces are quilted, then trace or pin the semi-circle pattern and cut using good fabric scissors if you’re making a round potholder.


Step 6: Sew bias tape onto the tops of the hand pocket pieces
Pin and sew 1/2″ double-fold bias tape onto the straight edges of the two hand pocket pieces. I used white bias tape. If you’re new to bias tape or need a refresher, see my popular tutorial on how to sew on bias tape.


Step 7: Baste the back hand pockets to the quilted potholder front
It will be easier later to sew bias tape around the outside of the potholder circle if you first baste the back semi-circles. Stack the two semi-circles onto the back of the circle. Baste them by sewing super close to the outer edge which will keep your basting stitches hidden once the bias tape is added.


Step 8: Add a hanger to the potholder (optional)
Sew together the open edge of a 5-6″ piece of bias tape, then fold in half and pin onto the side of the potholder. The hanger will face into the circle like this.


Step 9: Sew the binding onto the quilted potholder
Again, if you’re unfamiliar with bias tape or need a refresher then see my popular bias tape video on YouTube. I’ll show you the best way to start the bias tape and the best way to join the edges together in my bias tape video. And yes, the video also covers mitered corners but you can skip over that part if you’re making a round potholder is round — no corners!


Be sure to pin my modern quilted potholders DIY free sewing pattern


And see more of my easy sewing projects like these popular free sewing patterns:
- Pincushion thread catcher
- Apron with built-in potholders and secret iPhone pocket
- Kid-sized messenger bag
- DIY face mask review & how to add nose wire to masks
- Easy dog blanket free sewing pattern
++++++
Like it? Share it!
The nicest way to say you like it is to pin it on Pinterest, post a comment, follow Merriment Design on Facebook, Pinterest, Instagram or sign up for monthly emails. Enjoy! 🙂