

Looking for cute and easy clay craft ideas? Make some cute DIY clay magnets for your fridge.
Making DIY clay fridge magnets is a great clay craft idea for both kids and adults. Anyone who knows me knows that I like to make useful things. This clay craft not only makes a great kid’s craft activity but also helps you organize all those bits of paper and photos on your refrigerator.
See also: ‘Tips and tricks when working with polymer clay’ »
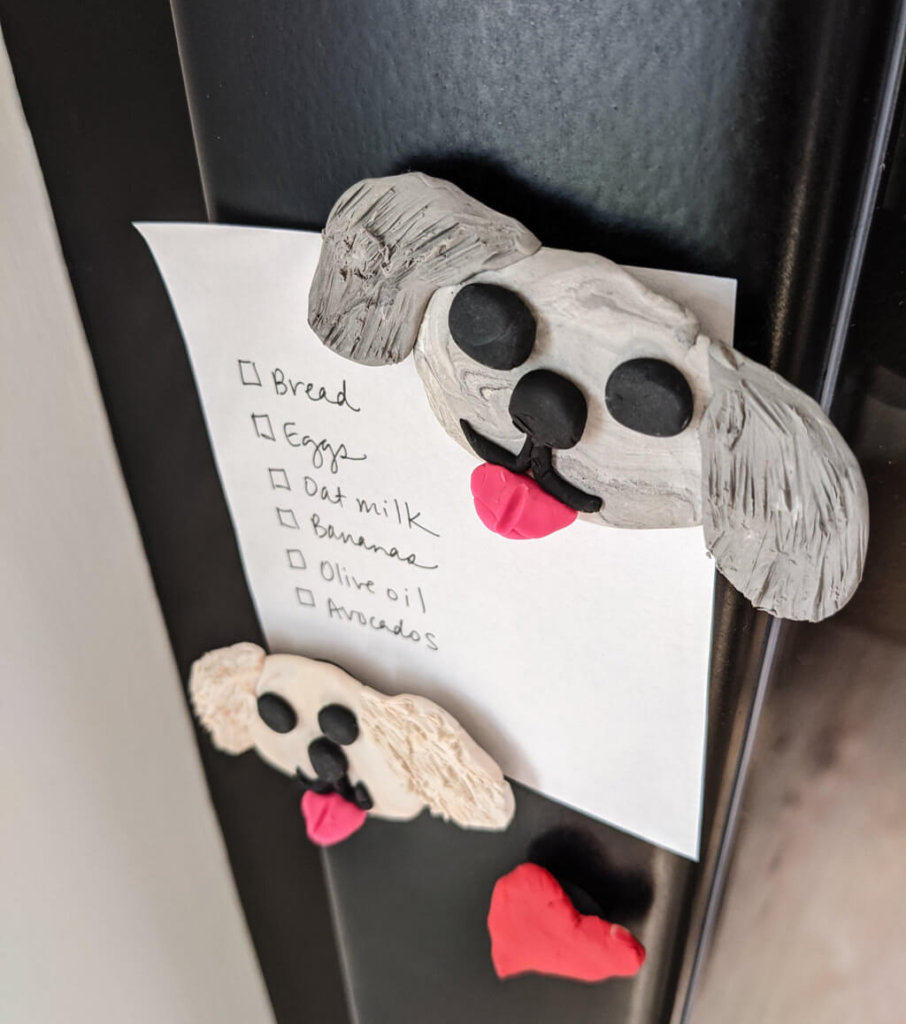
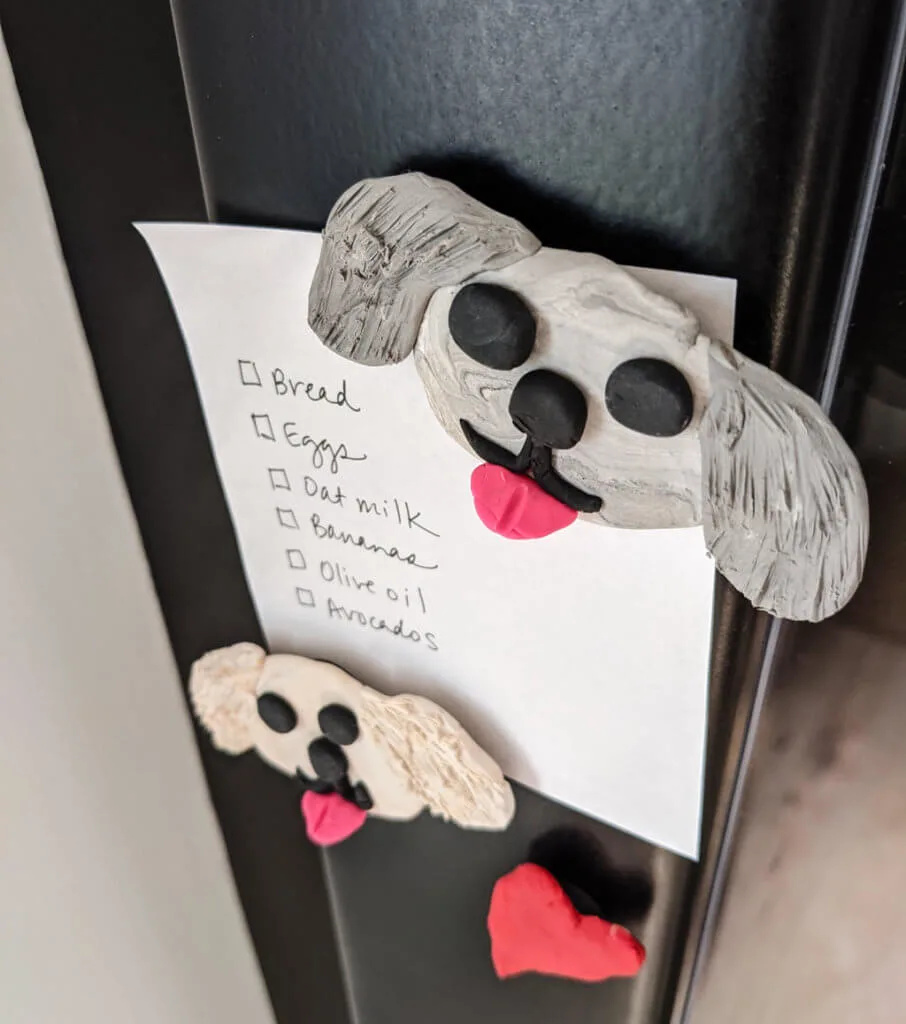
Clay magnets also make a great DIY gift idea. My kids made a set of dogs for their grandma in Arizona…


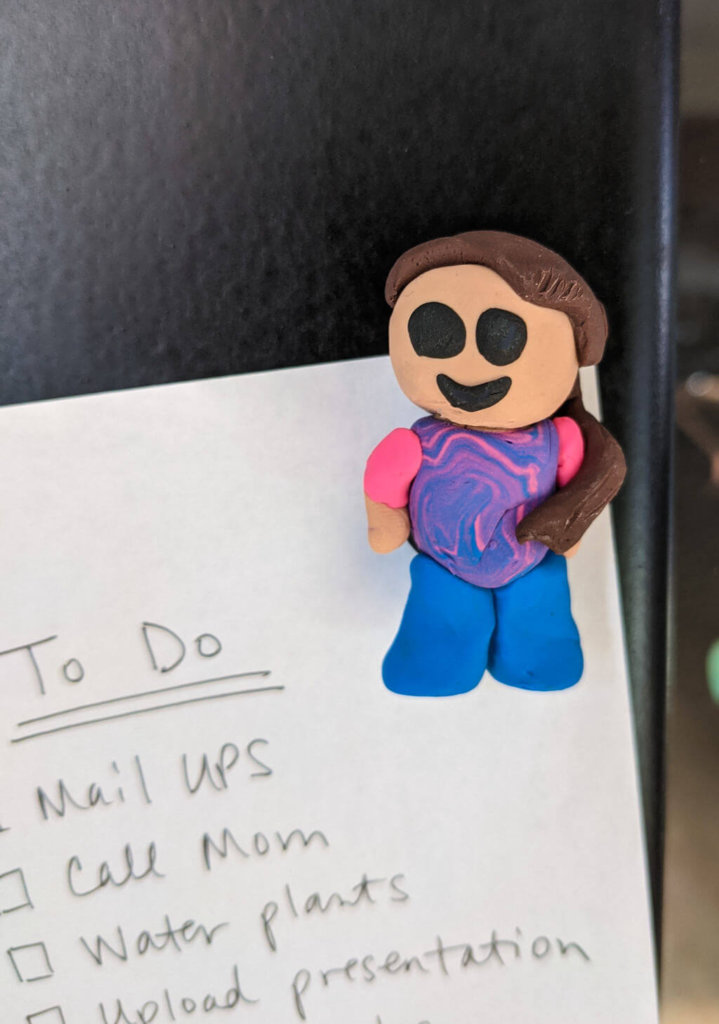
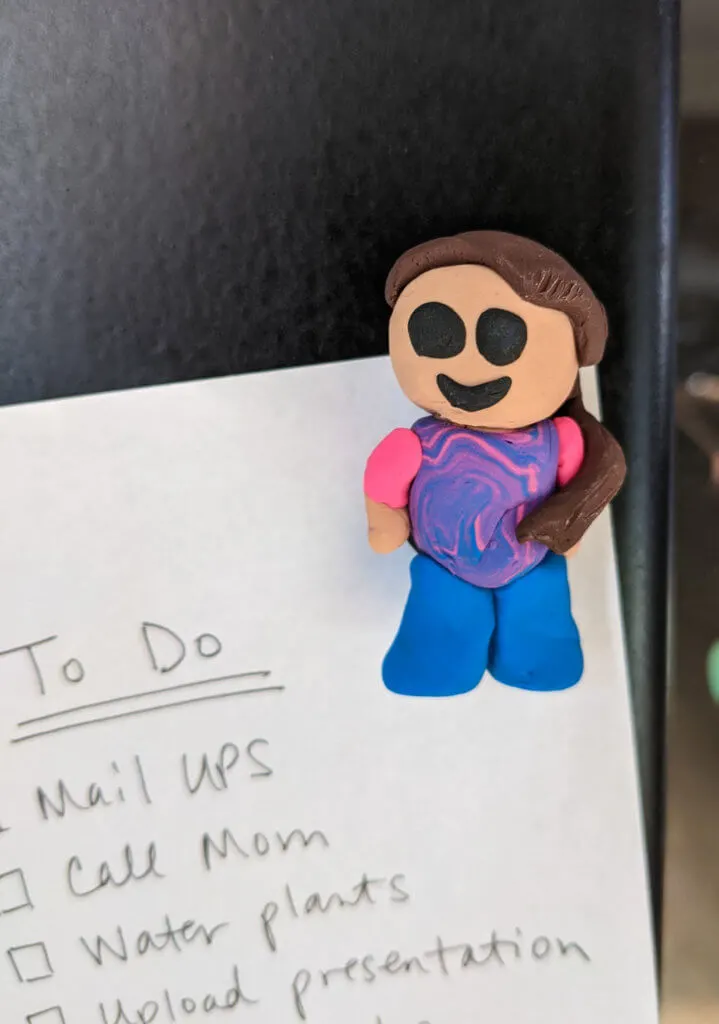
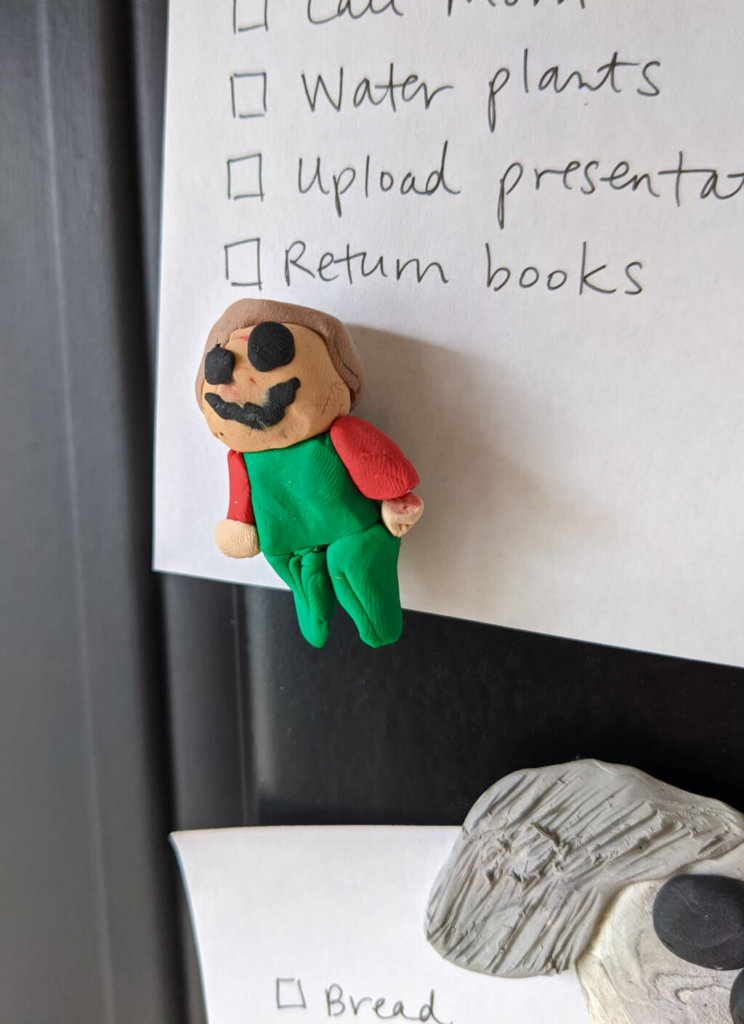
And they made clay magnets of themselves for their grandma in Indiana…


Make DIY clay magnets for Valentine’s Day gifts
These heart magnets would be a great Valentine’s craft for Valentine’s Day DIY gifts. Here are the clay heart magnets that my 8-year-old made. Love!


The great thing about making clay fridge magnets is that you can make whatever you want in whatever color you want. Try making a heart or a cheery rainbow, or yummy donuts, or whatever other DIY magnet idea that you can dream up. Keep reading to see how to make DIY clay magnets that look handmade, not homemade.


How do you make refrigerator magnets with clay?
It’s super easy to make clay refrigerator magnets. You can use either air dry clay or oven bake clay for this clay crafts project. Basically, you’ll protect your workspace, then knead the clay and create a cute shape. Then you’ll bake the clay in the oven, let it cool, and glue a magnet on the back.
How do you stick magnets to clay?
The quick answer is glue. Bake the modeling clay first according to package directions, let it cool, and then glue the magnet on using Gorilla Glue which will expand a bit to seep into any cracks between the magnet and the polymer clay. For air dry clay, just let your magnet air dry and then follow my gluing instructions. And no, you should not bake round magnets with the clay in the oven.
More DIY Gift Ideas
If you love making DIY gifts, try one of these craft ideas next:
Merriment Design is supported by readers like you. If you buy products that I recommend, I may earn an affiliate commission at no additional cost to you. Thanks – your clicks help me make more free DIYs!


Supplies for making DIY clay magnets:
- Clay – I usually like to buy Bake Shop soft clay or air dry clay rather than traditional polymer clay because it’s softer which makes it easier to work with, especially for kids, but all different types of clay will work for these magnets
- Magnets – I recommend these round ceramic magnets
- Gorilla Glue and toothpicks
- Freezer paper and blue painter’s tape, or silicone working mat
- Cookie sheet lined with aluminum foil
How to make DIY magnets using air dry or polymer clay:
Step 1: Set up your clay crafts work space
Start by protecting your work surface. Colors in both air dry clay and traditional polymer clay and Bake Shop soft clay can transfer onto working surfaces, and polymer clay is not food safe so I don’t recommend using it on plates or trays that you’ll be eating on later. You can buy a silicone working mat if you plan on making a lot of clay crafts but again, you should then use this mat only for clay, not food. I like to put a piece of freezer paper on the table and tape it down using blue painter’s tape. Freezer paper has a shiny side that’s great for working with polymer clay. I also like to use freezer paper when working with fondant.
Step 2: Have fun making clay shapes and figures
Here’s the fun part! First, choose a color and knead the clay until it’s soft enough to work with. This is a lot easier if you are using air dry clay or Bake Shop soft clay rather than traditional polymer clay. Here are some beginner tips when working with polymer clay. One thing I’ll mention specifically is that clay is not food-safe, so if you’re going to use cookie cutters then it’s a good idea to have clay-specific cutters that won’t be used for edible cookies in the future. OK, another thing I’ll mention: Be sure to wash your hands before switching colors to avoid color transfer.


Step 3: Bake polymer clay until hardened
Line a cookie sheet with aluminum foil. You want to do this because again, clay is not food safe, so it’s best to avoid putting it right on your cookie sheet. Bake polymer clay in the oven according to the package directions. You’ll bake it until the clay is hard and no longer bendable. And if you used air dry clay, well, you can obviously skip the baking and just set out your clay magnets to air dry.


Step 4: Glue magnets to the clay backs
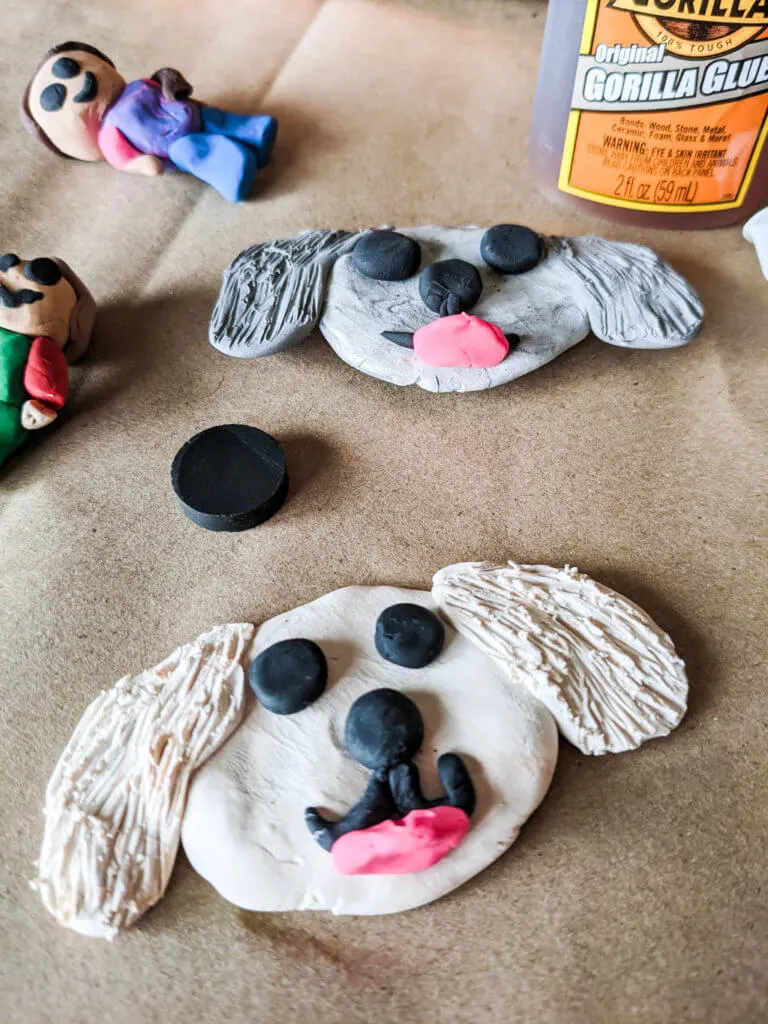
I used Gorilla Glue to adhere the magnets because it expands while it dries which helps the magnets get closer to bumpy clay figures. Be sure to check the Gorilla Glue after about 10 minutes and if the glue is expanding too much, just take some off using a toothpick. This is a step for the adults to do for young children because this glue is pretty strong and you don’t want it to get onto tiny fingers.


Step 5: Put your DIY clay magnets on the fridge
Let the magnets dry 24 hours before using. Then they’re good to go! Organize your fridge or decorate on any metal surface.
Be sure to pin this DIY clay magnets craft:


And see more kid’s crafts like magic Shrinky Dink DIY bracelets and handmade fingerprint tile coasters plus clay crafts like these clay hexagon wine tags.
++++++
Like it? Share it!
The nicest way to say you like it is to pin it on Pinterest, post a comment, follow Merriment Design on Facebook, Pinterest, Instagram or sign up for monthly emails. Enjoy! 🙂
Copyright stuff: You’re more than welcome to use my free project, printable templates, and tutorials for personal use. Contact me for commercial use and Etsy sales. Momma’s gotta pay the bills.