

Make these colorful and cheery pom pom DIY letter ornaments for your Christmas tree. You only need three craft supplies — bright mini pom poms, floral wire and mini rick rack ribbon — to make easy handmade Christmas ornaments that double as merry DIY Christmas gifts.


Easy DIY Christmas ornaments using cute mini pom poms
This easy Christmas craft project uses one of my all-time favorite cheery craft supplies: mini pom poms. I store these little cuties in a mason jar on a shelf in my craft studio so I can look at them all the time.


DIY letter ornaments makes a great Christmas gift
Each Christmas, I buy letter ornaments for the kids at Land of Nod. Yeah, I said buy …I love cute typography and Land of Nod has a different cute letter each year. Then I saw these cute pom pom cake toppers and thought I could use up some of my pom pom stash. I didn’t have pipe cleaners but I did have floral wire, so instead of making a Joann run, I used 22 gauge floral wire and it worked really well.


Cute gift tag for wrapping Christmas gifts
These pom pom letters would look super cute on top of of a wrapped gift under the Christmas tree. I made my first pom pom ornament for my friend who temporarily moved to Chicago for a job and had zero Christmas ornaments for her tree! It was easy to make and I was hooked, so I started making them for my whole Christmas list. This year, I need to make a K for myself!


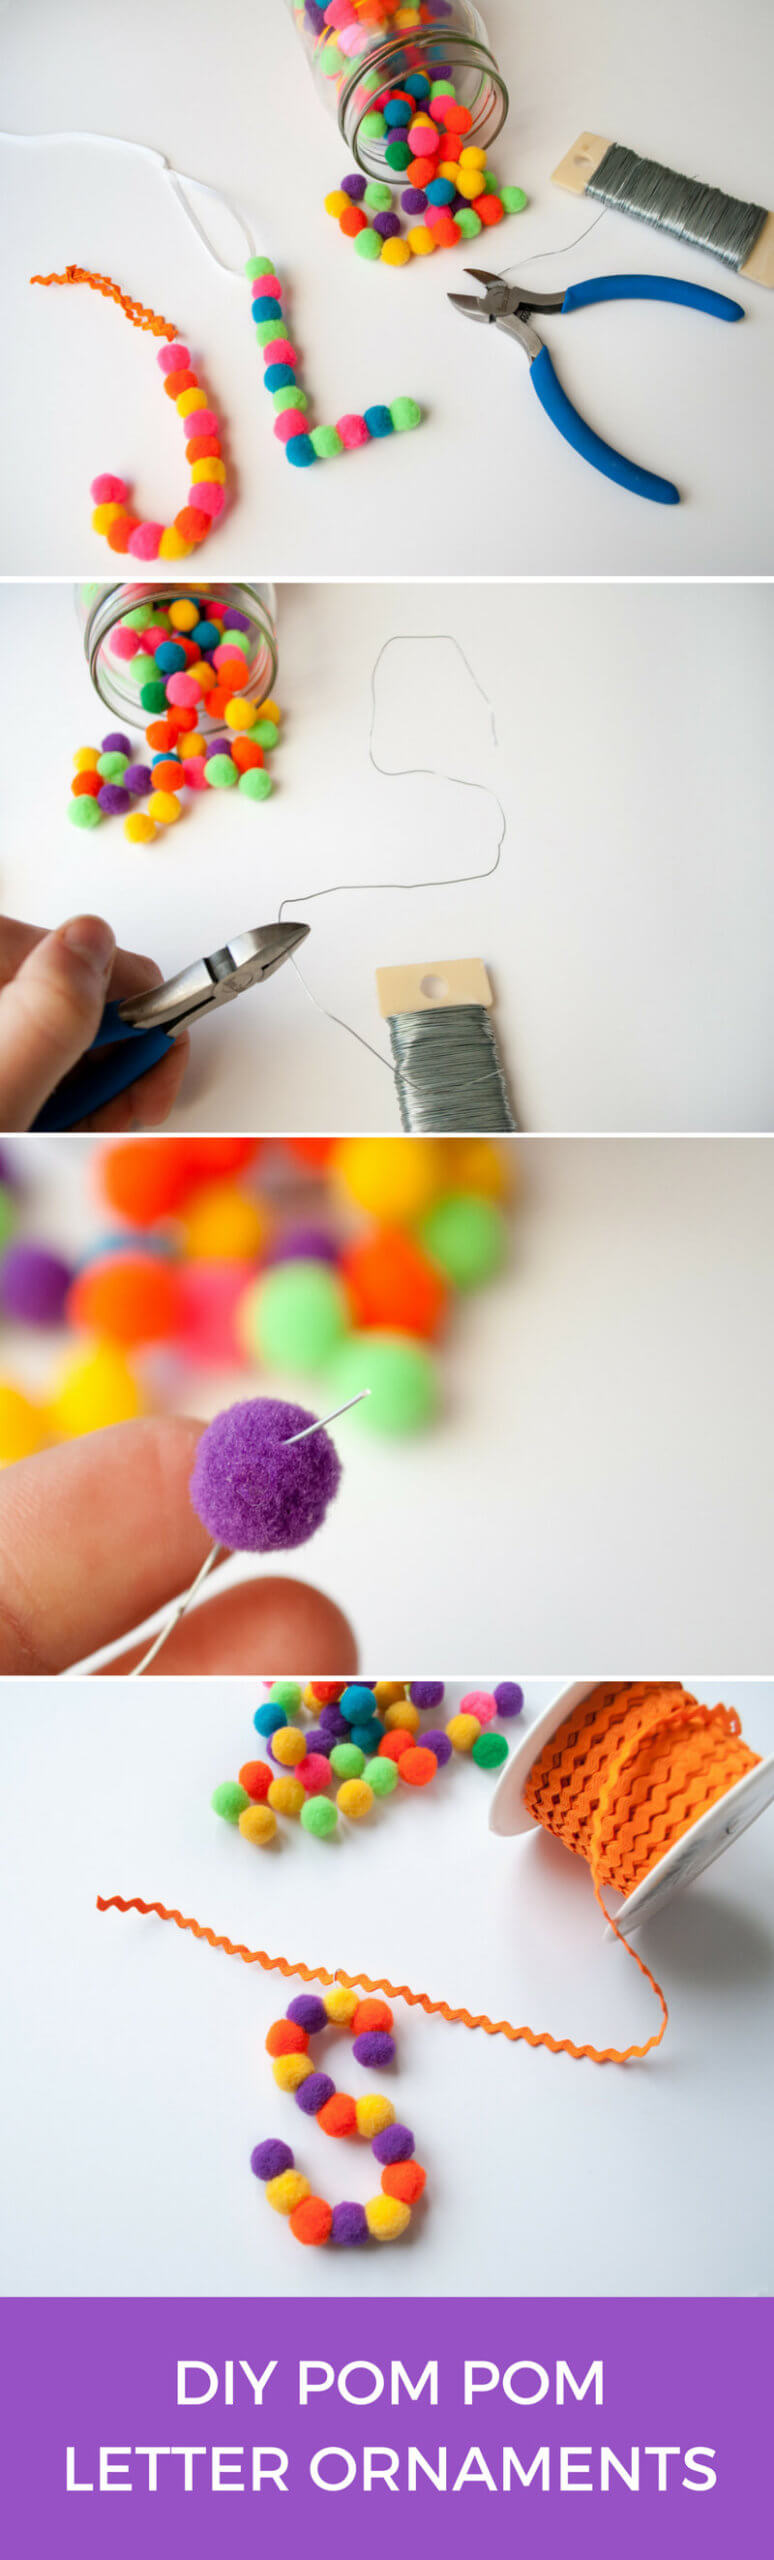
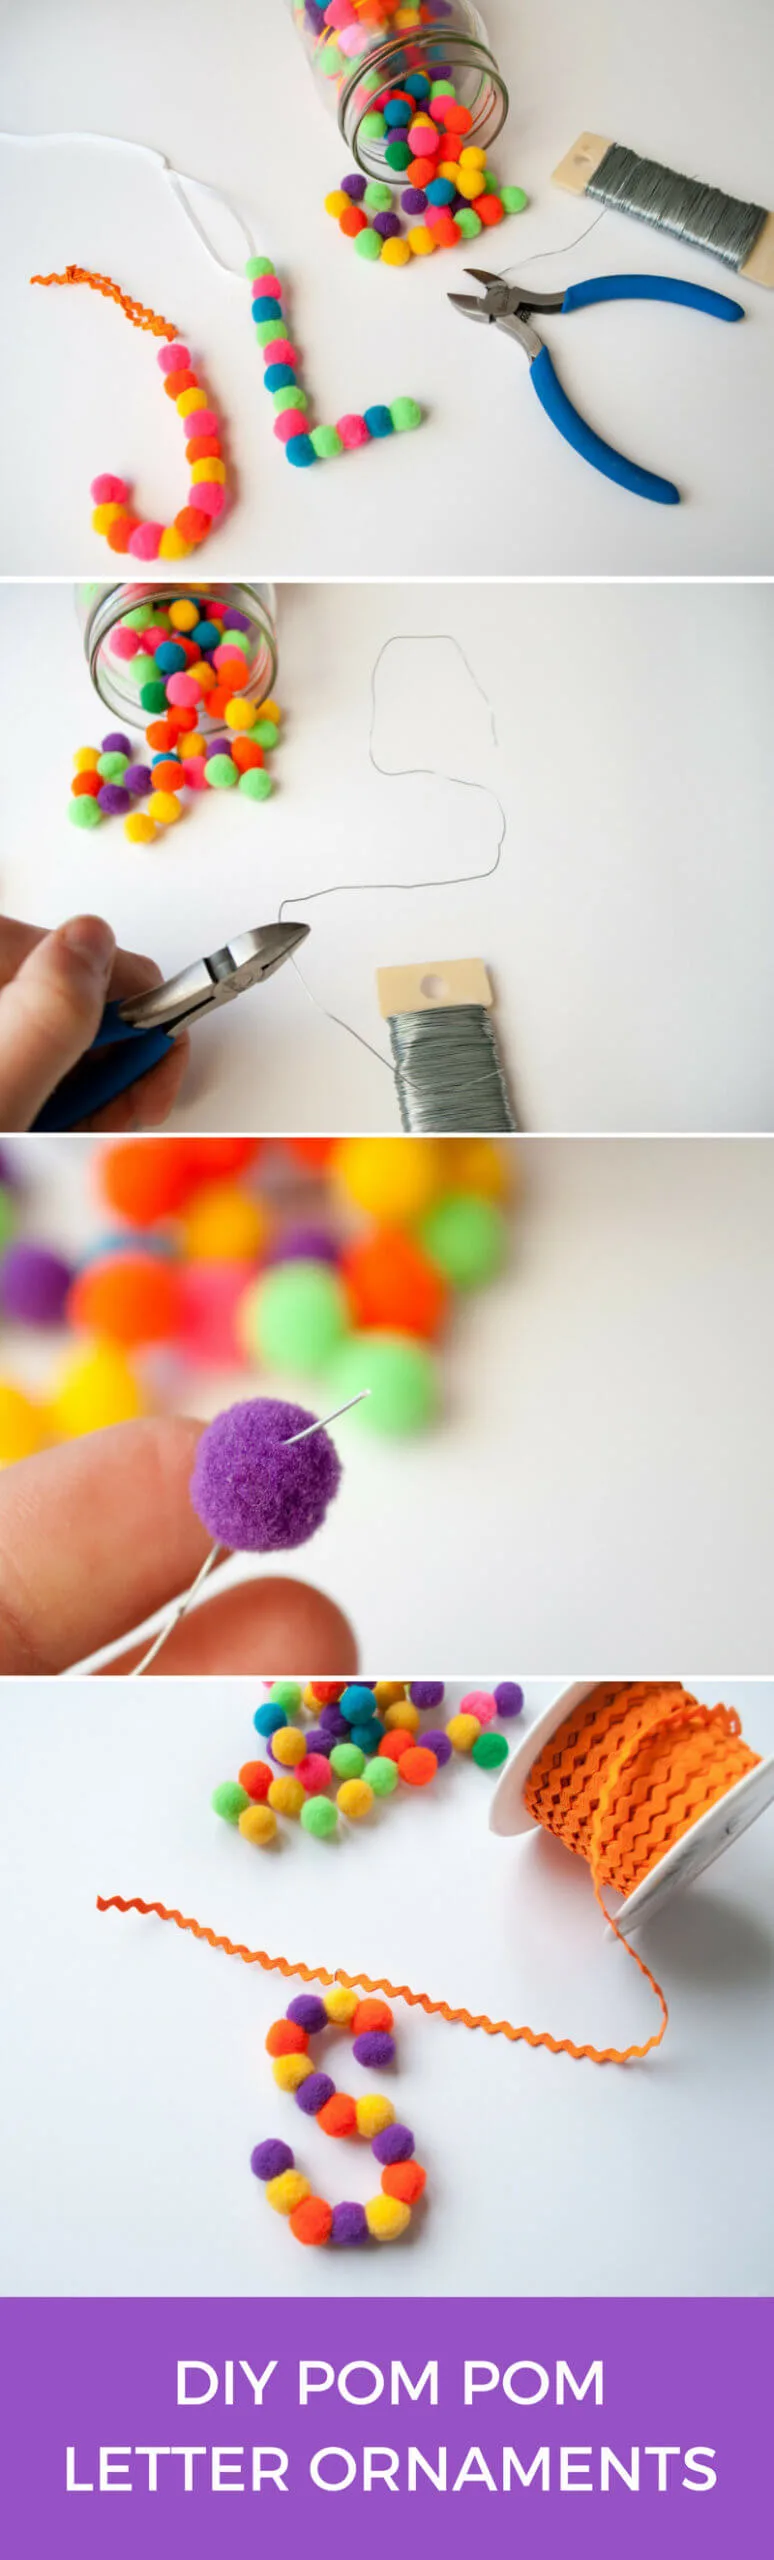
Supplies for making DIY pom pom ornaments – easy Christmas ornaments:
- Mini pom poms – I used 1/2″ pom poms and 1 cm should be good, too …any smaller sizes than these tend to have a tougher cores to go through
- Jewelry wire or paddle wire – be sure to choose 22 gauge or 20 gauge wire because thinner wire isn’t strong enough to go through the pom poms
- Wire cutters
- 1/8″ rick rack ribbon
- Good craft scissors
How to make DIY pom pom ornaments for Christmas:
Step 1: Make a letter shape from wire
Form a loose letter with jewelry wire or paddle wire and cut with wire cutters. You’ll want to cut it longer than you need just to give you enough room. And some letters, like K for example, will need a couple of pieces. Again, be sure to choose 20 gauge wire or 22 gauge wire because thinner wire isn’t strong enough to go through the pom pom.


Step 2: String the first mini pom pom onto the wire and secure
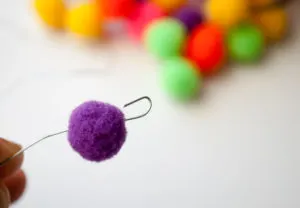
Be sure to use 1/2″ or 1 cm mini pom poms because smaller sizes have a tougher cores to go through. This is an easy 1-2-3 step (showing small photos below so you can see it more easily): String a pom pom onto the paddle wire (avoid poking yourself). Curve the end of the wire, then pull the pom pom down to hide the curved wire. Neat, huh?


Step 3: Continue stringing mini pom poms onto the wire
Keep stringing mini pom poms onto the paddle wire until the letter is fully formed.


Step 4: Loop the end back into the last pom pom and add a hook
Cut the wire about 1/4″ after the last mini pom pom, curve the end of the wire into a small hook, and slip back into the last pom pom to secure like step 2 above.
Step 5: Add a hook to your DIY Christmas ornament
Cut a small piece of wire and bend into a small hook. Slip it into one of the mini pom poms, and tie on a bit of rick rack ribbon. Repeat for every person on your list!


Be sure to pin these DIY pom pom ornaments for later:


Or pin this step-by-step:
And tell me in the comments below: What letter will you make for your DIY pom pom letter ornaments?
++++++
Like it? Share it!
The nicest way to say you like it is to pin it on Pinterest, post a comment, follow Merriment Design on Facebook, Pinterest, Instagram or sign up for monthly emails. Enjoy! 🙂
Carol
Saturday 10th of November 2018
This looks fun! Do you think 8 year olds can do it with assistance? How do you connect the wires for letters that need more than 1 piece?
Kathy
Wednesday 14th of November 2018
Hi Carol! Yes, I think that 8 year olds could do it. My daughter is 9 and we made a couple together. She needed the help getting the first pom pom started and then was able to string them, then I looped the end pom pom. If you need to connect two wires (like for an E or K like we did), you can string it through the pom pom and loop it back in, or you can wrap it around the wire. Like, take the middle small horizonal line for the E, string on the pom poms leaving the left end of the wire straight, loop that straight wire through the middle pom pom on the vertical left line of the E. Am I over-explaining? I tend to do that :D