

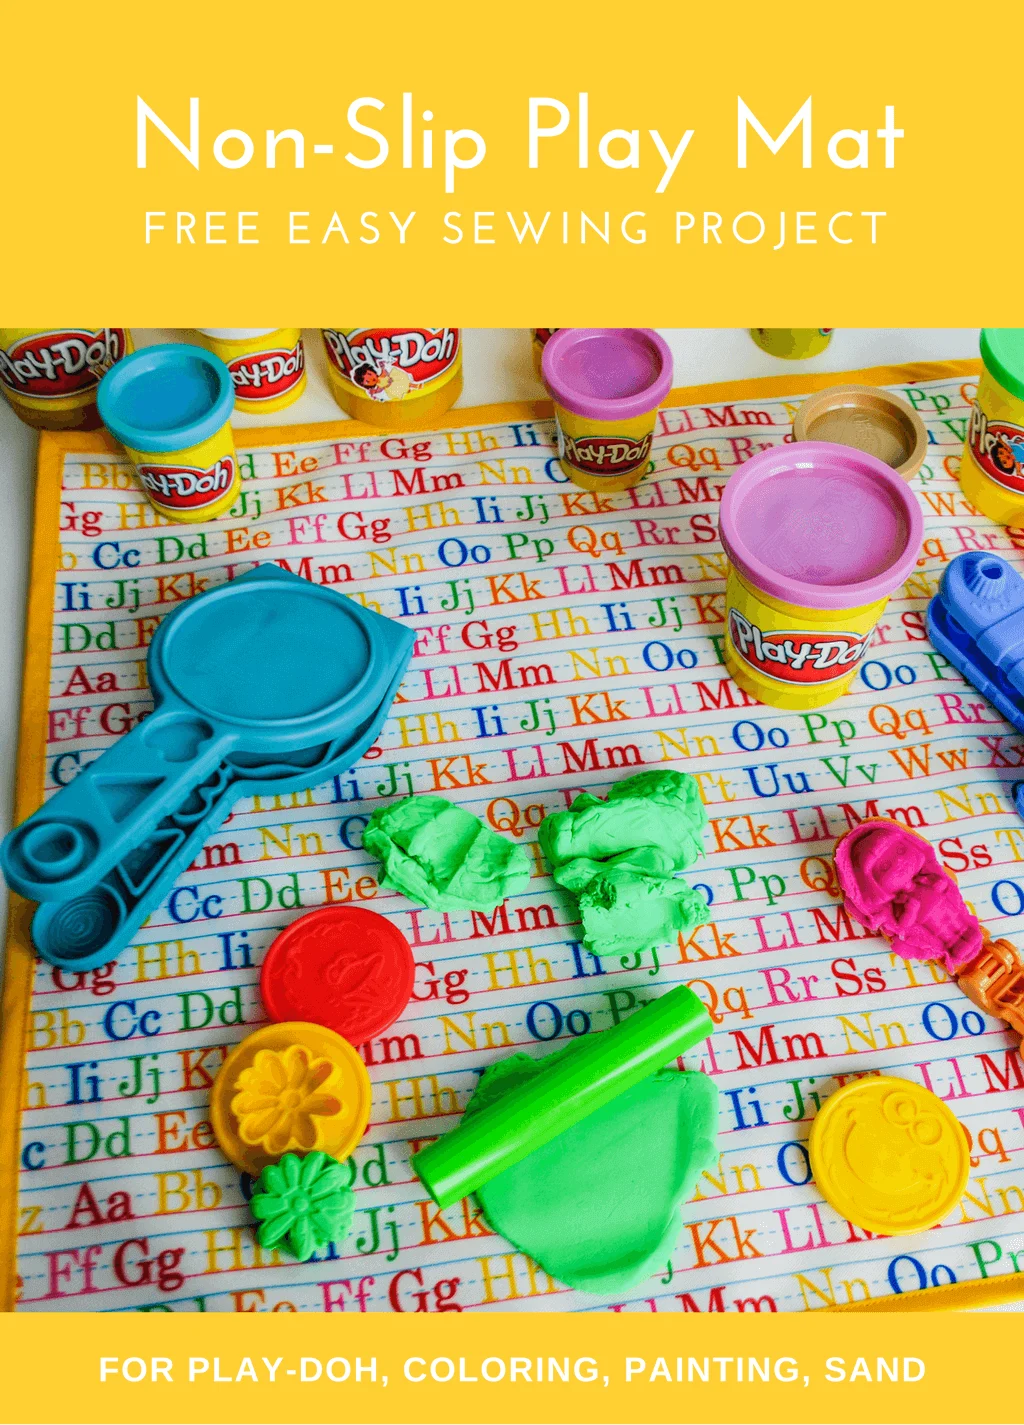
I sewed this non-slip fabric kid’s play mat for Play-Doh and coloring for our living room coffee table. The DIY fabric kid’s play mat is super oversized (16″ x 28″) to give lots of playing room. It’s machine washable, hang dry. And did I mention the play mat is non-slip too? Yep, I backed it with this super cool grip-stop rubber-backed fabric:


The front kid’s alphabet fabric is oil canvas — and no, that’s not a typo; it’s *oil canvas* not oilcloth or laminated cotton. This is my first oil canvas project and I like it a lot better than laminated cotton – the sheen and feel of oil canvas is much more like fabric than like plastic, it drapes well, folds nicely and is a lot easier to sew in general while still being wipe-able.


I used yellow bias tape to edge the kid’s play mat that I made myself for beans with my Simplicity Bias Tape Maker. And I wrote up a special post on how to sew bias tape around corners without cutting or pinning up front.


I love that Elise has a play mat for all her Play-Doh creations …and no more rolling out Play-Doh on my wooden coffee table thank you very much. And even better, I like that it’s doubling as a kid’s play mat for crayons and coloring books too …with no more stray crayon marks on my wooden coffee table…yay!


And I love that the oil canvas and grip-stop fabric can easily fold up for clean up time.


WANNA MAKE IT? Keep reading for my free sewing pattern, step-by-step tutorial instructions and supply list for making my non-slip fabric DIY kid’s play mat for Play-doh and coloring –>
Supplies for making my non-slip fabric DIY kid’s Play-doh playmat and coloring playmat:
- 1/2″ yard oil canvas fabric – I used “Back to School Alphabet”
- 1/2″ yard grip stop fabric – white fabric with little rubber circles on one side that make it non-slip, great stuff
- 1/2″ yard sew-in interfacing or drapery lining
- Thread
- Bias tape (1/2″)- I made my own using my Simplicity Bias Tape Maker
- Rotary fabric cutter, clear plastic ruler and self-healing mat
- Good fabric scissors
- Sewing machine
How to make a non-slip fabric DIY kid’s Play-Doh play mat and coloring play mat:
Cut a piece of grip-stop rubber-backed fabric 16″ x 28″ using your rotary fabric cutter, clear plastic ruler and self-healing mat. It’s like a canvas with little rubber non-slip dots on it.


Cut a 16″ x 28″ piece of oil canvas fabric (not oilcloth) – I used “Back to School Alphabet.”


Place the grip-stop rubber-backed fabric face down on your table. Layer the oil canvas fabric face-up on top.
Now I didn’t do this but I’d recommend adding in a layer of sew-in interfacing (or drapery lining if you feel comfortable using that material with kids) between the oil canvas fabric and grip-stop rubber-backed fabric because teeny circle indentations can appear when you roll out Play-Doh on the play mat. Elise and I don’t mind it but for all you perfectionists out there might want to try to cushion it a bit.


Here’s a trick on how hold fabric together without using pins: I use barrettes to hold together fabric that isn’t ideal to pin, like oilcloth, laminated cotton, PUL fabric and oil canvas. Someday I may buy these Clover Wonder Clips but in the meantime barrettes do the trick.


Let’s get the bias tape started.
UPDATE: I found a new and improved technique for sewing on bias tape. Check out my post on the best way to sew bias tape with mitered corners. You can either use my new method for sewing on the bias tape, or keep reading below.
Pick a straight raw edge; I chose the lower right side of my playdough mat. Fold the folded edge of the bias tape down towards your raw edge to make a triangle and pin.


Now start sewing your bias tape onto your fabric by stitching in the bias tape fold that’s closest to the raw edge. You can do this without pins if you’re confident, or you can pin it, or just use barrettes like I tend to do on oil canvas, oil cloth, laminated cotton and PUL fabric.


OK, so here we are now approaching a corner so slow down. We’re going to make the bias tape go around corners to make really nice mitered corners. I wrote up a whole detailed post on how to sew bias tape around corners to make mitered corners so check that out for step-by-step details.


In a nutshell, you will fold the bias tape to the right (see how to sew bias tape around corners to make mitered corners)…


…then you fold it back over itself and secure without pinning by using a barrette.


Continue this way around the entire mat. When you reach the beginning again, overlap your bias tape a couple inches and backstitch.


Cut the bias tape off close to where you finished stitching.


Now turn the folded bias tape edge over your raw edge to the back. Be sure to pull the bias tape tightly so that the bias tape on the back will catch when you sew it from the front. Pin or use a barrette to hold.


Here’s what the play mat for Play-Doh or coloring looks like from the back…


And here are those nice bias tape mitered corners on the front.


Sew close to the bias tape edge, removing barrettes as you reach them, making sure to catch the bias tape on the back when you sew.


Now some people like to stitch in the ditch here (which basically is stitching in the seam between the bias tape and your fabric, which essentially hides the stitching on the front while catching the bias tape on the back). Personally, I kind of like the topstitched look on the bias tape but this is totally up to you.


Now roll out your Play-Doh, get out the crayons and play on your fabric play mat!


++++++
Be sure to pin this easy DIY play mat sewing project for later.

++++++
Tell me in the comments below – what is your favorite color of Play-Doh?
—
Like it? Share it!
The nicest way to say you like it is to pin it on pinterest, post a comment, follow Merriment Design on Facebook, twitter, pinterest, Google+, instagram or sign up for monthly emails. Enjoy! 🙂
Copyright stuff: You’re more than welcome to use this free project and tutorial for personal use. Contact me for commercial use and etsy sales.
Sheryl
Monday 30th of April 2018
Hi Kathy, I was doing a search to try and find where I can get the oil canvas fabric and all that would come up was something called duck cloth so my question is are the two the same thing and also where did u find the non slip fabric, thanks Sheryl B.
Kathy
Wednesday 2nd of May 2018
Hi Sheryl, a good substitute is laminated cotton and there are lots of cute prints out there. Or you could use oil cloth; however, check the label because some oil cloth is not tested for kids (from what I understand, all laminated cottons are tested). I got the no-slip fabric at JoAnn in the utility fabric section, but honestly I have so much of it that if you have any trouble, email me directly and I'll pop some in the mail. Happy sewing!
Amie smith
Wednesday 2nd of April 2014
I am hoping to cover a kids table and chairs with this fabric. Do you know where I can get it from? Thanks.
Vikki
Thursday 14th of November 2013
Did you post where to find the oil canvas fabric? I am looking for it also. Please advise! Thank you!
Kathy Beymer
Friday 15th of November 2013
Hi Vikki, I have searched Jo-Ann and it looks like they only sell oil cloth now, not oil canvas. That's a shame because it was so nice to work with! If you end up finding any would you please let me know?
keyword2
Friday 18th of October 2013
You can definitely see your enthusiasm within the paintings you write. The sector hopes for more passionate writers such as you who aren't afraid to mention how they believe. All the time follow your heart.
Jennifer
Thursday 10th of January 2013
Could you tell me where you have found the oil canvas fabric? I noticed the link in the tutorial is for oilcloth yet you said that wasn't it. Thanks for the information. LOVE the tutorial and idea!