

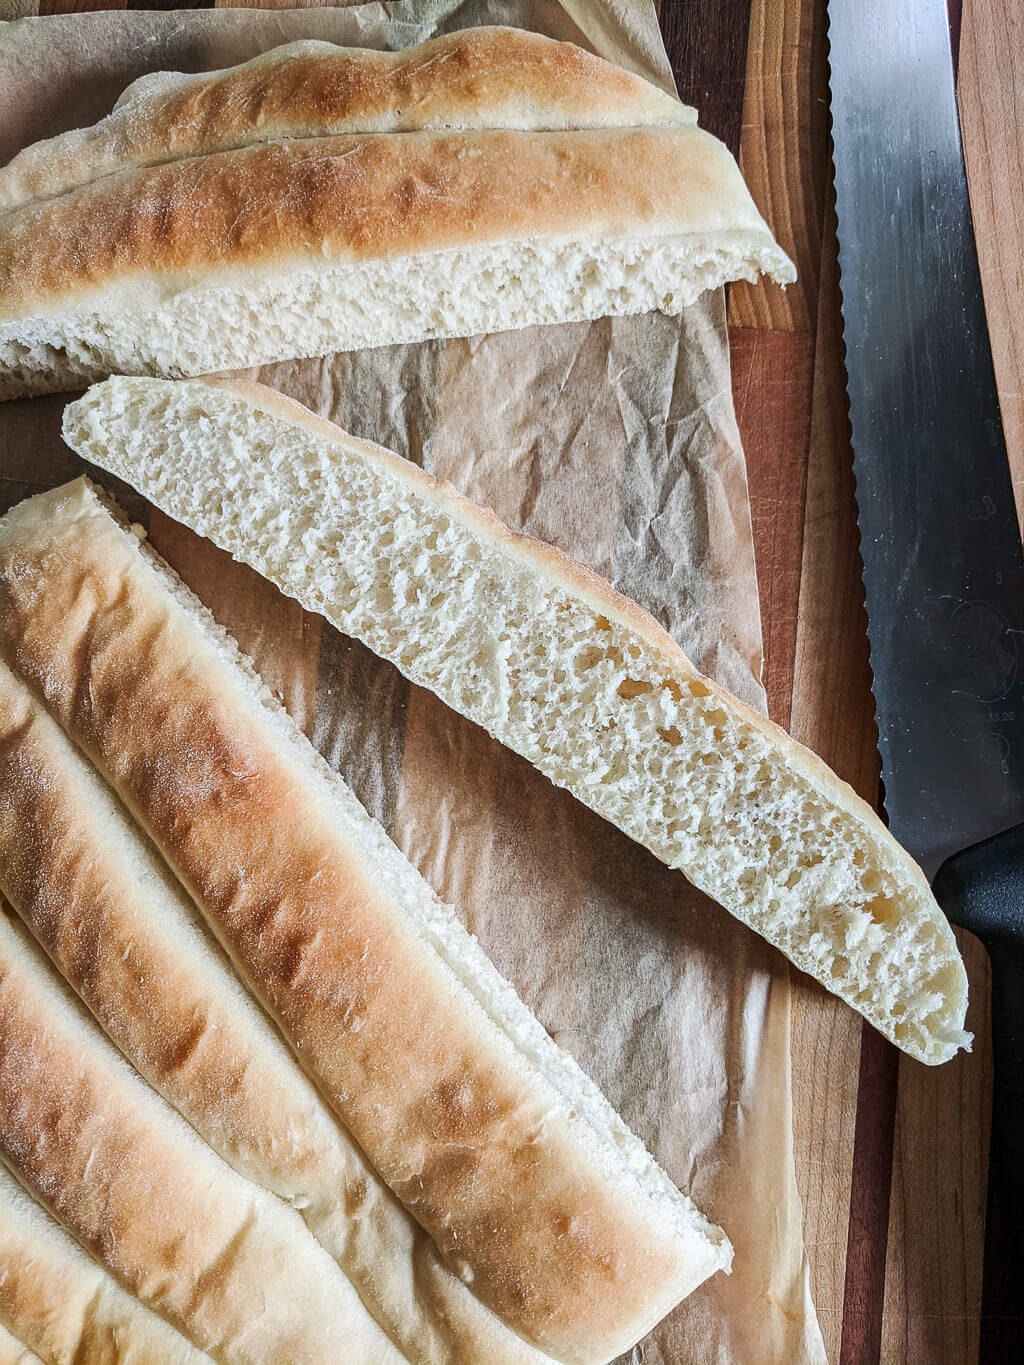
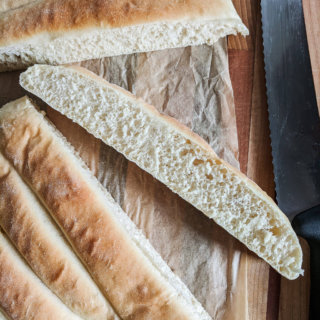
Here’s an easy, same-day breadsticks recipe for bakers like me who prefer instant gratification. This quick and easy breadsticks recipe uses instant dried yeast and a bit of honey to speed the baking process. In less than 2 hours, you’ll have a pan filled with warm, pull-apart crusty breadsticks ready for dipping! Add oregano, garlic salt, or Parmesan cheese for extra flavor. You can either twist your breadsticks like I did or leave them more traditional – both methods taste great.
Better than Olive Garden breadsticks
You can skip the twists make them more traditional like the Olive Garden’s breadsticks. I like this breadsticks recipe better because it has an airy crumb inside that feels lighter to eat.

How to twist breadsticks dough into twists (optional)
And there’s an optional twist: You can either make traditional breadsticks like the Olive Garden’s breadsticks, or twist two smaller breadsticks into cute little twists. I’ll show you how to make breadstick twists quickly and easily.


Can I bake your breadsticks recipe on regular cookie sheets?
Yes, you can bake these breadsticks on typical rimmed baking sheets (regular cookie sheets), or for best results when baking all kinds of breads, use the Challenger Bread Pan that I used to not only make these breadsticks but all kinds of baked goods.
What Is The Challenger Bread Pan?
The Challenger Bread Pan helps you Bake Bread Like a Pro™ in your oven.
Challenger Breadware asked me to use their hand poured and hand-seasoned Challenger Bread Pan black cast iron pans to help me learn how to Bake Bread Like a Pro™ in a regular oven. You can also see the Challenger Breadware recipe section which shows beginner bakers how to use this amazing bread pan for all kinds of baked goodies.
You can make a wide range of goodies in the Challenger Bread Pan such as chili, apple crumble, and of course, all kinds of bread recipes and baguettes including sourdough loaves. And you can make my easy homemade breadsticks recipe today in time for dinner tonight!


++++++
Ingredients to make breadsticks from scratch:
- 3/4 cup water (1/2 cup boiling plus 1/4 cup room temp)
- 1 tablespoon unsalted butter
- 1 tablespoon honey
- 1-½ teaspoons active dry yeast
- 1/2 teaspoon sea salt
- 1-½ cups flour (or up to 2 cups as needed)
++++++
How to make quick and easy breadsticks:
Step 1: Preheat the oven to 400F
If you’re using the Challenger Breadware Pan then place the lid of the Challenger Breadware Pan into the oven. Preheat the lid and oven to 400F while you make the dough. If you’re using cookie sheets, continue to step 2.
Step 2: Bloom the yeast for breadsticks
Add cold butter and honey into an electric stand mixer. Pour 1/2 cup boiling water on top and stir until the honey dissolves and butter melts. Add 1/4 cup room temperature water. Cool the mixture to lukewarm (about 110°F). Be patient: any warmer and you may kill the yeast. Cooling shouldn’t take long because of the cold butter and aluminum bowl. Stir yeast into the lukewarm mixture and let it sit for 10 minutes to ensure that your yeast is active; you should see bubbles and growth.


Step 3: Add flour and mix the breadsticks dough
Aerate the flour by whisking the flour a bit inside its container before measuring. Spoon the flour into ½ cup and 1 cup measuring cups and level with a knife (note: avoid dipping or scooping cups into flour when measuring because it can overpack the flour).


Attach a dough hook to the stand mixer. Add salt and ½ cup of flour and stir until moistened. Continue adding the flour and knead for about 3 minutes until the dough forms a ball and is slightly sticky yet able to release itself from the sides of the bowl. Scrape the bowl down as needed to incorporate all of the flour. If needed, you can add a bit more flour a spoonful at a time, up to ½ cup more, as needed if the dough needs more flour to release from the bowl. Let the dough rest in the bowl for 15-20 minutes. Line the base of the Challenger Breadware pan with parchment paper while the dough is resting and set aside.


Step 4: Cut the breadsticks into sticks or twists
Pat the dough onto your parchment paper with lightly floured fingers into a rectangle about 7-inches by 11-inches or so. I’m showing it on a lightly floured cutting board but now I’ve learned to instead flatten the breadsticks dough right on top of the lightly-floured parchment for less mess.


Make breadsticks into either sticks or twists:
To make sticks: Cut dough into 1-inch strips with a bench cutter or pizza cutter and place onto the parchment paper-covered Challenger Breadware pan.
To make twists: Cut dough into ½ inch strips with a bench cutter or pizza cutter. Pinch the top ends of two strips together. Twist the strip left over right and place onto the parchment paper-covered Challenger Breadware pan. I like to alternate the twists to make a knit-sweater effect.


Optional: Now’s the time to sprinkle with optional oregano, garlic salt, or Parmesan cheese to make cheesy breadsticks from scratch. My kids prefer them plain.
Place a dishrag on top and let rise for 15-30 minutes until doubled in size. I let mine rise on my stovetop in the wintertime to get a little extra warmth from the preheated oven below. You can let them rise even longer if you’d like.
Step 5: Bake breadsticks and serve
If you’re using a regular jelly roll pan (cookie sheet): Bake for 10 minutes at 400 degrees uncovered, check them, and bake 5-10 minutes more if needed.
If you’re using a Challenger Baking pan: Place the Challenger Baking pan into the oven and cover it with its preheated lid. Bake for 10 minutes at 400 degrees covered, then take the lid off and bake 5-10 more minutes uncovered until golden.
Pull baked breadsticks apart and serve warm with marinara dipping sauce.


More time-saving tips: You can measure the flour and line the pan with parchment paper while the water/honey/butter mixture is cooling to lukewarm. Alternatively, start with room-temperature butter and warm water. Measure the flour and salt the night before and set aside.

Easy breadsticks recipe from scratch
Equipment
- 1 Challenger Baking Pan optional - you can alteratively use a jelly roll pan or cookie sheet
Ingredients
- 3/4 cup warm water 105 degrees is ideal
- 1 TBSP butter
- 1 TBSP honey
- 1-1/2 tsp active dry yeast
- 1/2 tsp sea salt
- 1-1/2 cups all-purpose flour
Instructions
- Preheat the oven to 400F.
- Add butter and honey into an electric stand mixer. Pour 1/2 cup boiling water on top and stir until the honey dissolves and butter melts. Add 1/4 cup room temperature water. Cool the mixture to lukewarm (about 105-110°F).
- Stir yeast into the lukewarm mixture and let it sit for 10 minutes to bloom the yeast. You should see bubbles and growth.
- Add flour and salt. Mix with a dough hook until a dough forms. Continue to kneed for 3-5 minutes. Cover dough with a towel and let the dough rest in the bowl for 15 minutes.
- Pat the dough with lightly floured fingers onto a piece of parchment paper into a rectangle about 7-inches by 11-inches. Cut into 1" breadsticks. Place a dishrag on top and let rise for 15-30 minutes until doubled in size.
- If you're using a regular jelly roll pan (cookie sheet): Bake for 10 minutes at 400 degrees uncovered, check them, and bake 5-10 minutes more if needed.If you're using a Challenger Baking pan: Place the Challenger Baking pan into the oven and cover it with its preheated lid. Bake for 10 minutes at 400 degrees covered, then take the lid off and bake 5-10 more minutes uncovered until golden.
Notes
++++++
Here are some common questions about the Challenger Bread Pan:
What is the Challenger Bread Pan?
The Challenger Bread Pan is a portable cast iron bread oven designed by bakers, for bakers. Founder Jim Challenger invented this bread pan to help bakers like you bake better bread at home every day! You can bake everything from breadsticks, demi-baguettes, and other loaves of almost any size, sourdough or otherwise, plus other things like chili, apple crumble, and more.
What are the Challenger Bread Pan dimensions?
The exterior (including handles) is 15.4″ x 10.2″x 5.4″ (392 mm x 260 mm x 136 mm). Here are the exact full dimensions of the Challenger Bread Pan.
Where can I read a Challenger Bread Pan review?
Here are a bunch of Challenger Bread Pan reviews. My favorite review is from Martha Stewart. I like that the Challenger Bread Pan is easy to care for. It comes pre-seasoned, and you just add a bit of oil from time to time. You don’t even really need to wash it often, and be sure to dry it after you wash it. See the full Challenger Bread Pan care instructions.
Is there a Challenger Bread Pan coupon code?
You can get $40 off the Challenger Bread Pan as an introductory price. And you’ll get 10% off two or more Challenger Bread Pans. Get your own Challenger Bread Pan so you can Bake Bread Like a Pro in a regular oven.
Can I bake sourdough in a Challenger Bread Pan?
Yep, founder Jim Challenger is actually a sourdough bread expert. He also shares local shops where to purchase grains, bread flour, and sourdough starters near you.
Where is the Challenger Bread Pan made?
The Challenger Bread Pan is made in the USA and ships worldwide.
++++++
Be sure to pin this quick and easy breadsticks recipe:


++++++
And be sure to see more recipes like my easy cakes and Swedish tea ring recipe.
—
Like it? Share it!
The nicest way to say you like it is to pin it on Pinterest, post a comment, follow Merriment Design on Facebook, Pinterest, Instagram or sign up for monthly emails. Enjoy! 
Copyright stuff: You’re more than welcome to use this free project and tutorial for personal use. Contact me for commercial use and Etsy sales.