• Home
  • DIY & Crafts
    • Sewing Projects
    • Printables
    • Baby & Kids
    • DIY Gift Ideas
    • Paper Crafts
    • Home Decor
    • Recipes & Easy Cakes
    • Recycled Crafts
    • Vintage Inspired
  • Holidays
    • Valentine’s Day
    • St. Patrick’s Day
    • Easter Crafts
    • Earth Day
    • Mother’s Day
    • Father’s Day
    • Fourth of July
    • Halloween
    • Thanksgiving
    • Christmas
    • New Year’s Eve
  • Birthdays & Parties
    • Birthdays
    • Easy Cakes for Kids
    • Weddings & Engagements
  • Blog
  • Shop
  • About
    • About Merriment Design
    • Portfolio & Press
  • Contact
    • Facebook
    • Instagram
    • Pinterest
    • Twitter

Merriment Design

DIY projects, crafts, free sewing patterns and printables that look handmade, not homemade

Home / Holidays / Halloween / Spiderweb DIY Halloween Candy Bowl for Trick-Or-Treat

Spiderweb DIY Halloween Candy Bowl for Trick-Or-Treat

October 10, 2012 by Kathy

  • Share
  • Tweet

Painted Spiderweb Halloween Trick-Or-Treat Candy Bowl free project tutorial

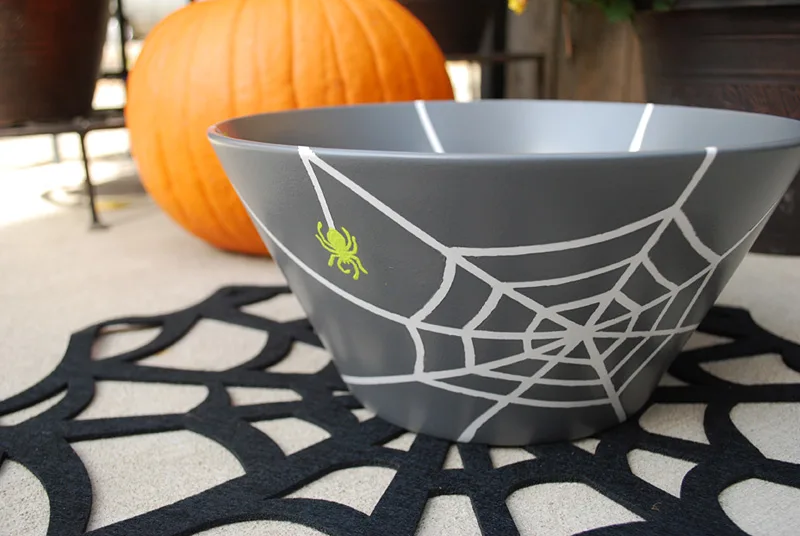
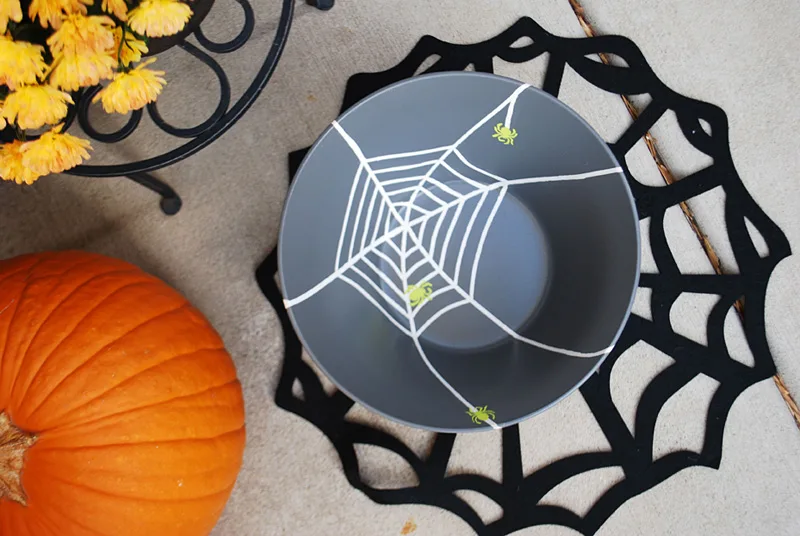
This painted spiderweb DIY Halloween candy bowl for trick-or-treat ranks at the top of my all-time favorite Halloween crafts.

Each Halloween my downstairs neighbors and I sit on our Chicago city stoop with our candy bowl piled with chocolate treats for costumed kids (plus maybe a glass or two of wine for us).
Painted Spiderweb Halloween Trick-Or-Treat Candy Bowl free project tutorial

Painted Spiderweb Halloween Trick-Or-Treat Candy Bowl free project tutorial

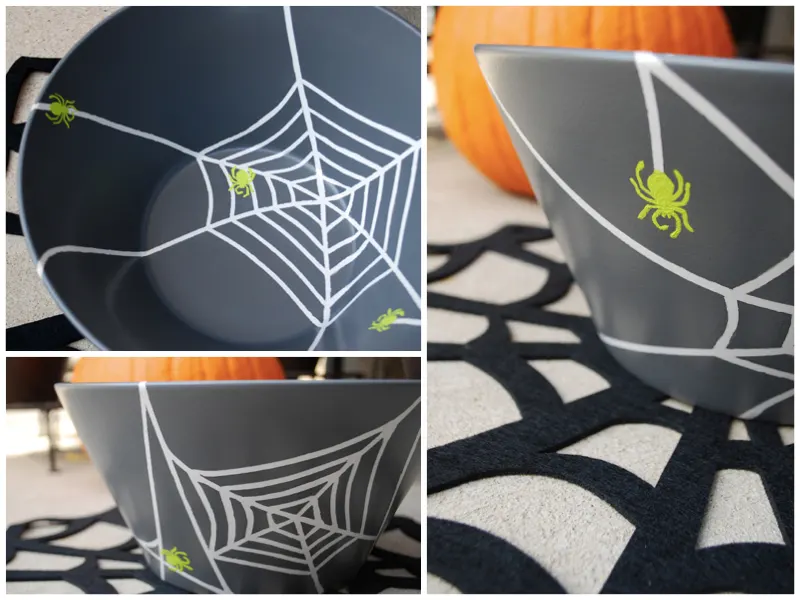
I made us a new spiderweb Halloween candy bowl this year using simple painting techniques that you can do too with a little help from Martha Stewart Crafts.

See also: ‘Subtle Spiders DIY Halloween Front Porch Decoration’ »
Painted Spiderweb Halloween Trick-Or-Treat Candy Bowl free project tutorial

This post is sponsored by Martha Stewart Crafts; all opinions are my own. Martha Stewart Crafts sent me a delicious box of Martha Stewart paints in Halloween colors. They asked me to create a Halloween craft using the supplies which I painted on our rooftop deck with its Willis/Sears Tower view. Great paint colors, yes?
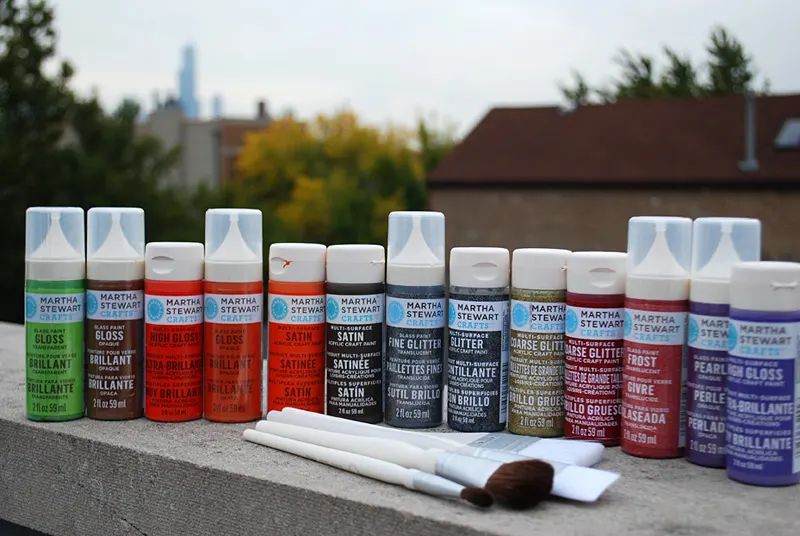
Painted Spiderweb Halloween Trick-Or-Treat Candy Bowl free project tutorial

They also sent me Martha Stewart adhesive stencils, silkscreens, brushes, glass patterning tape and more. Now this is my kind of trick-or-treating…
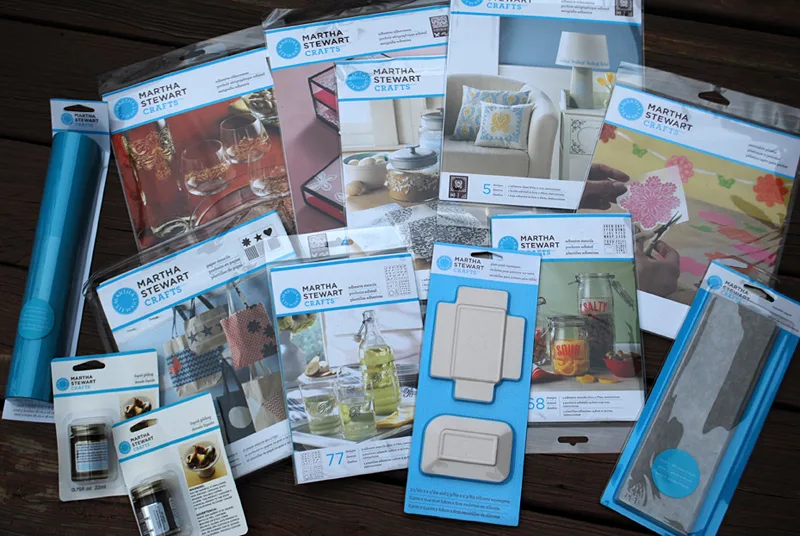
Painted Spiderweb Halloween Trick-Or-Treat Candy Bowl free project tutorial

++++++

How to make a DIY Halloween candy bowl

Step 1: How to make a DIY Halloween candy bowl

I started with a plain cream ceramic bowl that I found on clearance. I recommend a ceramic bowl because you can quickly cure it in your oven when you’re finished to really harden the paint.
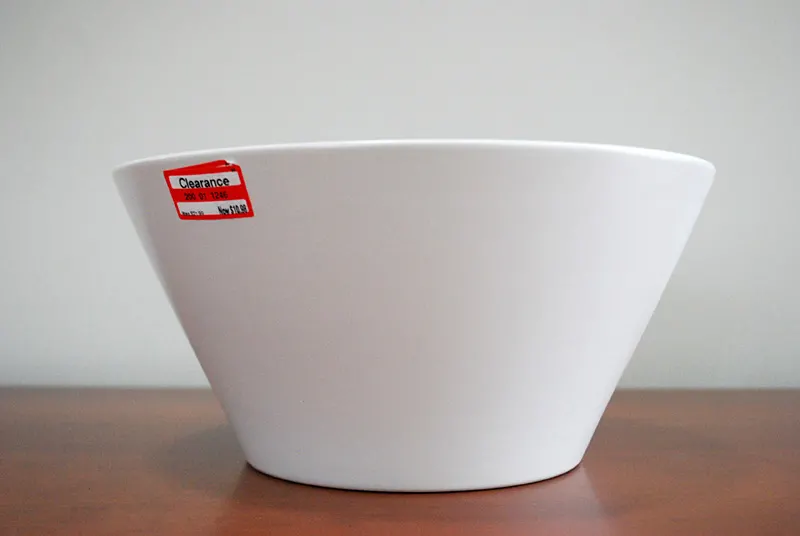
Painted Spiderweb Halloween Trick-Or-Treat Candy Bowl free project tutorial

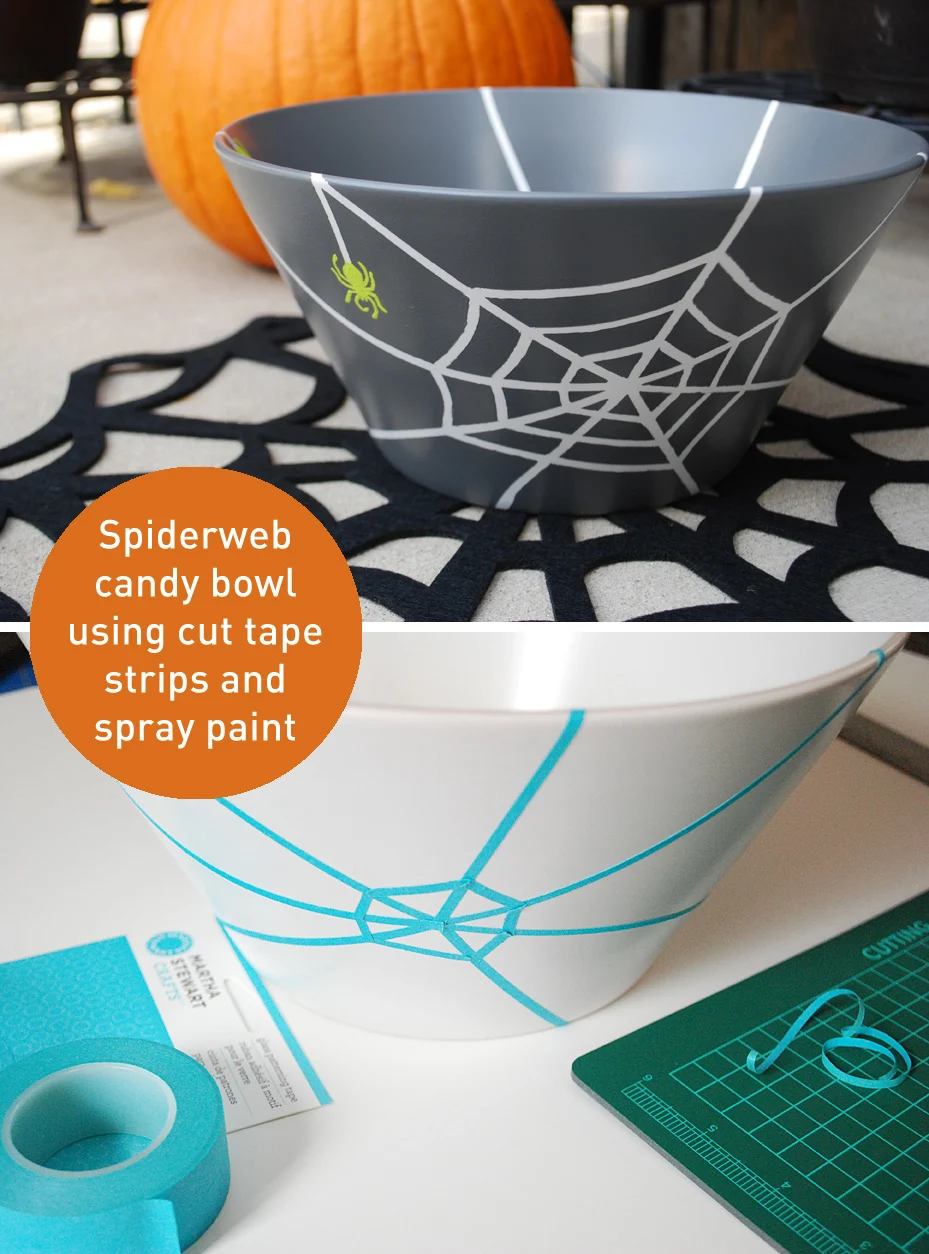
Then I cut the pretty turquoise Martha Stewart Glass Patterning Tape into thin strips using a craft knife…
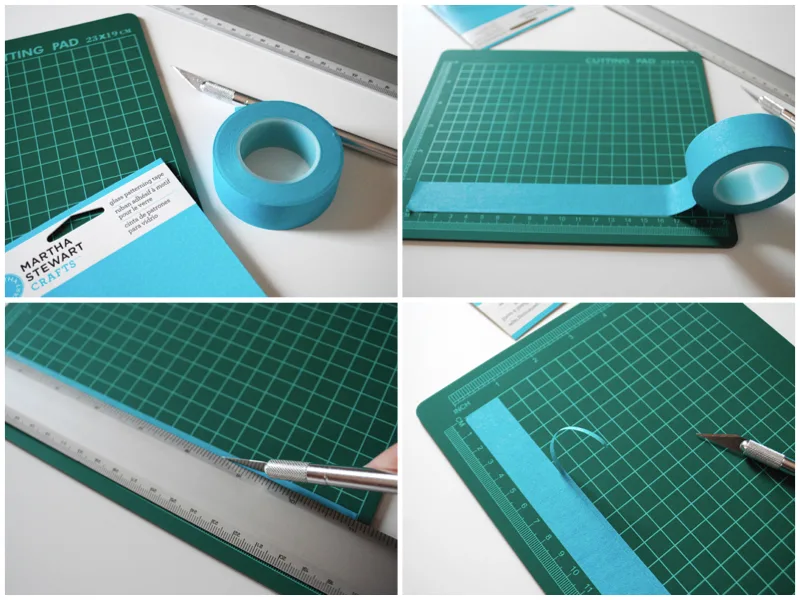
Painted Spiderweb Halloween Trick-Or-Treat Candy Bowl free project tutorial

…and then curved and maneuvered the glass patterning tape strips to freehand spiderwebs onto the bowl.
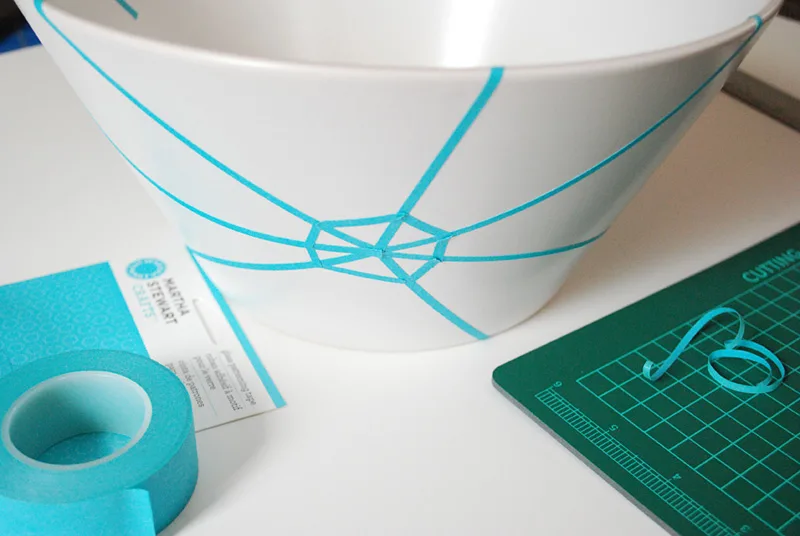
Painted Spiderweb Halloween Trick-Or-Treat Candy Bowl free project tutorial

This was so much fun to do and I loved how cutting thin strips put a little twist on how to use Martha’s glass patterning tape.
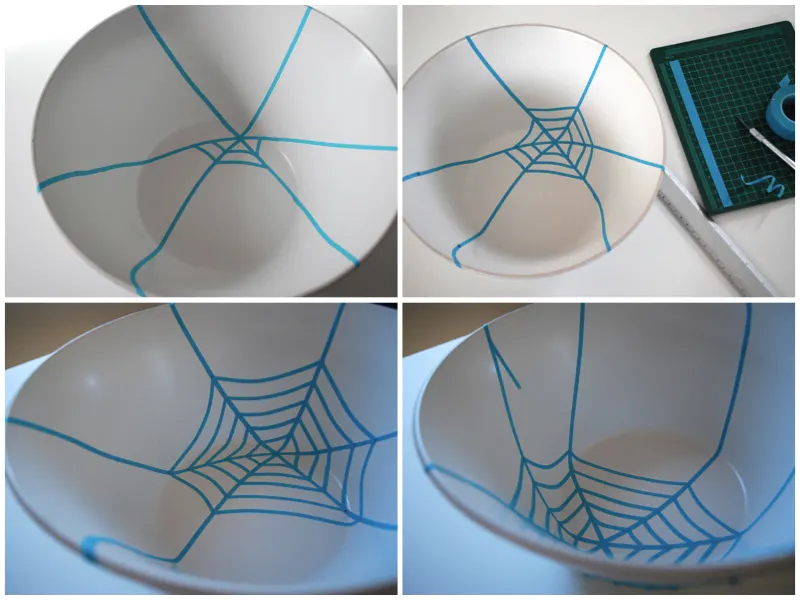
Painted Spiderweb Halloween Trick-Or-Treat Candy Bowl free project tutorial

I love how these webs look and it was really easy to do.
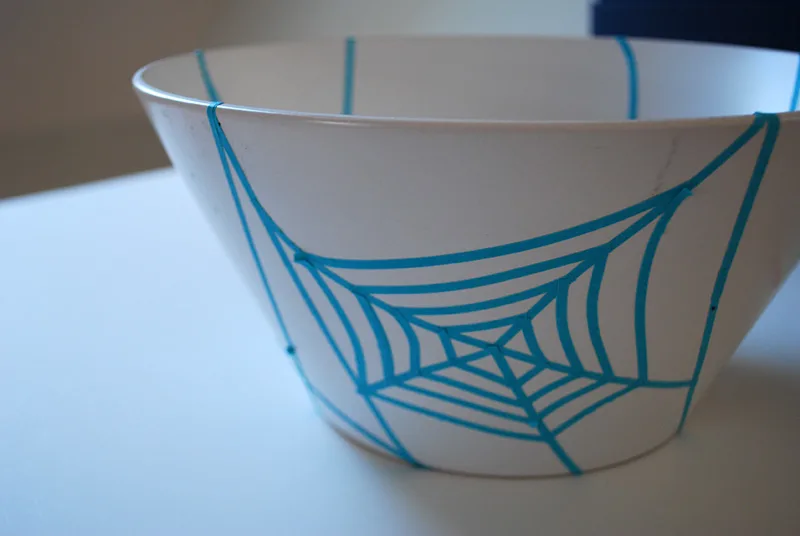
Painted Spiderweb Halloween Trick-Or-Treat Candy Bowl free project tutorial

And I admit that as a novice painter I got nervous and almost wished I could stop here — scared to mess this up!
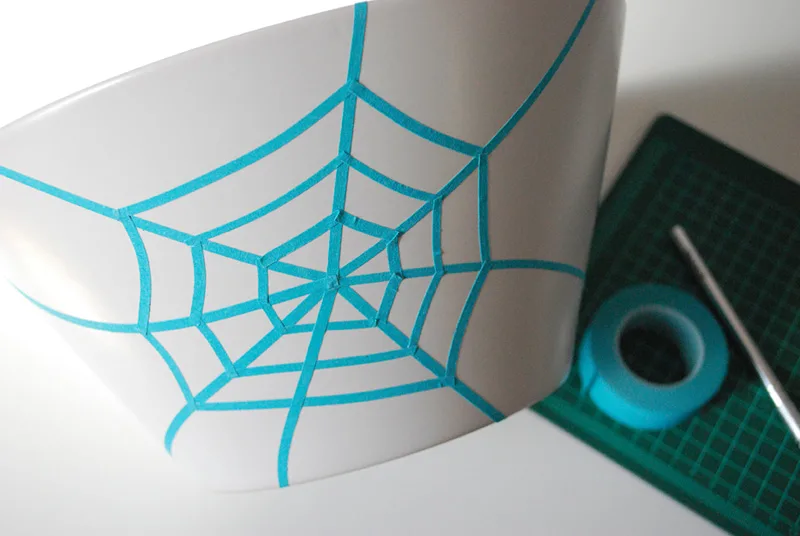
Painted Spiderweb Halloween Trick-Or-Treat Candy Bowl free project tutorial

Step 2: Spray paint your DIY Halloween candy bowl

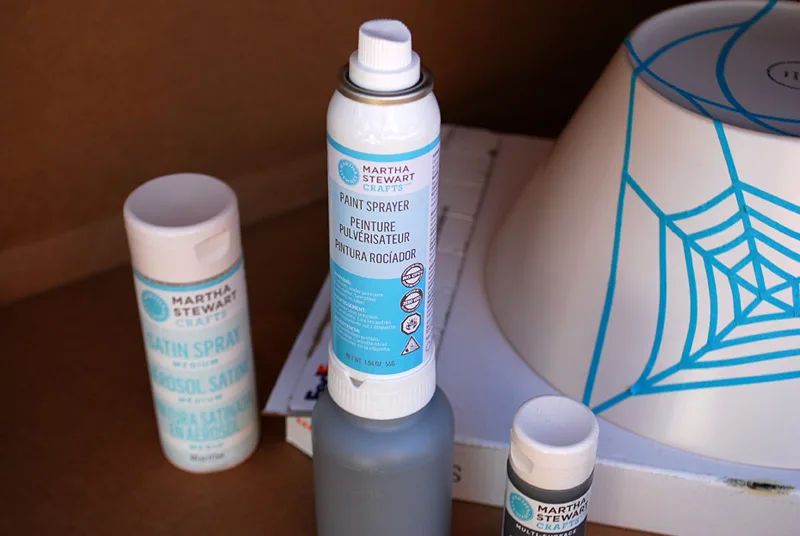
I finally stopped procrastinating and busted out the Martha Stewart Satin Spray Kit to quickly and evenly paint the bowl gray. And, well, I’m hooked.
Painted Spiderweb Halloween Trick-Or-Treat Candy Bowl free project tutorial

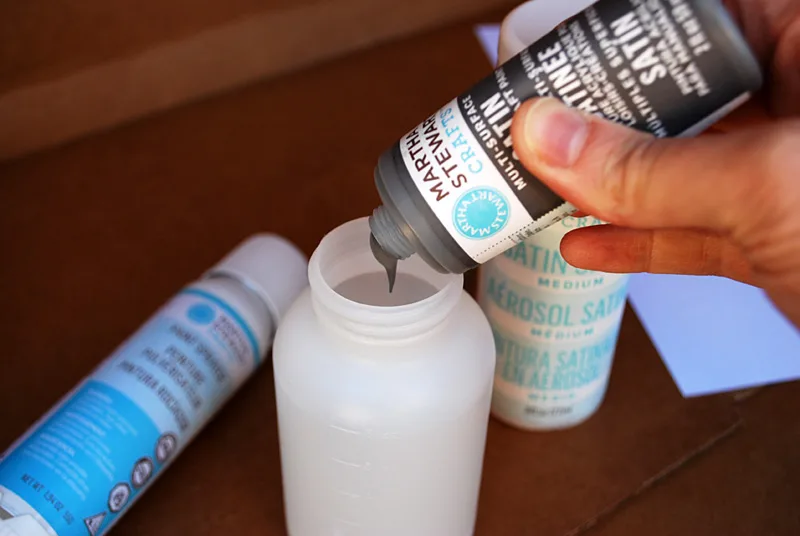
The Martha Stewart Satin Spray Kit is basically a genius way of turning almost any Martha Stewart Crafts paint into spray paint — which comes in super handy for me in Chicago where it’s illegal to purchase spray paint within city limits.
Painted Spiderweb Halloween Trick-Or-Treat Candy Bowl free project tutorial

The system is so nifty that I wrote up a step-by-step post on how to use the Martha Stewart Satin Spray Kit so you can create your own custom spray paint colors too.
Painted Spiderweb Halloween Trick-Or-Treat Candy Bowl free project tutorial

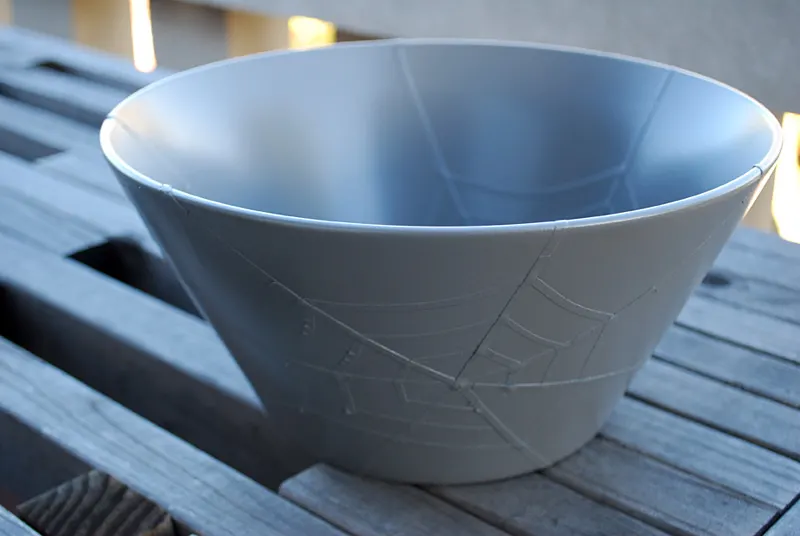
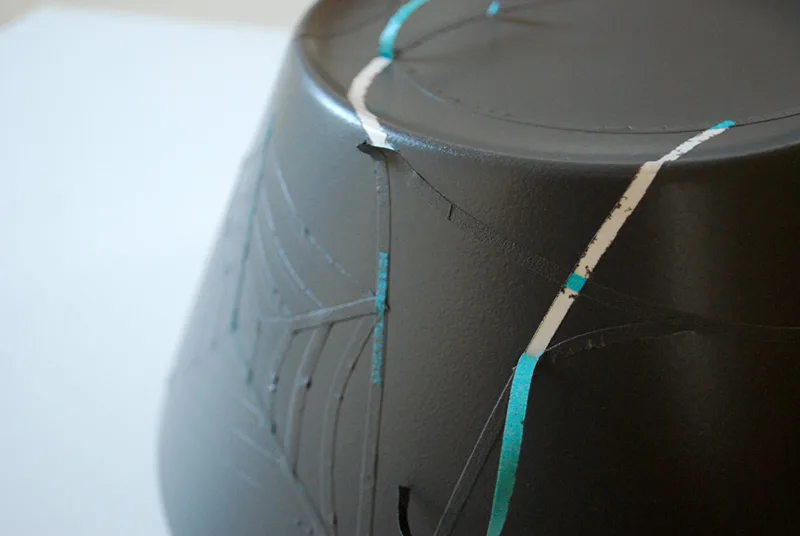
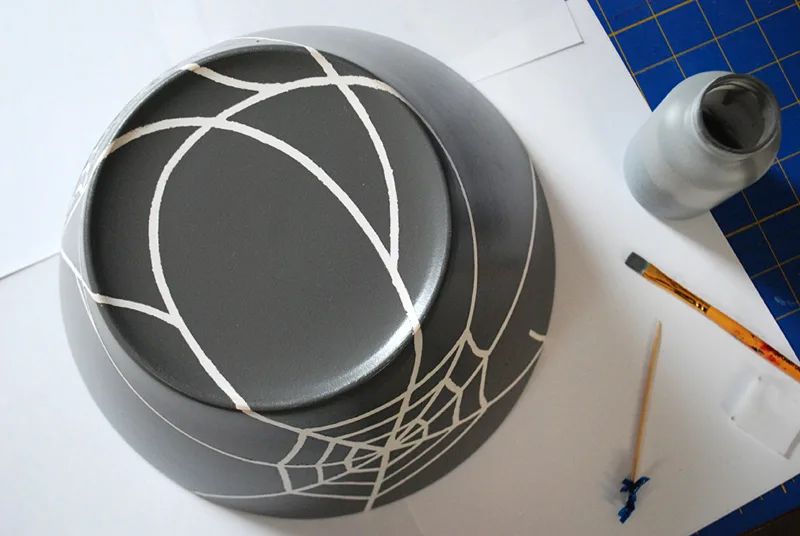
When the gray paint was all dry I peeled off the painter’s tape strips to reveal the ecru spiderwebs below from the original bowl.

(NOTE: I have since learned that I should have either pulled up the painting tape while it was wet or scored around the dry painted tape with an Xacto knife so it would have pulled up more cleanly. So take that step and avoid the touch ups, folks.)
Painted Spiderweb Halloween Trick-Or-Treat Candy Bowl free project tutorial

So I had to do a little cleanup where the paint bled under some bits where I should have pushed down the tape more, and touch up with paint in places where I pulled off more paint than I wanted. It actually turned out pretty cool – I like how it almost looks like the webs are hand painted onto the Halloween candy bowl even though it’s really the reverse.
Painted Spiderweb Halloween Trick-Or-Treat Candy Bowl free project tutorial

Step 3: Stencil on spiders

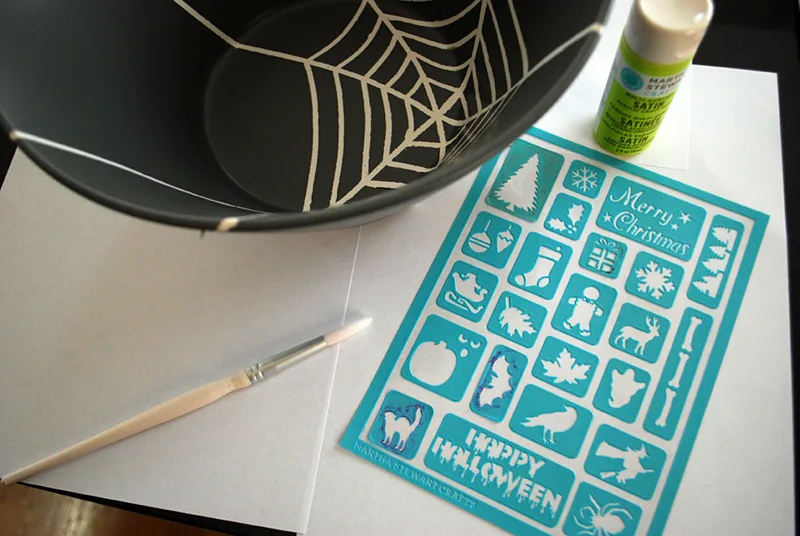
Then I added some spiders to my DIY Halloween candy bowl using Martha Stewart Crafts paint in Granny Smith and reusable holiday adhesive stencils. These stencils stick to the surface even they’re washed and dried.
Painted Spiderweb Halloween Trick-Or-Treat Candy Bowl free project tutorial

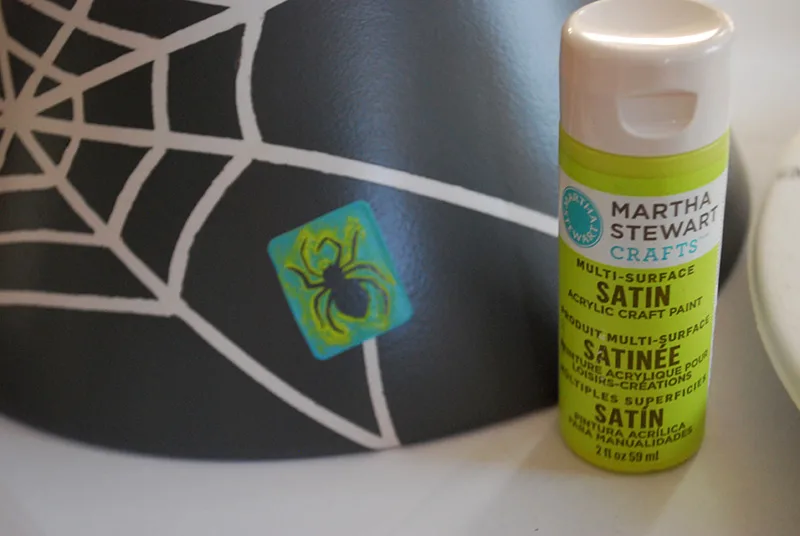
I’m not a painter or a stencil-er. Never really done it before. So I knew starting with a spider stencil was a bold move.
Painted Spiderweb Halloween Trick-Or-Treat Candy Bowl free project tutorial

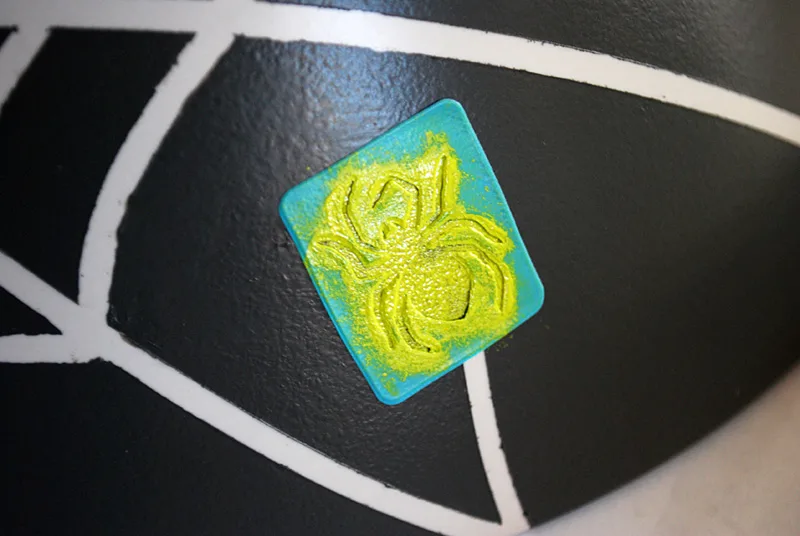
And so I practiced a few times on paper before putting it on the bowl itself and all was well.
Painted Spiderweb Halloween Trick-Or-Treat Candy Bowl free project tutorial

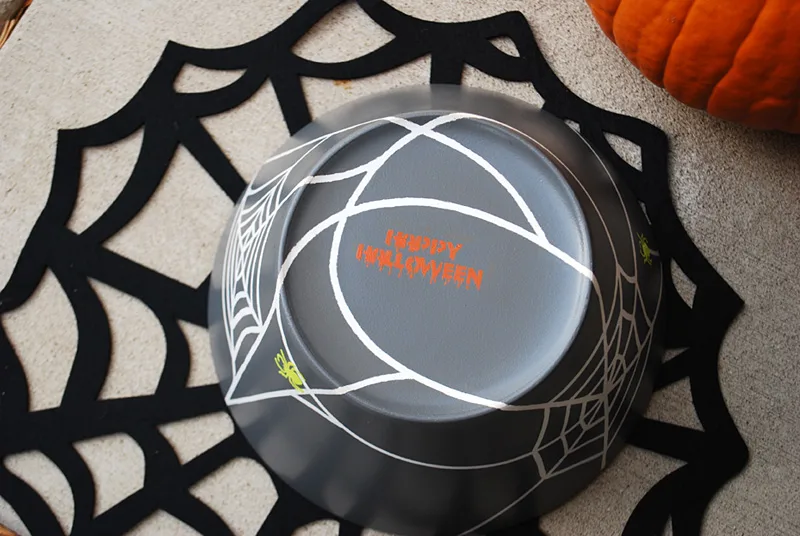
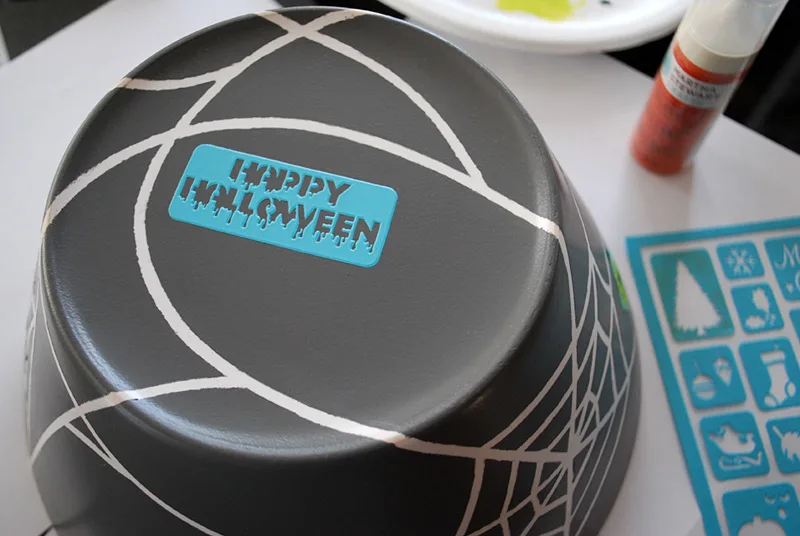
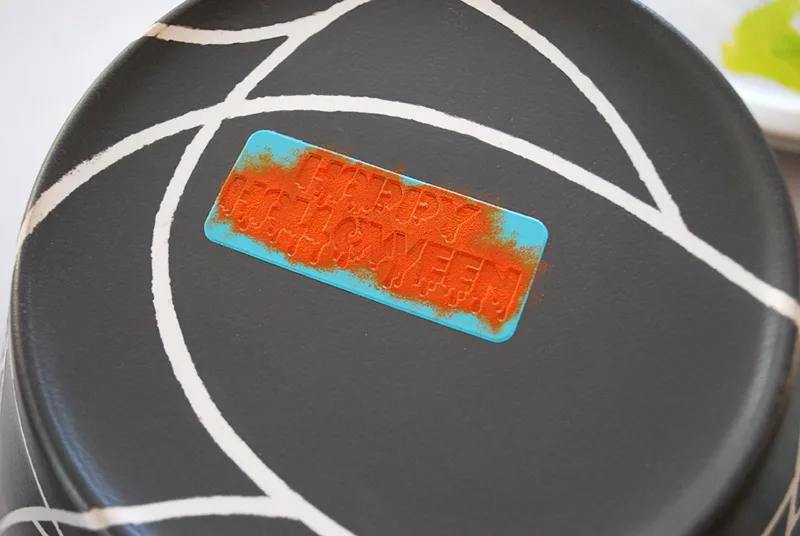
When the spiders were in their webs I added a Happy Halloween message on the bottom of the bowl.
Painted Spiderweb Halloween Trick-Or-Treat Candy Bowl free project tutorial

And if you get a little paint outside the stencil like I did here just wipe it off with a wet cloth before it dries. Let the bowl cure for 21 days or you can oven cure it – I’m doing the 21 day version and then I’m going to take a look at it, maybe I’ll need to seal it at that point because I peeled some of the paint away so I’ll keep you posted. I think I may also add a layer of Martha Stewart Crafts Glow-In-The-Dark Finish. Once cured the paint bottle says that it should be top rack dishwasher safe although I’ll probably still hand wash.
Painted Spiderweb Halloween Trick-Or-Treat Candy Bowl free project tutorial

I’d like to thank Martha Stewart Crafts and Plaid for all the painting treats that you saw here and more.

  • Plaid on Facebook: http://www.facebook.com/InspiredByPlaid
  • Plaid on Twitter: http://www.twitter.com/PlaidCrafts
  • Plaid on Pinterest: http://www.pinterest.com/PlaidCrafts

This is a sponsored post in partnership with Blueprint Social and Martha Stewart Crafts. All opinions are mine.
Painted Spiderweb Halloween Trick-Or-Treat Candy Bowl free project tutorial

Feeling inspired? See more DIY Halloween craft projects, costumes, and DIY treat bags.

—

Like it? Share it!
The nicest way to say you like it is to pin it on pinterest, post a comment, follow Merriment Design on Facebook, pinterest or sign up for monthly emails. Enjoy! 🙂

Copyright stuff: You’re more than welcome to use this free project and tutorial for personal use. Contact me for commercial use and etsy sales.

Filed Under: DIY Tutorials, Fall, Halloween, Holidays, Sponsored

About Kathy

I'm Kathy, maker of things and Chicago mom who likes simple and clever DIYs that look handmade, not homemade. I like sewing, printables, handmade birthdays, holiday decor and easy cakes. See my work at HGTV, DIY Network, Apartment Therapy, DesignSponge, more. ✂️

  • Email
  • Facebook
  • Instagram
  • Pinterest
  • Twitter

More Posts

  • DIY Boo Front Door Halloween DecorationDIY Boo Front Door Halloween Decoration
  • DIY Halloween Front Door Decoration: Subtle SpiderwebsDIY Halloween Front Door Decoration: Subtle Spiderwebs
  • DIY Halloween luminaries from recycled baby formula cansDIY Halloween luminaries from recycled baby formula cans
  • Tombstone Printable Halloween Cupcake ToppersTombstone Printable Halloween Cupcake Toppers
How to use the Martha Stewart Satin Spray Kit {and review}
GIVEAWAY: Adorable Hand Crocheted Hat by cute.tuques

Comments

  1. 1

    the aesthete and the dilettante says

    October 10, 2012 at 8:57 pm

    This looks amazing! So fun. I’m going to try this with Hannah, my 10 year old crafter!

  2. 2

    Melissa says

    October 10, 2012 at 9:01 pm

    Kathy,

    This looks great! At first I thought you hand painted the webs–they look amazing.

    Melissa

  3. 3

    Abby says

    October 10, 2012 at 9:31 pm

    I love this. I am not crafty but it looks like something I could do. Thanks!

  4. 4

    karilyn says

    October 10, 2012 at 9:52 pm

    Looks fabulous!

  5. 5

    Wendy says

    October 10, 2012 at 10:20 pm

    If this disappears from your front stoop on Halloween, you know where to look! Love it!

  6. 6

    Virginia says

    October 10, 2012 at 10:26 pm

    This is awesome! And you make it sound so easy!

  7. 7

    Michelle L says

    October 11, 2012 at 9:14 am

    This is fabulous! What a great use of that tape – I never woulda thought of that. Love it!

  8. 8

    Megan says

    October 13, 2012 at 1:02 pm

    This turned out awesome 🙂

  9. 9

    Artisanal Creations says

    July 11, 2018 at 11:31 pm

    Looks Awesome!

Kathy Beymer from Merriment Design
  • Email
  • Facebook
  • Instagram
  • Pinterest

Join for monthly DIYs, giveaways & exclusives

Recent Posts

Heart alphabet letter handmade Valentine's Day card or valentines artwork

Heart Alphabet Letters Handmade for Valentine’s Day

Dogs and hearts DIY clay magnets clay crafts idea

How to make clay fridge magnets – easy DIY tutorial

Visit my etsy store

  • Ashlee Taylor, etsy purchaserAshlee Taylor, etsy purchaserPhoto Props Editable Sayings Bubbles and Ages Printable

    "Great deal! I was able to custom it and when I had any question, she responded instantly to my messages. You can also use the print outs for other things like the photo booth characters, which is just the cutest idea ever! I highly recommend this shop!"

  • Shannie Lou, etsy purchaserShannie Lou, etsy purchaserPersonalized Frozen-inspired Snowflake Birthday Banner printable

    "Easy to personalize and wonderful crisp image"

  • Melissa Rassi, etsy purchaserMelissa Rassi, etsy purchaserStar Wars Parody Opening Crawl Stair Risers Signs

    "This item is so clever! I knew I had to have it for my son's Star Wars birthday party. The download was simple and easy to modify with my own text changes. The instructions on how to get it printed at FedEx Office were easy to follow. Thank you so much for this great item! Easiest party decoration I ever made!"

  • Monica Mora-Handlos, etsy purchaserMonica Mora-Handlos, etsy purchaserPrintable Super Hero birthday banner and iron-on

    "This was just what I needed to make a superhero shirt for my husband's birthday party. He loved it!! Thanks for the great digital file!"

  • Emma Wilson, etsy purchaserEmma Wilson, etsy purchaserpersonalized construction t-shirt iron on printable PDF

    "Thrilled to bits with my boys personalised birthday party t-shirt! Fantastic design and very clear instructions, thank you."

  • Jen White, etsy purchaserJen White, etsy purchaserpurchased personalized milestone postcards

    "I don't think there is a nicer person in the world to work with! Such a beautiful job and everything explained in detail! Thank you!"

Get Craft & DIY Monthly Emails

[email protected]
xo Kathy
  • Home
  • DIY & Crafts
  • Holidays
  • Birthdays & Parties
  • Blog
  • Shop
  • About
  • Contact

Copyright © 2021 · Merriment Design Co. All Rights Reserved. · Privacy Policy