
Hearts is the theme of two easy Valentine’s Day gifts perfect for spoiling the sweet toddler and tween girls in your life.
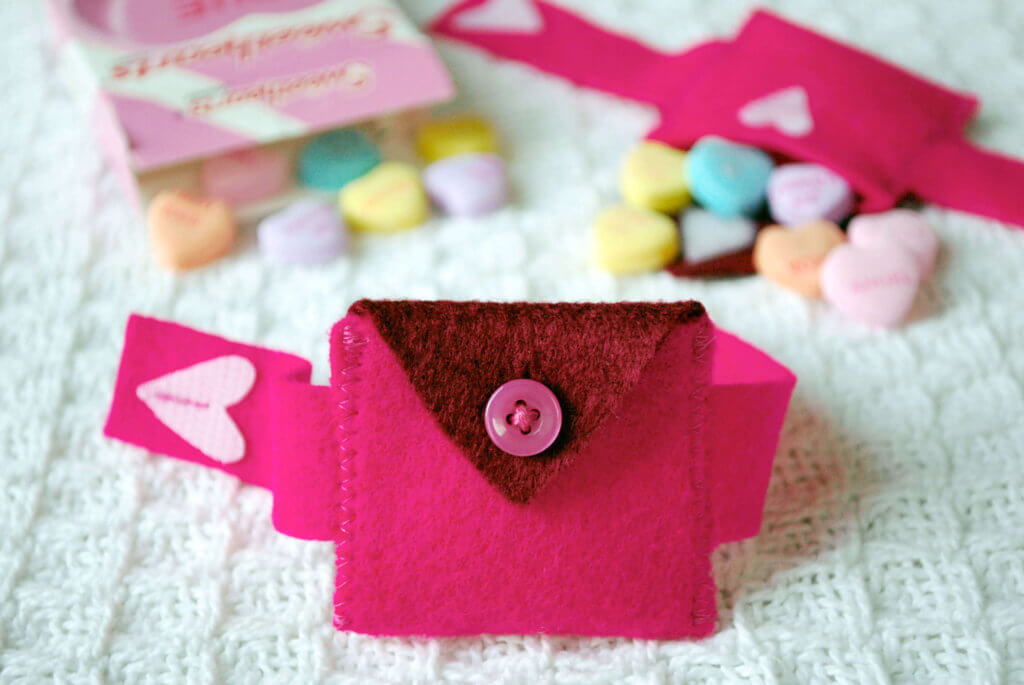
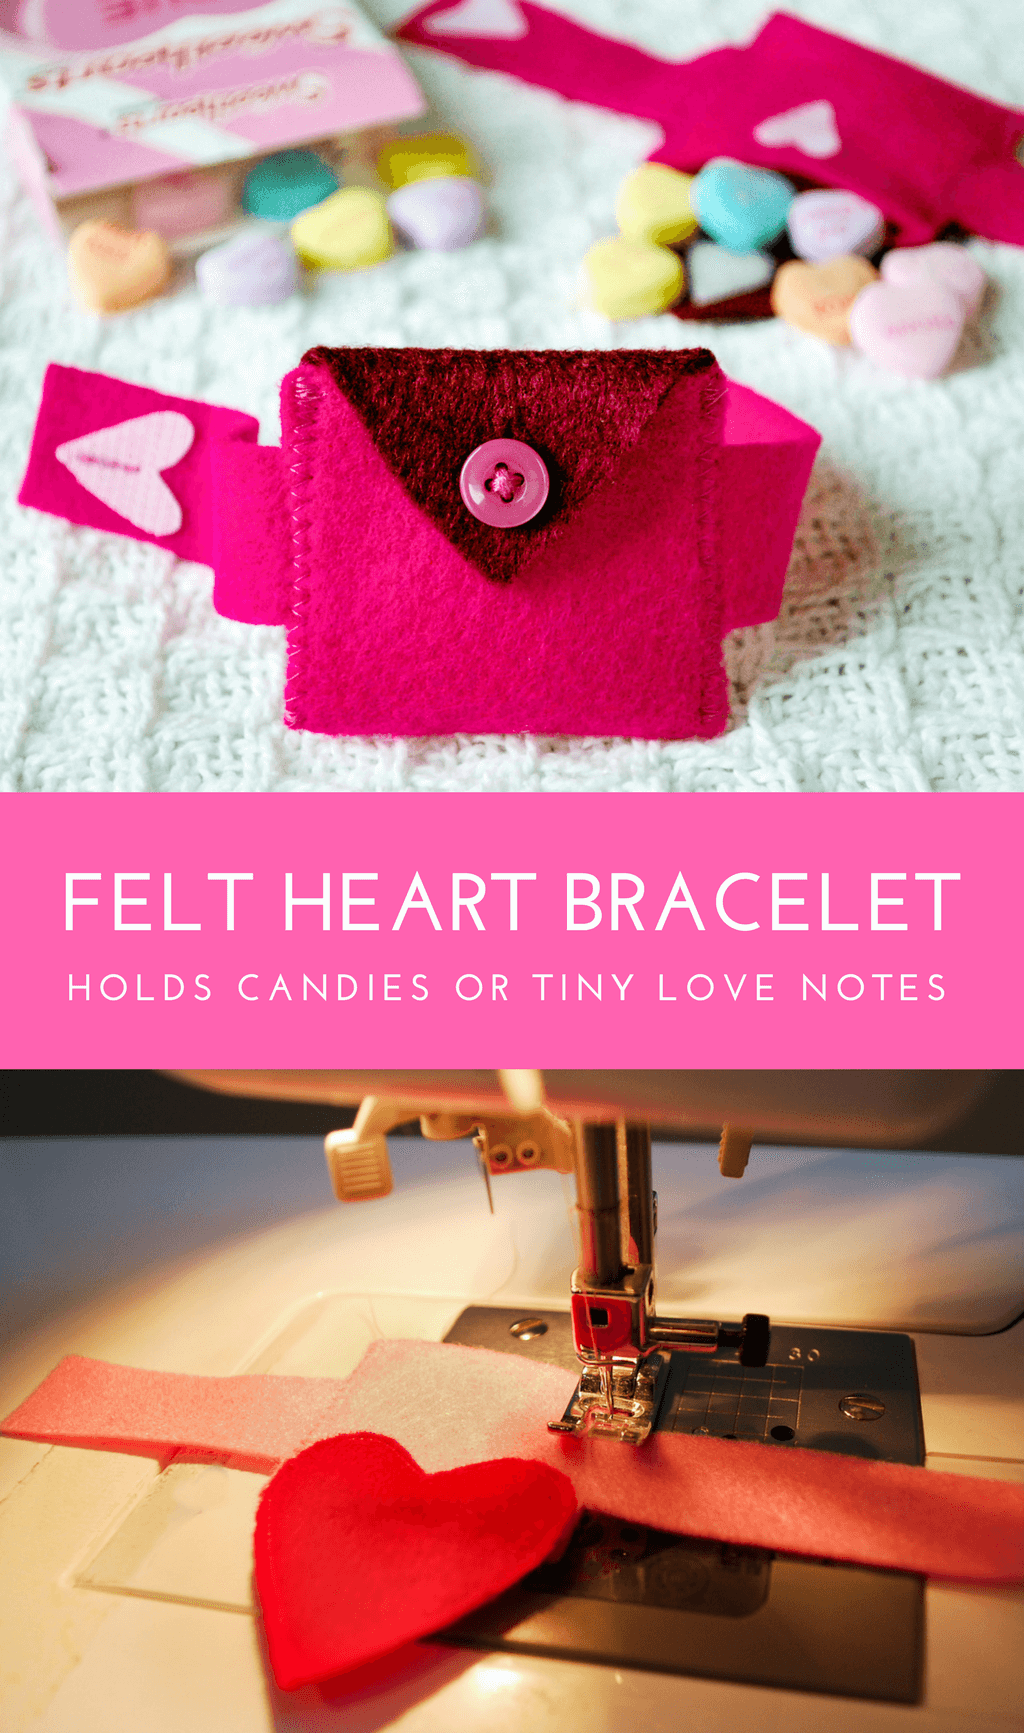
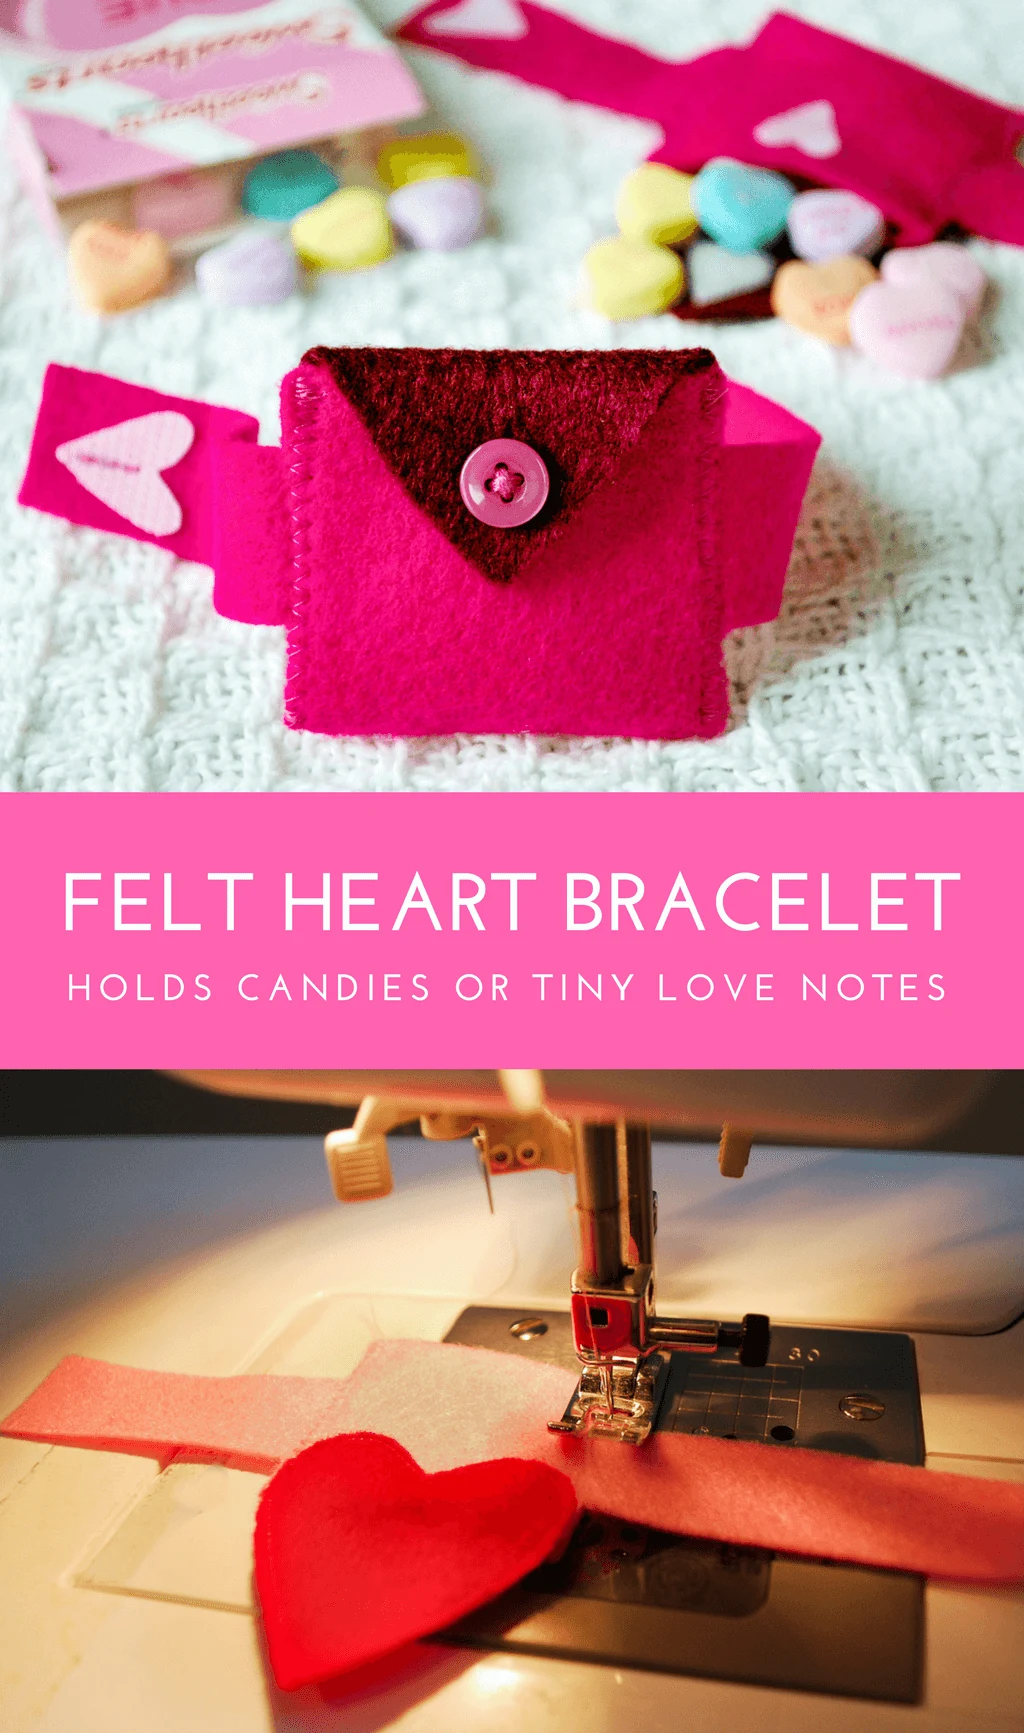
First is a teeny pouch bracelet perfect for storing candies or tiny love notes.


You can make it with either heart-shaped velcro and button closures …and you can hand sew it too rather than use a sewing machine if you’d like.


Next is a cute and simple mini-purse…


Like the bracelet the flap is actually a heart! Here it is shown open and turned over…


…and here it is open…


These are two easy and quick Valentine’s Day projects. Hearts!
++++++
Supplies for making a felt heart pocket bracelet and mini purse for kids:
- Kathy’s free template for the heart pocket bracelet and mini-purse for kids (PDF – this is for teeny toddler and tween wrists …to make this for larger wrists, just enlarge it on a copier or lengthen the straps)
- 1 square of red felt
- 1 square of dark pink felt
- Button (for mini-purse, optional for heart pocket bracelet)
- 6″ piece of grosgrain ribbon for mini-purse handle
- Embroidery floss
- Good fabric scissors
- Thread
- Fabric glue
- Sewing machine (optional – you can just hand-stitch or use fabric glue instead)
- VELCRO® brand Sticky Back Tape or VELCRO® brand Sew-On Tape (for bracelet)
:: How to Make a Felt Heart Pocket Bracelet ::
Download my free heart pocket bracelet template. Note that this pattern is sized for a 3-4 year old, so increase the size as needed by increasing the band size or enlarging the pattern on a Xerox machine before cutting. Pin onto the felt and cut out.
Here’s a video of how to make the bracelet …or just keep scrolling for step-by-step instructions and photos.


Fold the pocket in half, matching sides together. Sew the left and right sides using a zigzag stitch or just hand stitch it on your own.


Cut out my free heart pattern. Fold the heart template in half. Fold the felt in half so that you just have room to fit the template. Cut out your heart.


Notice the line on my heart pattern? The area above the line is the part that will be on the back of the heart. Use fabric glue to affix the top of the heart onto the back of the bracelet. Let this dry completely. I recommend putting it under a heavy book to ensure a good bond.


Cut out hearts from your VELCRO fasteners. I fold the VELCRO fasteners in half and cut. Peel back the adhesive and place on the band of the bracelet.


You can sew a few stitches in the VELCRO fasteners heart like I did to ensure it stays secure.


Cut a small buttonhole in the heart flap.


Close the heart flap and mark where you should sew your button for the pocket to close. Sew the button and fill with sweet surprises.


:: How to Make a Heart Mini-Purse ::
Here’s a video of how to make the heart mini-purse …or just keep scrolling for step-by-step instructions and photos.
Cut out my free mini-purse bracelet template. Lay the rectangle pattern onto the felt and cut (you can pin the pattern to the felt first if you’d like).


Fold the rectangle together. Fold your ribbon in half and slip inside the layers on one side. Sew the left and right sides together using a zigzag stitch, leaving the top open.


Cut out the heart pattern and fold it in half. Place it on a folded felt square that’s slightly larger than the pattern. Cut and open your heart.


Notice the line on my heart pattern? The area above the line is the part that will be on the back of the heart. Put fabric glue onto the back of the heart above that line and affix to the mini-purse. Let this dry completely. I recommend putting it under a heavy book to ensure a good bond.


Cut a small buttonhole slit in the heart just large enough for the button to fit through. Careful, not too big!


Fold down your heart top and mark where the button will need to be placed to fit through the buttonhole. Sew on the button.


Be sure to pin this DIY felt heart pocket bracelet for later:
—
Like it? Share it!
The nicest way to say you like it is to pin it on pinterest, post a comment, follow Merriment Design on Facebook, twitter, pinterest, Google+, instagram or sign up for monthly emails. Enjoy! 🙂
Copyright stuff: You’re more than welcome to use this free project and tutorial for personal use. Contact me for commercial use and etsy sales.
Wendy
Tuesday 17th of February 2015
I was looking for a small purse to make something for my granddaughter and this looks to be just the right size that I was looking for. Plus, the mini purse is just adorable!
Zee
Sunday 11th of May 2014
Hey Kathy ... I have tagged you on the pic .. My username is azeejaaman ... Check n let me know if you got to see it
Zee
Wednesday 7th of May 2014
Hi ....
This is a cute and pretty felt mini purse ... I made one and sent it for my mother in law... I have also put it on my Instagram clicks .. N hash tagged merrimentdesign , incase you guys on Instagram,,,,
Kathy Beymer
Friday 9th of May 2014
Hi Zee, thanks so much! I'm glad the pattern worked for you. I'm not very good at instagram - would you tell me what your instagram username is? I would love to re-gram it. My instagram is instagram.com/kathybeymer
Carole
Wednesday 13th of March 2013
I can't wait to make these for my little great-grandaughters. Thank you for sharing the pattern!
Kathy Beymer
Wednesday 13th of March 2013
Thanks, Carole! Would love to see pictures on Facebook when you're finished if you'd like to share. http://www.facebook.com/merrimentdesign
Janelle
Tuesday 12th of February 2013
Thanks for the tutorial! Love these for my daughters valentines.