

Today we’re going to learn how to make marshmallows using a really easy marshmallow recipe – it’s a yummy DIY gift and you can always make some extras for yourself. Lately I’ve developed a bit of a hot chocolate habit during the mid-afternoon workday at the day job. After spotting a box of “homemade” marshmallows at Williams-Sonoma over the holidays my sisters and I decided to try to make a batch ourselves.
After finding bunches of online marshmallow recipes and tutorials we settled on Alton Brown’s marshmallow recipe and made a few festive variations of marshmallows with different flavors. Man! This marshmallow recipe tastes so much better than the store-bought marshmallows and my mom’s KitchenAid stand mixer made making this marshmallow recipe a piece of cake.
Marshmallow recipe ingredients (recipe from Alton Brown, directions slightly adapted)
- 3 packages unflavored gelatin
- 1 cup ice cold water, divided
- 1 1/2 cups granulated suga
- 1 cup light corn syrup
- 1/4 teaspoon kosher salt
- 1 teaspoon vanilla extract
- 1/4 cup confectioners’ sugar
- 1/4 cup cornstarch
- Nonstick spray
- Candy canes, crushed (optional)
- Chocolate (optional for drizzling on finished marshmallows)
Other supplies to for how to make marshmallows:
- Candy thermometer
- Parchment paper
- 9 x 13 pan
, or two 9 x 9 square pans
for thinner marshmallows
- KitchenAid stand mixer
- Flour sifter
- Kitchen scissors


Assemble your ingredients for how to make marshmallows. Crush the candy canes if you’re making peppermint marshmallows and put aside.


Place the gelatin into the bowl of a KitchenAid stand mixer with the whisk attachment along with 1/2 cup of the water. In a small saucepan combine the remaining 1/2 cup water, granulated sugar, corn syrup and salt. Place over medium high heat, cover and allow to cook for 3 to 4 minutes.


Uncover, clip a candy thermometer onto the side of the pan and continue to cook until the marshmallow mixture reaches 240 degrees F, approximately 7 to 8 minutes. Once the mixture reaches this temperature, immediately remove from the heat. Turn the mixer on low speed and, while running, slowly pour the sugar syrup down the side of the bowl into the gelatin mixture. Once you have added all of the syrup, increase the speed to high.


It’s really cool how the mixture starts to turn snow white and look like real marshmallows. Continue to whip until the mixture becomes very thick and is lukewarm, approximately 12 to 15 minutes. Add the vanilla during the last minute of whipping. You can either add the optional crushed candy cane pieces in the final minute of whipping, or you can use later as a garnish, or both. I made 1/2 the batch as plain vanilla and then mixed peppermint pieces into the rest.
Place a square of parchment paper in the bottom of the pan and spray lightly with nonstick spray. When ready, pour the marshmallow mixture into the prepared pan, using a lightly oiled spatula for spreading the marshmallows evenly into the pan. Spray a second square of parchment paper and place it on top of the marshmallows, oil side down, and lightly smooth the mixture. Allow the marshmallows to sit for at least 4 hours and up to overnight.


Combine the confectioners’ sugar and cornstarch in a small bowl. Turn the marshmallows out onto a cutting board and cut into 1-inch squares using kitchen scissors or a pizza wheel or dusted with the confectioners’ sugar mixture. Roll the cut marshmallows in the confectioners’ sugar mixture to lightly cover, or use a Flour sifter like I did. Optionally drizzle melted chocolate over the top of the marshmallows. Store the marshmallows in an airtight container for up to 3 weeks or place in sealed plastic gift bags.
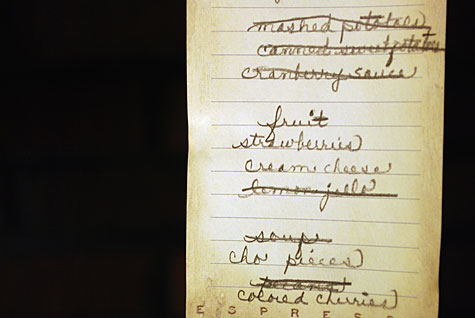
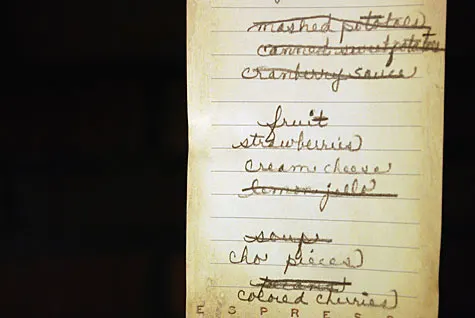
While making these tasty lovelies in my parents’ kitchen, I snapped a photo of my mom’s latest grocery list on the black refrigerator door. My handwriting looks like dog food compared to this. Long live keyboards!
Janet McCord
Thursday 11th of October 2012
I'm a bit confused. The recipe says to use the "whisk" attachment of the KitchenAid but the pictures show you using the "mixer" attachment. Which would be better?
Ria Sheridan
Wednesday 23rd of September 2009
Hi - can't believe I haven't found your website before - it is heaven! Question about the gelatin in these please - I am from over the pond in England and would like to know how much is in a 'packet' of unflavoured gelatin? All the ones in the supermarkets over here have different quantities - can't wait to try these out for my 'grown-ups' Halloween party! (Imagining them dipped in dark chocolate with a white chocolate half moon to decorate...mmm...)
Traci
Tuesday 13th of January 2009
Hi! I just stumbled on your blog via... oh heavens knows where I was last.. but anyhoo, I use Alton Brown's recipe too and it rocks! People always ask "why would you make marshmallows when you can buy them for a dollar?"
.. dude. These are NOT the same as storebought. Just eat one and you'll understand...
Colleen @ The Everyday Bride
Thursday 1st of January 2009
1 word: jealous. (that you got to post about this first...) my mil and i made some homemade mallows JUST YESTERDAY and, had i snapped some shots, i would have been all over a post... another one bites the dust. but, yes, i totally agree - way better than store bought - even better than williams-sonoma (dare i say?!)
Kathy Beymer
Thursday 1st of January 2009
Dude! Post yours too! I'd love to see how they turned out. Did you use a similar recipe? I think I cut mine too big ...but you can never have too much marshmallow, yes?