
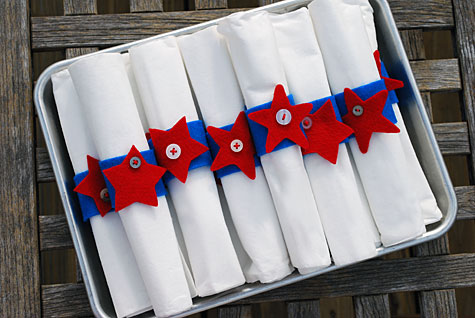
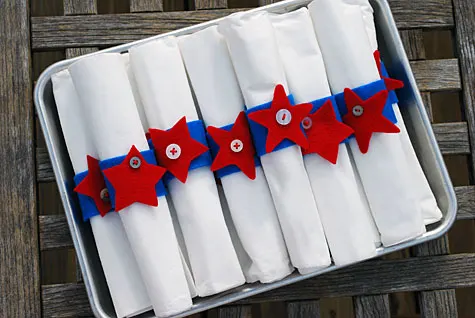
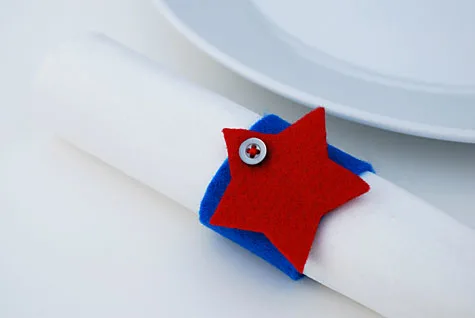
These no-sew felt 4th of July napkin rings really brightened up Shane’s Fourth of July Birthday BBQ – no sewing machine required!
I made a variety of star shapes using star cookie cutters and various loose buttons. Here they are all piled up before setting the table…
And even more DIY napkin rings
And yep, I realize I’m a bit on napkin rings kick …first the felt leaf napkin rings for Thanksgiving, then recycled napkin rings made from Saran Wrap cardboard tubes, then Father’s Day Tie napkin rings, and now these patriotic napkin rings for the 4th of July. But they just make such a statement on the table that I say, the more napkin rings the better!
Supplies for making Fourth of July DIY Napkin Rings from Felt and Buttons:
- Metal star cookie cutters (or freehand your own star shape)
- Blue Felt and Red Felt
- Red embroidery floss
- Disappearing ink fabric marking pen
- Rotary fabric cutter, ruler and self-healing mat
- Good fabric scissors
Table
How to make Fourth of July Napkin Rings from Felt and Buttons
Here’s a video that shows how to make the Fourth of July napkin rings. Or keep scrolling for individual photos and directions.
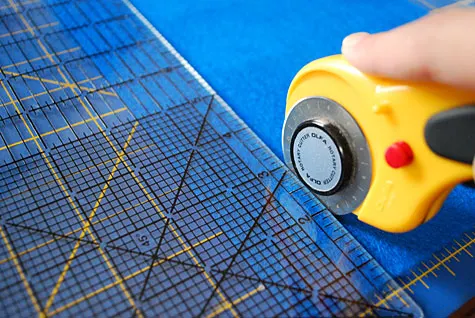
Step 1: Cut blue rings
Cut blue strips 6″ wide x 1.5″ tall using a Rotary fabric cutter, ruler and self-healing mat
QUICK NOTE: In this case, I planned to use high-quality paper napkins and plastic silverware so I made the rings 6″ wide. However, if you’re making them for cloth napkins you should make them 7″ — or just roll up a test napkin (with or without silverware), measure around it, and add 1 inch. The good thing about making them 6 inches is that you can just cut strips and cut them in half (see below).
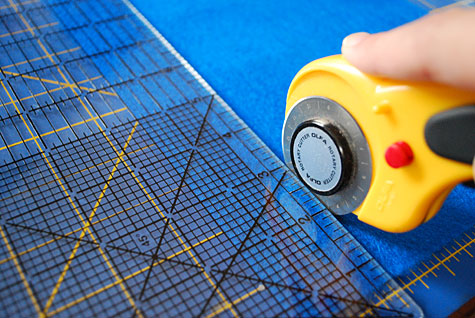
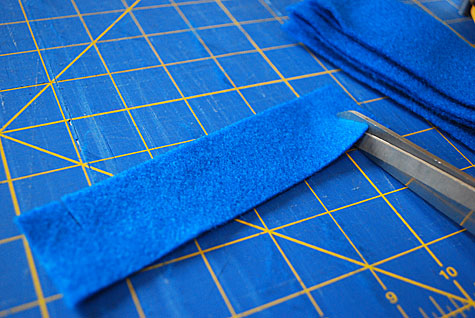
Fold each strip in half and cut with a pair of scissors to make two blue rings.

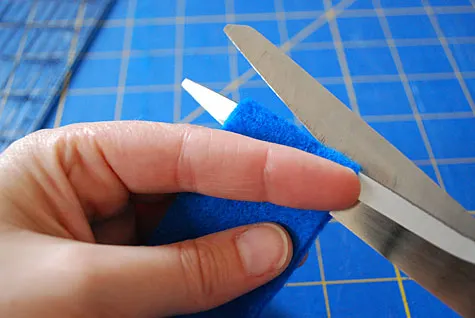
Step 2: Cut ring slits
Measure 1/2″ from the left side and cut a slit halfway through (so your slit will be half of the 1.5″ tall). Repeat on the right side, but make sure the slit is opposite like in the photo above.

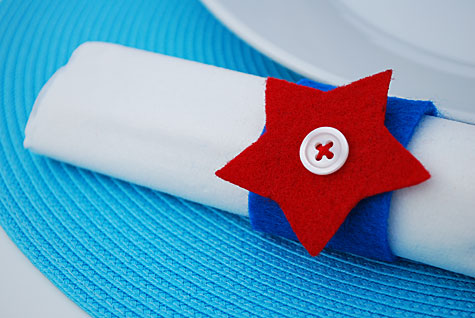
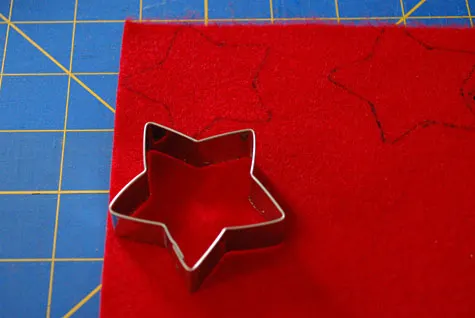
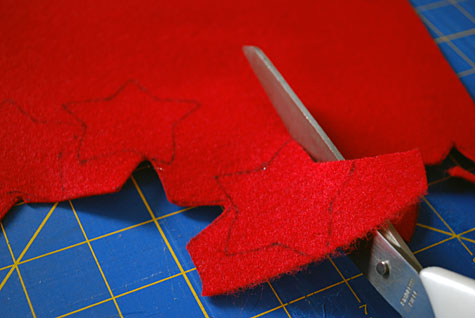
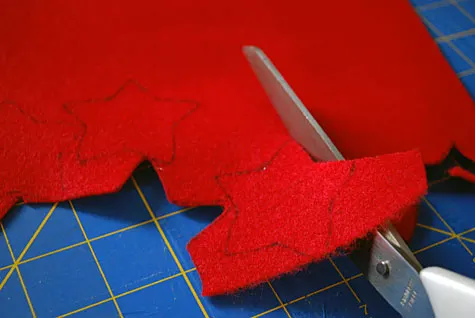
Step 3: Cut stars
Trace your star cookie cutter or freehand your own star shape onto the red felt and cut out. Use disappearing ink pen if you can; I am lazy and used a Sharpie so I just cut inside the lines to make up for it. Cut one star for each ring.

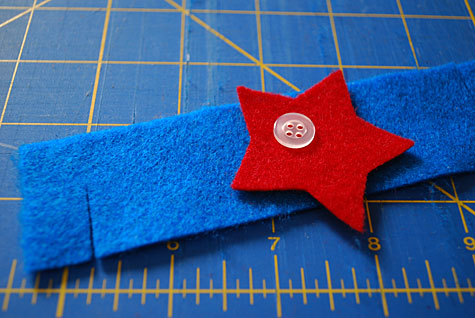
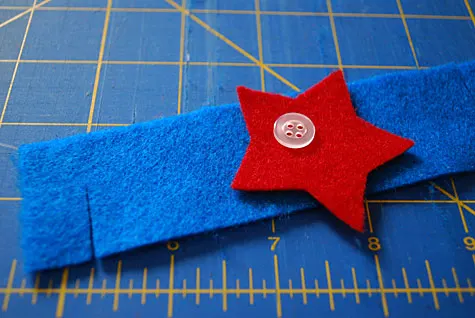
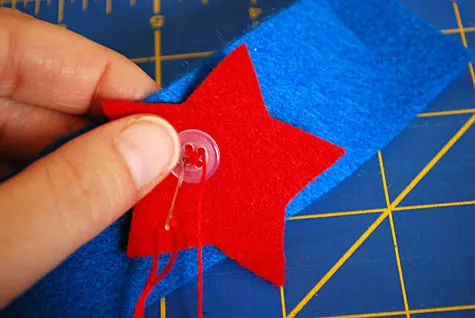
Step 4: Attach stars to ring with button
Place your star in the middle of the blue ring. Place a small button on top. I like making the buttons and stars off-center because it gives it more energy. Using a needle and red embroidery thread, sew through the button, star and ring to secure. Tie a knot in the back.

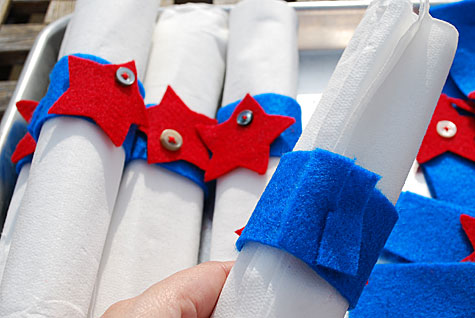
Step 5: Wrap your DIY napkin rings around your napkins
Roll your silverware in a napkin and secure the tabs to close the ring. As mentioned earlier, I used high-quality paper napkins and plastic silverware for the BBQ, so if you’re using fabric or silverware then you may need to make larger rings.
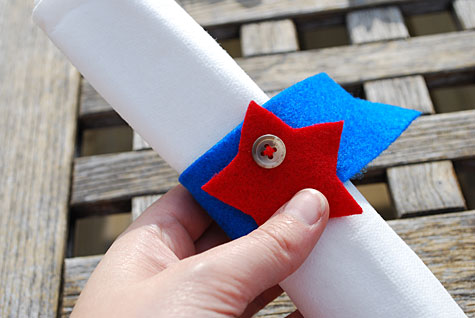


This is what the back will look like. Bring on the burgers…

—
Like it? Share it!
The nicest way to say you like it is to pin it on pinterest, post a comment, follow Merriment Design on Facebook, twitter, pinterest, Google+, instagram or sign up for monthly emails. Enjoy! 🙂
Copyright stuff: You’re more than welcome to use this free project and tutorial for personal use. Contact me for commercial use and etsy sales.
Debra
Saturday 3rd of July 2010
These are adorable!!!!!! I was looking for ideas for my daughter's first birthday and ran into your site. You are so creative! I'm totally inspired now. Thanks for sharing!!!
Kathy Beymer
Tuesday 13th of July 2010
Hi Debra, thanks, I just checked out your super cute Sunshine Party and am looking forward to your birthday party planning lessons learned and DIYs. My baby Elise's 1st birthday is in October. Would you please ping me when it's up on your blog? Thanks!
Becky D.
Wednesday 30th of June 2010
Thank you for the fun, crafty project. I posted it to my Facebook profile page. Nice work!!!
Sonia
Thursday 9th of July 2009
These are wonderful! I can't wait to try them 0ut-- definitely for our next annual Mother's Day brunch with felt flowers instead of stars! Hopefully I'll be able to find another reason to make these before then though : )
Kathy @ MerrimentDesign.com
Thursday 9th of July 2009
Hi Sonia, I absolutely love the idea of making these with flowers! The buttons would make the centers look super cute. Thanks so much for passing along your suggestion along to everyone!