
++ UPDATED: I have evolved this craft considerably and posted a MUCH better way to make them. Please go to https://www.merrimentdesign.com/chalkboard-pillows-for-kids-and-adults-redux.php instead. And enjoy!! ++
I’m really excited about my newest creation: Chalkboard pillows!
The idea originally came to me last fall when I was spray painting some glass vases with chalkboard spray paint. I thought it would be fun to be able to write things on a pillow and display it on my black leather recliner. So when I saw that Design*Sponge was holding a 2008 DIY contest I decided to make chalkboard pillows a reality.
I’m happy to announce that out of 500 entries I was chosen as a semi-finalist!
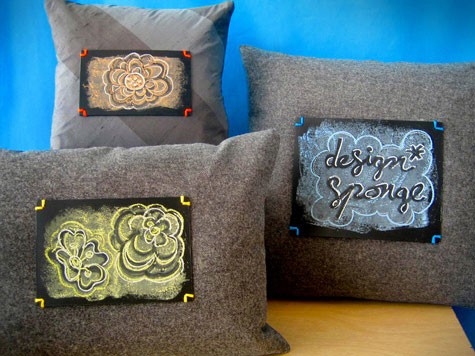
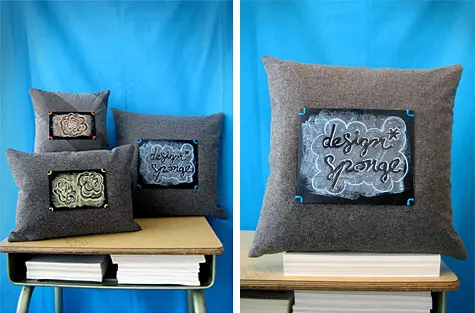
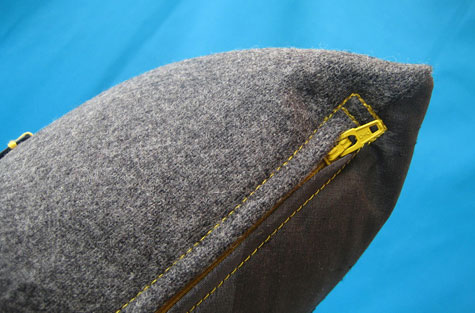
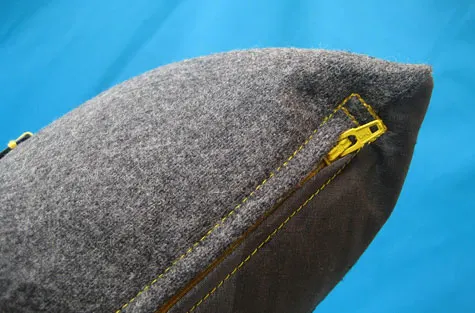
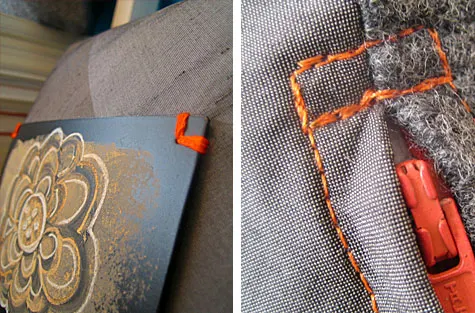
I love that this idea has so much range. I made three classic ‘adult’ pillows with rectangle chalkboards on gray nubby wool fronts (to play off the chalkboard eraser) and dupioni silk gray striped backs (to add a little sophistication as well as make it reversible) with colorful zippers and stitching in orange, yellow and blue.


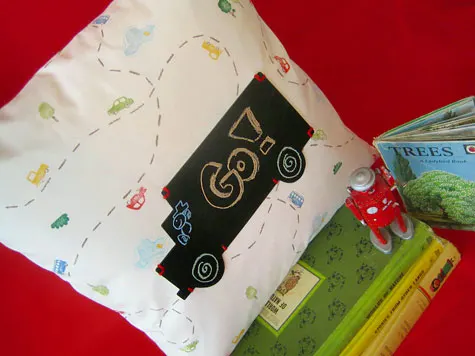
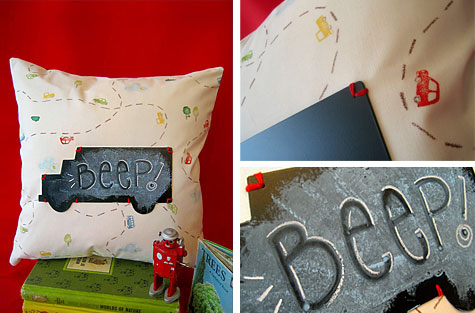
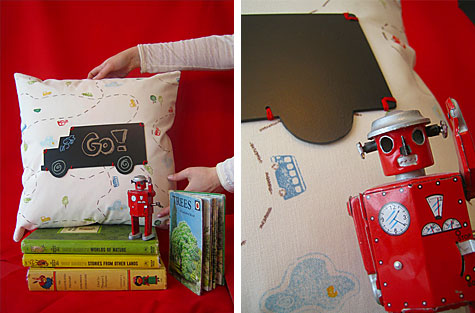
I also made a whimsical kid’s version with a truck-shaped chalkboard on Japanese imported automobile fabric and red wool gabardine back with red zipper and stitching.


My friend Heather Crosby hosted a pillow photo shoot in her Pilsen home. A thousand thanks to Heather for letting me tap her fantastic photo set styling and photography skills! And here are her two favorite outtakes from our fun day:

Supplies (for the 18″ x 18″ pillow):
- 18″ x 18″ pillow (I used 10/90 down-feather blend)
- 19″ x 19″ fabric square for front
- 19″ x 19″ fabric square for back
- Two squares 19″ x 19″ medium weight no-sew stabilizer (optional but recommended to add weight and crispness)
- 14″ zipper (optional but recommended)
- 8″ x 6.5″ rectangle (or cut your own fun shape!) ‘chalkboard’ from .06 thick plastic styrene sheet (which is is also very good for handbag bottoms) or you could try thin wood
- Truck chalkboard template (PDF, use if desired)
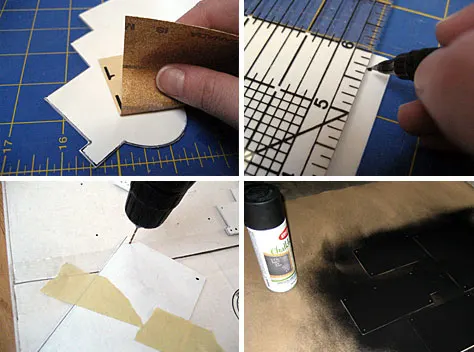
- Krylon Chalkboard Paint
- Embroidery floss
- Thread
- Drill with small drill bit (I used 3/32″)
- X-ACTO knife, metal ruler, gridded self-healing rotary mat
- Fine sandpaper (optional but recommended)
COPYRIGHT NOTE: You’re more than welcome to use this project and templates for your own personal use. Contact me for any commercial, distributed or published use.
First create your chalkboard. Trace a rectangle or shape onto the plastic using a Sharpie. You can use my truck pattern if you want. Using your metal ruler cut out the shape by running your X-ACTO knife next to the ruler. When making round shapes such as the truck tires be patient, just cut in the same spot over and over again and it will break through.
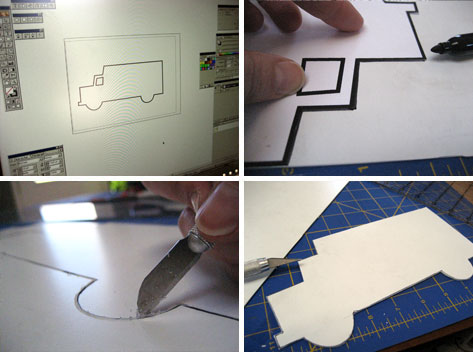

Lightly sanding your cut plastic piece is optional but I think it looks nicer to round off edges and rough up the front so the spray paint adheres better. Wipe off any dust using a wet lint-free cloth and let dry. Mark and drill holes 1/4 inch from each side on all four corners. The plastic is really easy to drill through, so I like to tape it on a cardboard box for easy control. Follow the spray paint directions to coat your chalkboard with three coats.

If using stabilizer, baste it onto the wrongside of the front and back so it’s easier to work with. If you’re putting in a zipper here are two ways to do it, either topstitched or not. Start by marking a dot 2 1/2 inches from both the left and right sides your front piece on one side. With right sides together, sew one side of the front to the back using a 1/2 inch seam up to the dots, leaving the middle open.
For topstitched: Baste the middle using a 1/2 inch seam. Press the seam open. Place the zipper face down and hand baste. Topstitch through the zipper. Take out your basting stitches.
Not topstitched: With the zipper open and face down on the right side of the fabric, sew one half of the zipper onto the front piece and the other half onto the back.

Sew around the other three sides of the pillow. I then add a tight zigzag stitch to make inside seam edges pristine. Turn right side out. Sew the chalkboard onto the front using floss. Insert the pillow form and sketch away!

Like these pillows but don’t want to make them yourself? Contact me and I’ll help.
COPYRIGHT NOTE: You’re more than welcome to use this project and pattern for your own personal use. Please post a comment below or email me if you use this project so I can smile when I see that it’s being used. Craft and pass it on!
Rachel
Wednesday 26th of January 2011
love these... i have featured you here: http://www.bubblynaturecreations.com/2011/01/why-didnt-i-think-of-that-wednesday.html
Tamara
Saturday 6th of September 2008
Wow! These are super cool, looking forward to checking them out at Renegade : )
Heather Crosby
Tuesday 4th of March 2008
I am so excited to see this up! What fun we had...you are inspiring, girl.