
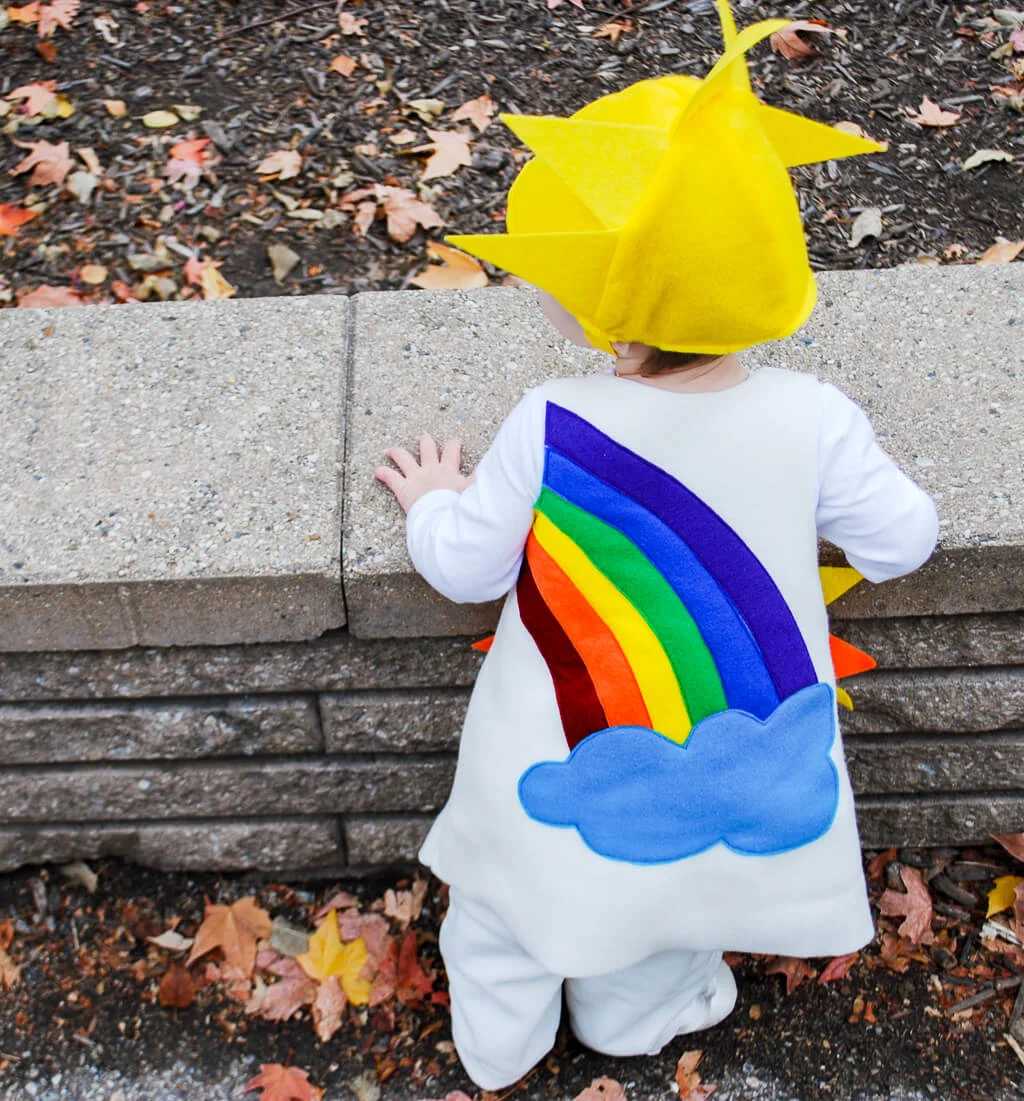
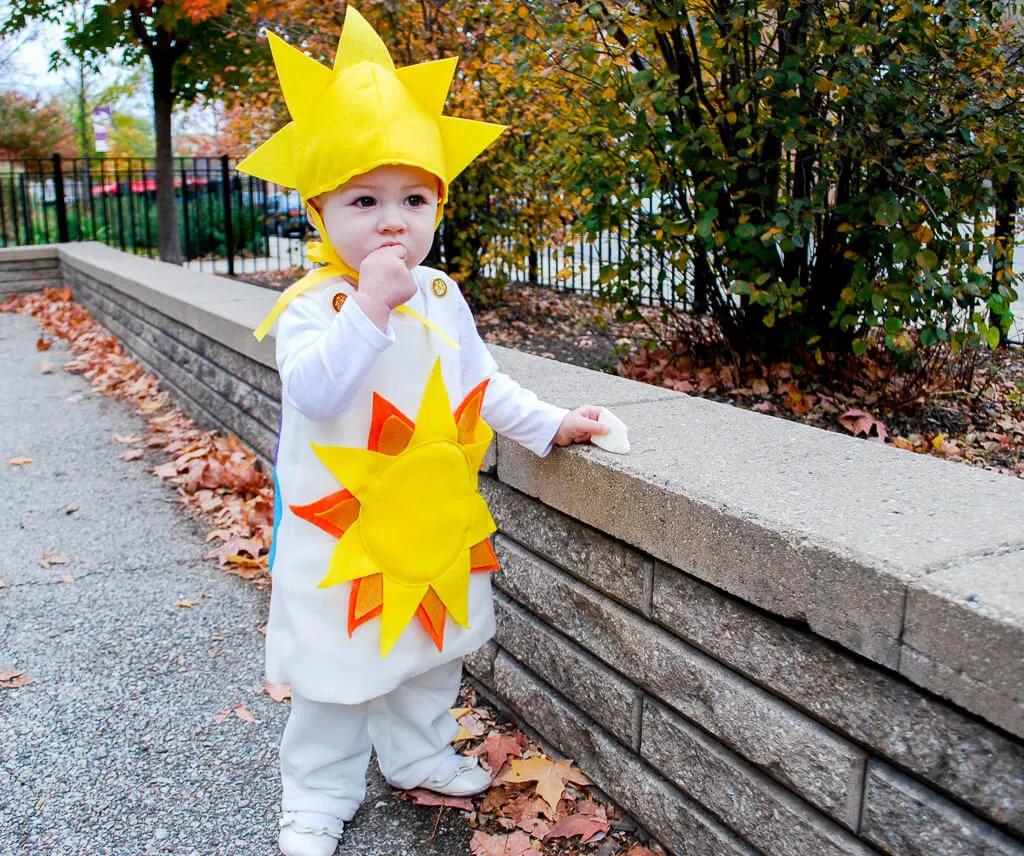
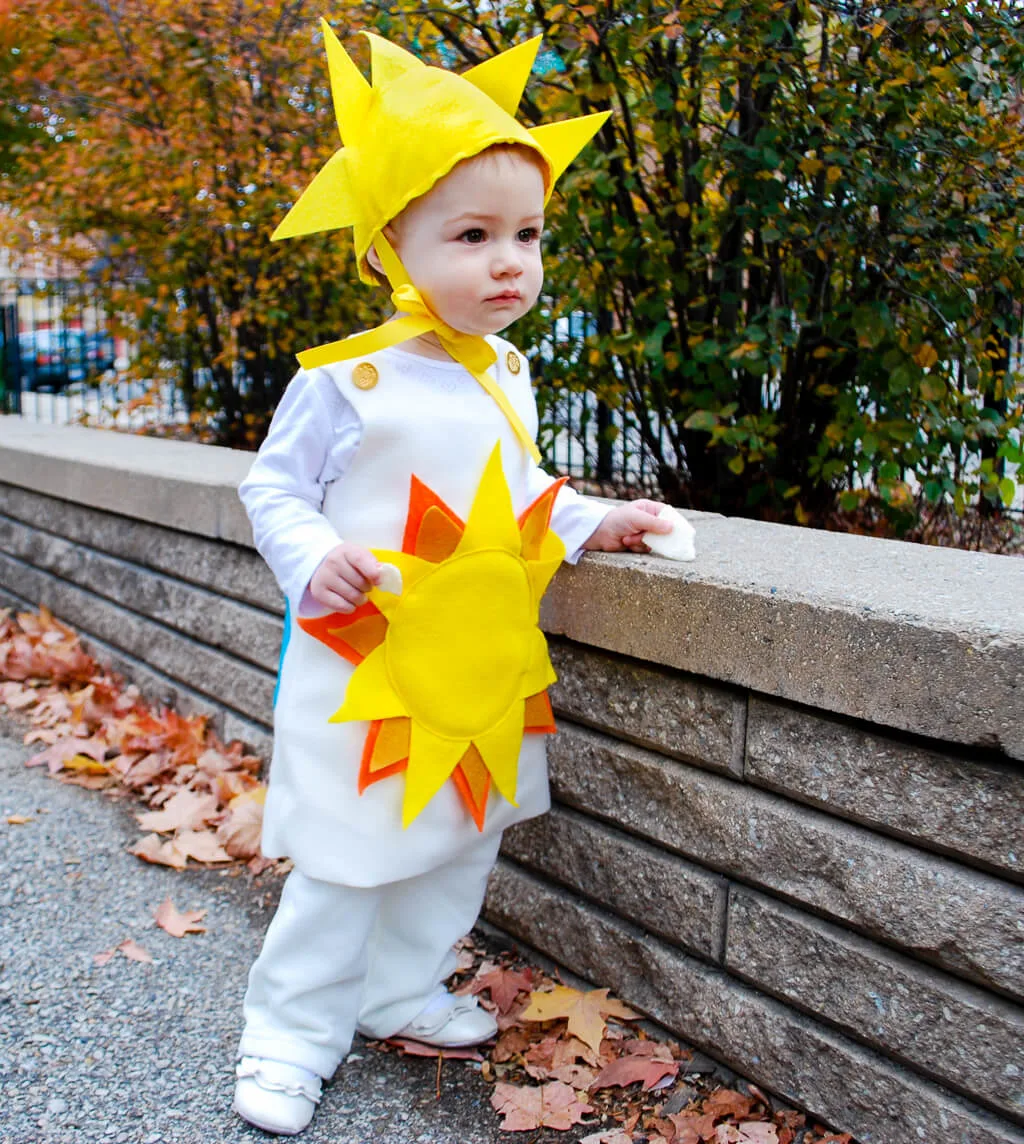
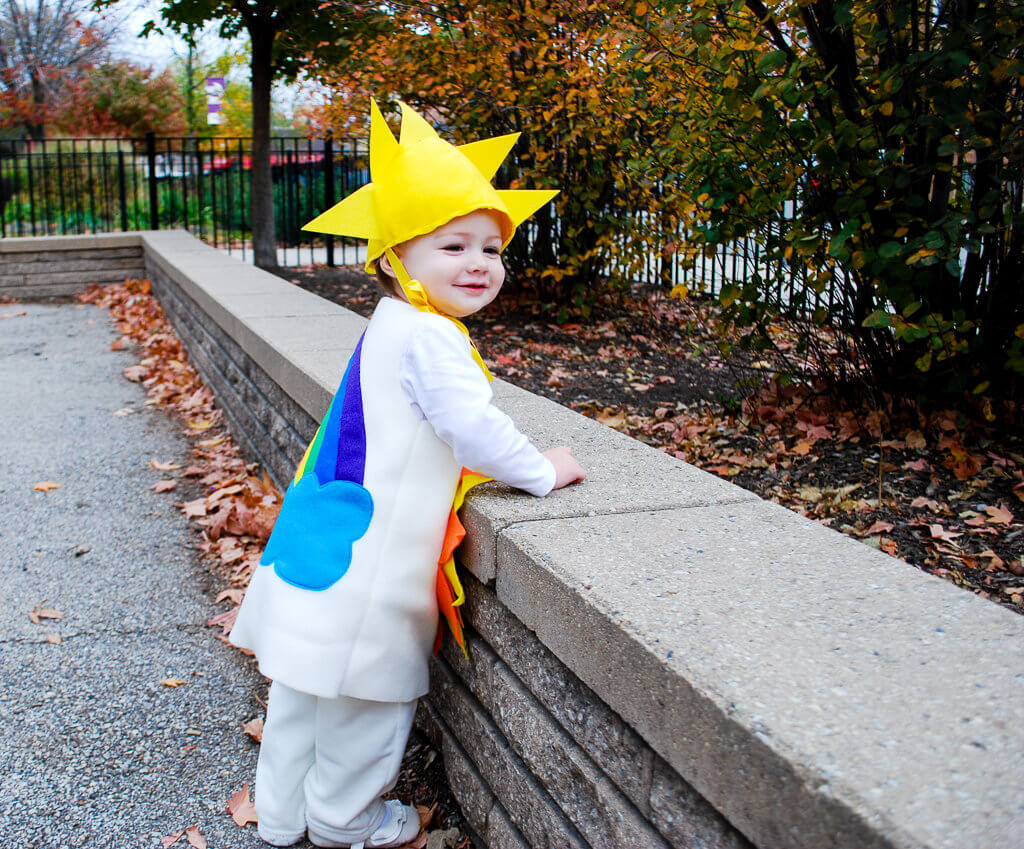
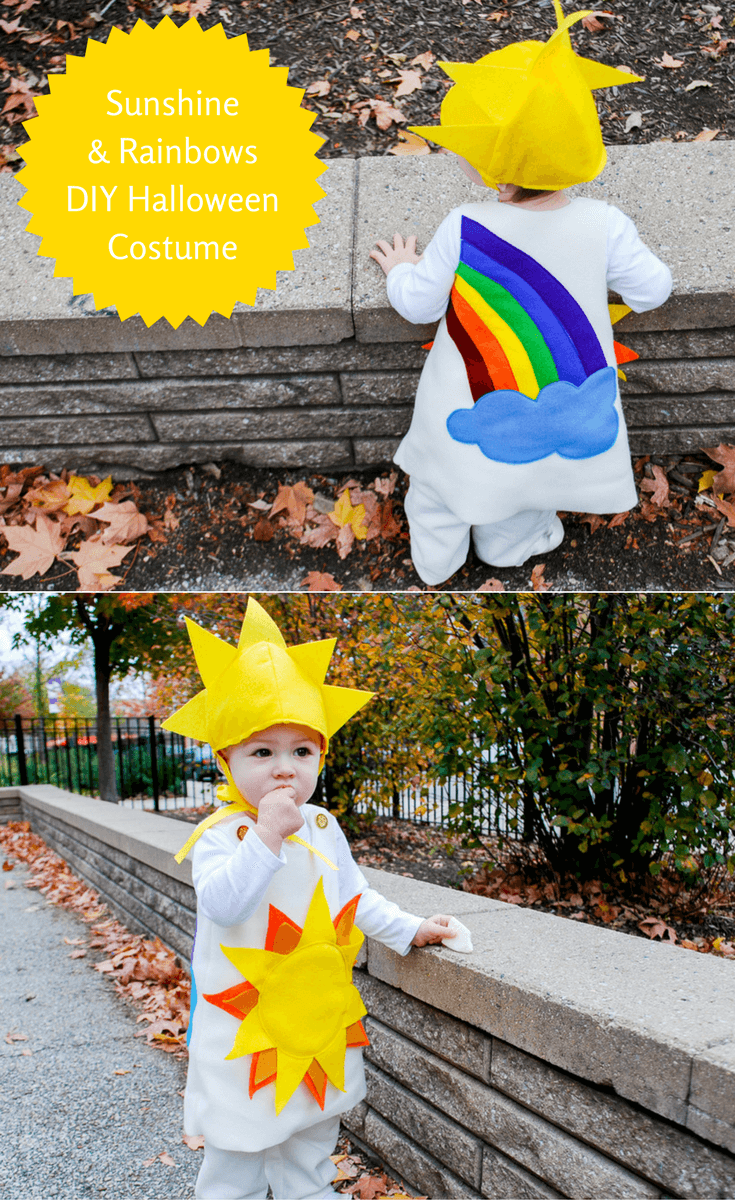
My daughter Elise is my little ray of sunshine, without a doubt. So when it came to making my delightful girl her first proper Halloween costume, I came up with this cheery fleece and felt “Sunshine and Rainbows” Halloween baby costume with sun on the front, sun hat, and colorful rainbow on the back. It’s a cute and unique DIY Halloween costume idea for toddlers and kids.

Cute Sunshine and Rainbows DIY Halloween costume for baby and toddlers
My free Sunshine Halloween Costume Pattern is sized for babies about one year old like Elise, but you can size it up or down as you need to to make a Sunshine and Rainbows toddler costume, or take inspiration to make this for an elementary school aged kid. I think Sunshine and Rainbows is a great Halloween costume idea for both boys and girls.
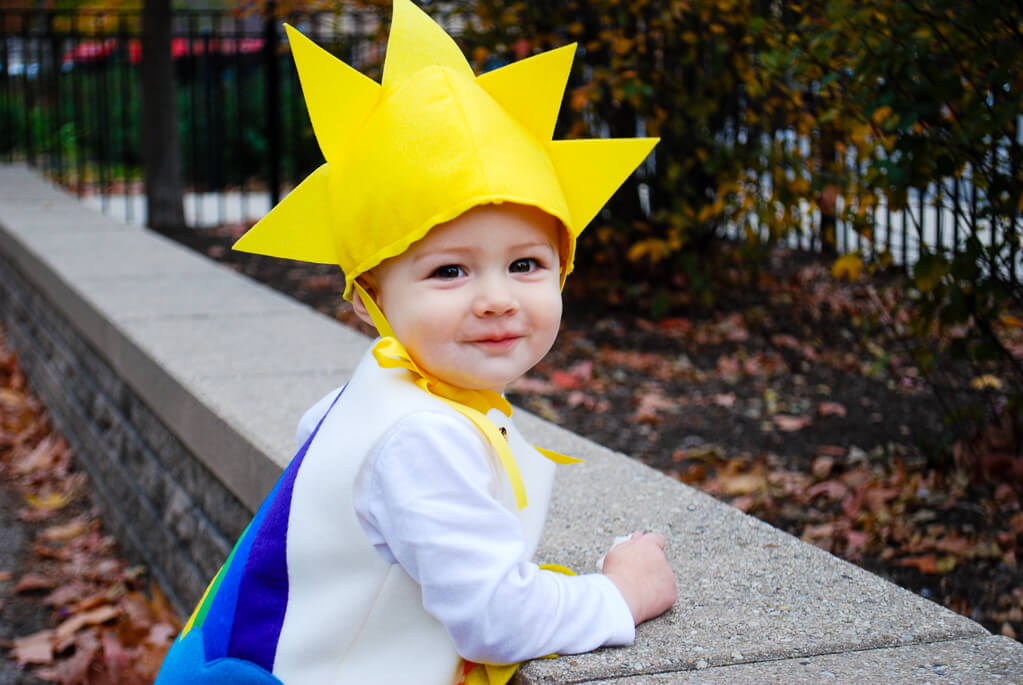
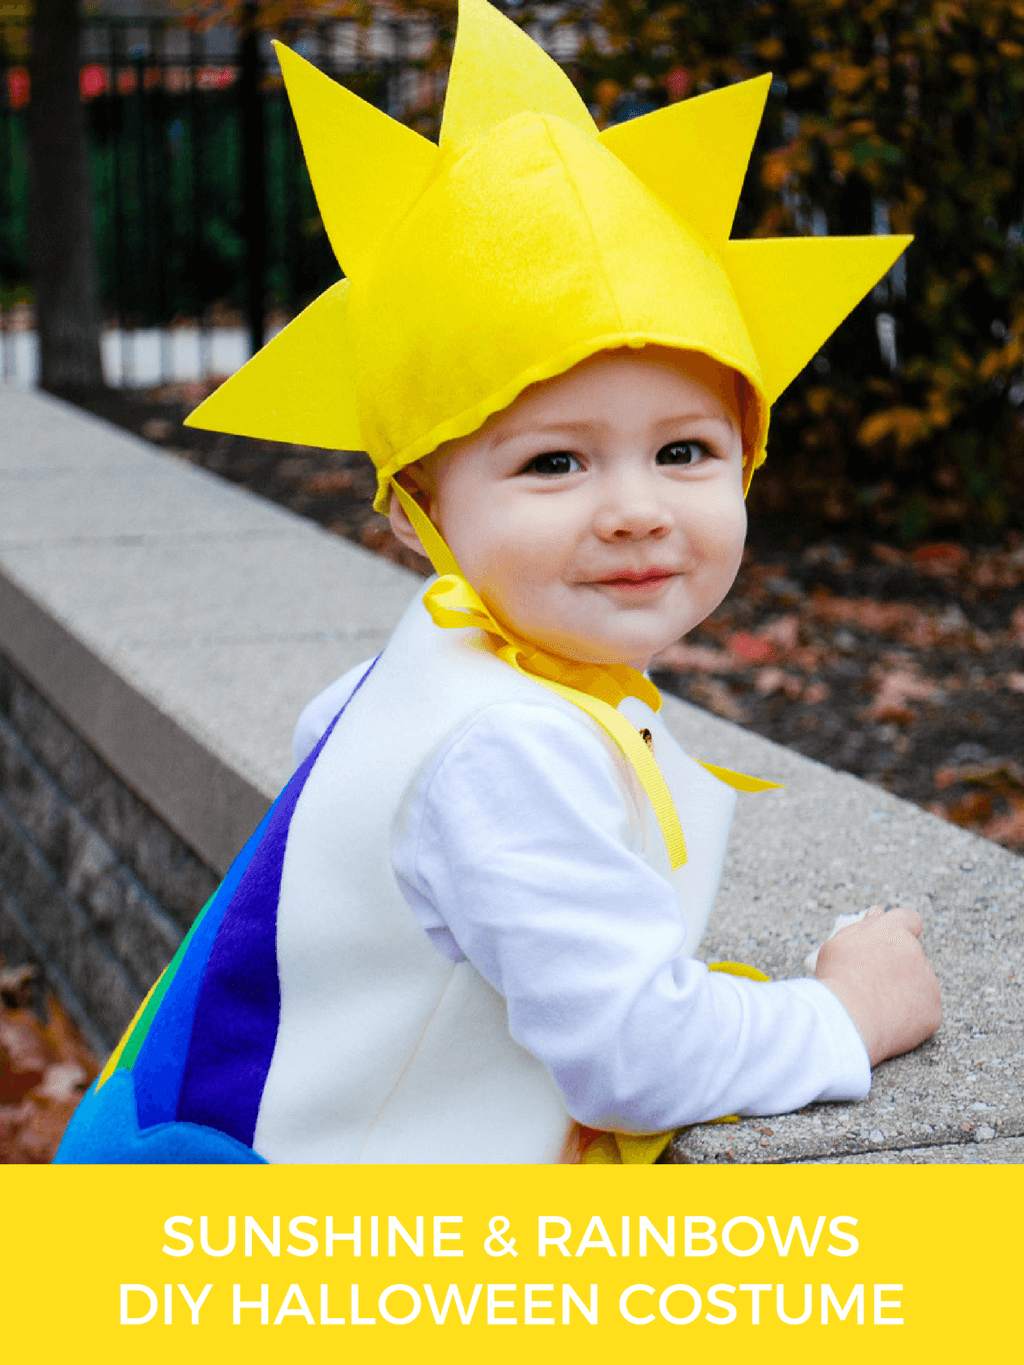
DIY sun hat pattern with rays of sunshine
I used a special stiffened Friendly Felt made from recycled post-consumer plastic bottles to make her DIY sun hat’s “sun rays” naturally poke in the air. Cute, huh?

Last Halloween, Elise was a mere two weeks old so all we did was to put her in this Halloween-themed t-shirt from her Mammy Winegard:


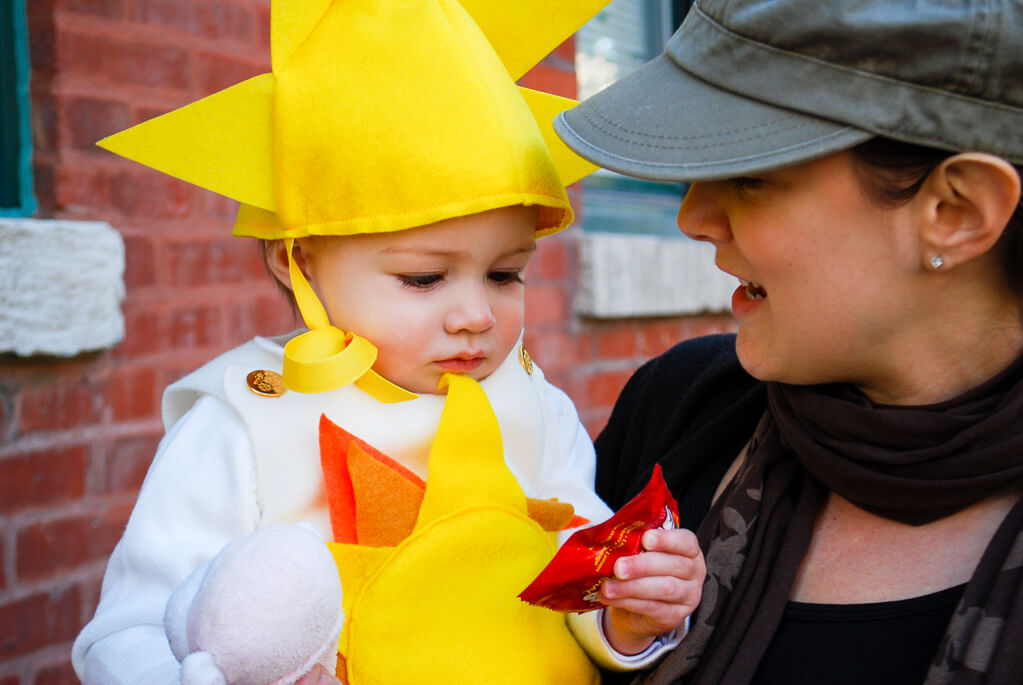
This year I bet this bucket of sunshine is going to score loads of Halloween candy. But to me, I think that *Elise* is the treat!


+++++
Supplies for making a DIY Sunshine and Rainbows Halloween costume:
- Kathy’s Sunshine Halloween Costume for babies, toddlers and kids free pattern template (PDF – just a friendly warning — the pattern is 24MB and 12 letter-sized pages – contains sunshine hat pattern, rainbow and cloud pattern, dress pattern sized for a 1 year old)
- 1/2 yard of polar fleece fabric (or more yards if you’re making your own dress pattern)
- Felt squares: 1 red, 3 yellow, 1 gold, 1 orange, 1 green, 1 blue, 1 turquoise
- 1 yellow square of stiffened 9”x12” Friendly Felt – it’s stiff felt made from recycled post-consumer plastic bottles – you’ll use it to make the sunshine rays on her hat stick up into the air. Cool, eh? If yellow is out online then they will have it at Jo-Ann in the store.
- 1/8 yard of yellow quilt-weight cotton fabric
- 2 gold buttons – I used some from Shane’s old suit but check out these cheesy-but-cute sun buttons
- 1 yard yellow grosgrain ribbon 7/8″
- Rotary cutting set for fabric: contains a Rotary fabric cutter, self-healing cutting mat and clear acrylic ruler
- Good fabric scissors
- Pins (I prefer glass head pins)
- Thread
- Good iron and ironing board
- Tissue paper (optional if you’re drawing your own rainbow)
—
How to make a DIY Sunshine and Rainbows Halloween costume
Step 1: Cut out the toddler-sized “dress” for the DIY Sunshine and Rainbows Halloween costume
Print and cut out my free sunshine Halloween pattern for babies and kids. I have fully embraced the rub-off process described in Project Runway finalist Daniel Vosovic’s fun book “Fashion Inside Out” and created this pattern by tracing around a dress that fits Elise well, adding length to the bottom, and adding 1/2″ on both sides for the side seams.


If your child is younger or older than one, you can shrink or enlarge the free pattern. Or you can just trace a dress that currently fits your child like I did. And if you are new to sewing, check out these two posts:
1. Start sewing: What you need in your beginner sewing kit
2. Sewing machines for beginner sewers
Tape the pattern pieces together. Pin the pattern on your fleece or use pattern weights and cut.


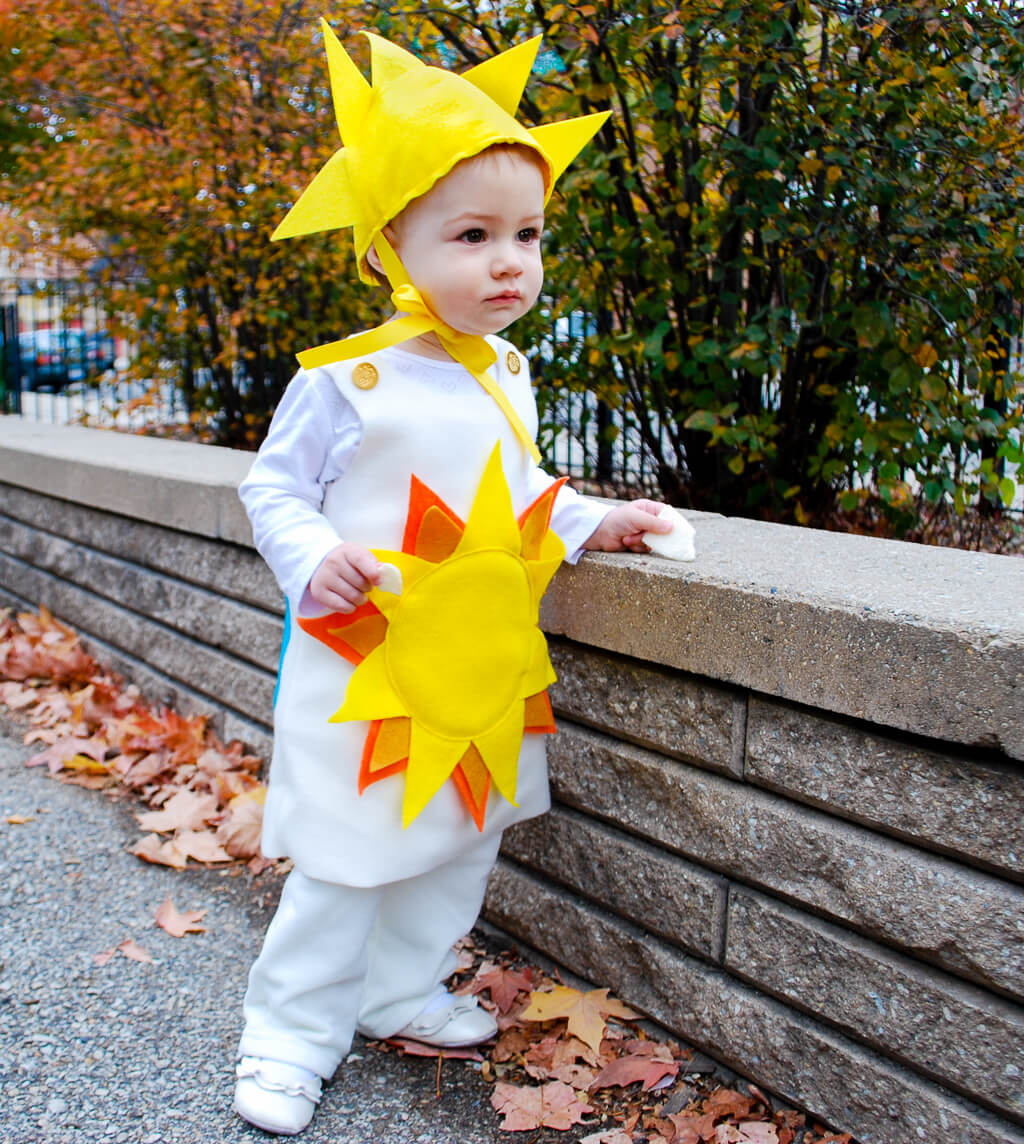
Step 2: Create your sun on the DIY Sunshine and Rainbows Halloween costume front
Print and cut out my free sun pattern. Cut 7 yellow triangles, 7 orange triangles and 7 gold triangles. Cut out one 8″ circle (I traced around a small plate).


Arrange the triangles how you wish, making sure they fit about 1/2″ under the circle. Pin when you like what you’re seeing.


Sew around the circle, leaving the ends of the ‘sunbeam’ triangles loose.


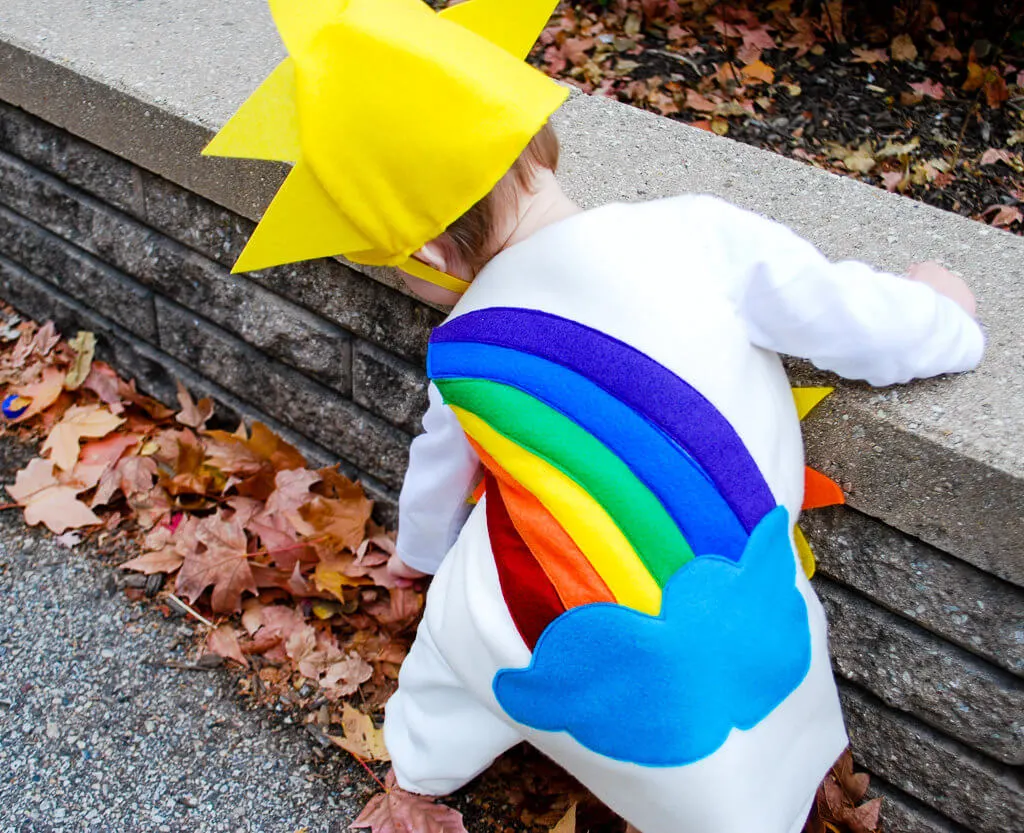
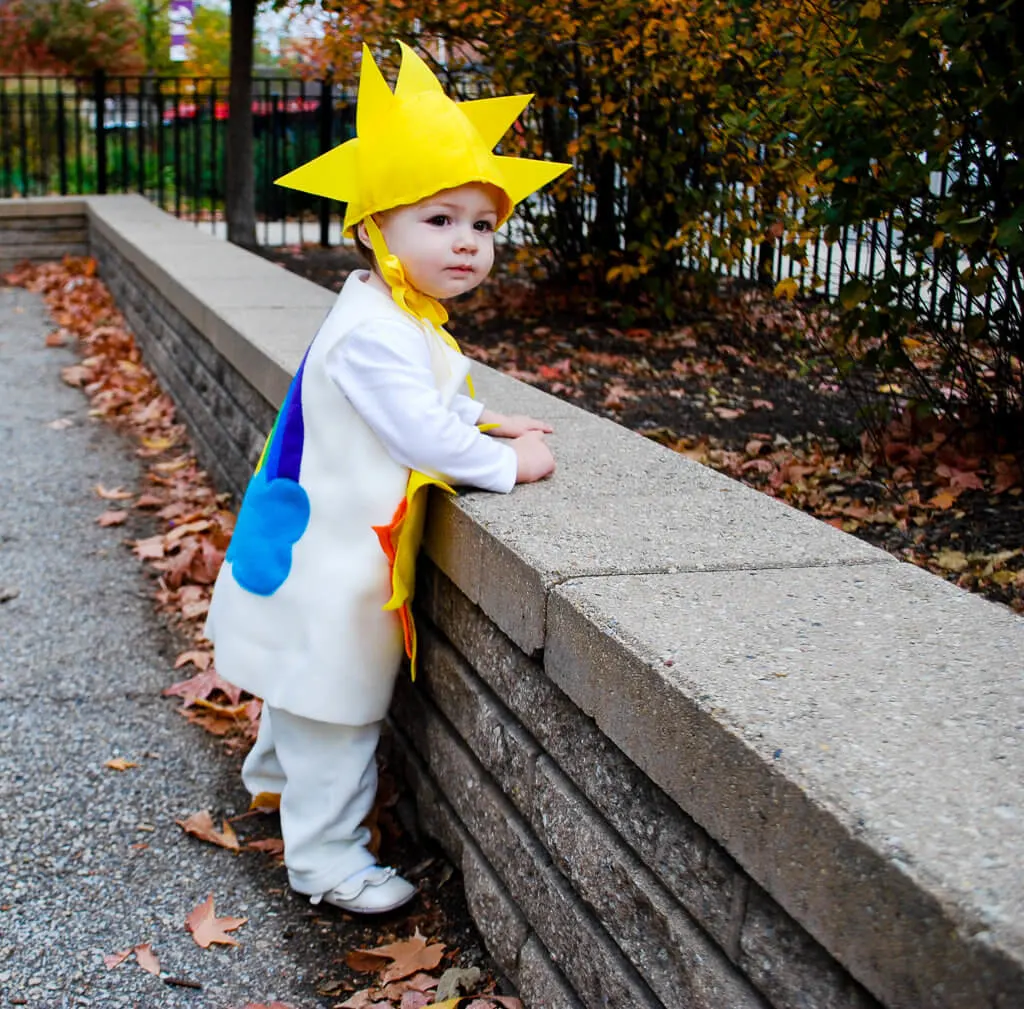
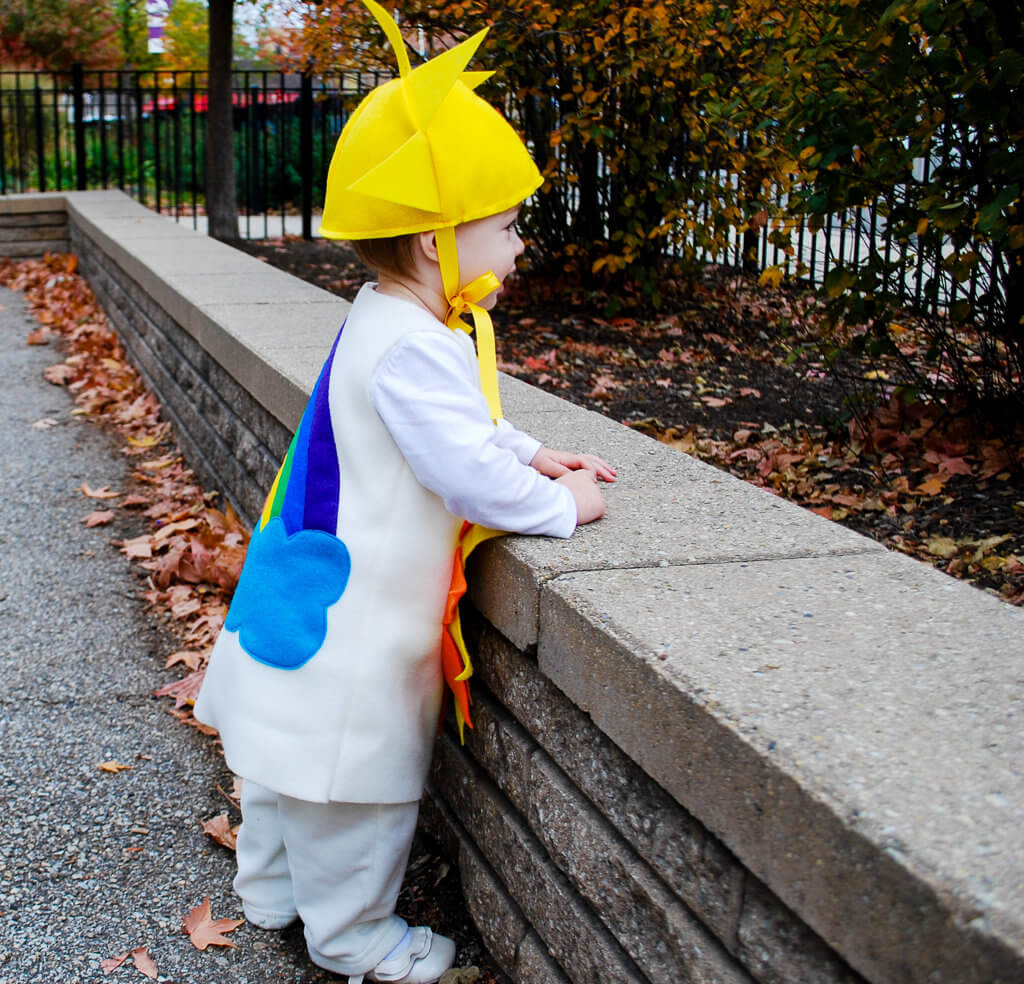
Step 3: Create your rainbow on the DIY Sunshine and Rainbows Halloween costume back


Print and cut out my free rainbow pattern, pinning each piece onto the piece of felt. (After the fact, I was reading “What Makes A Rainbow” and realized that I put red on the bottom when red should be on the top. Curses! So you are welcome to flip them when you cut out your rainbow!)
I created this pattern by putting the back piece on my table and drawing a rainbow on a piece of tissue paper like so…


Layer the rainbow, slightly overlapping colors as you go up.


Make sure you like where the red piece is placed, then remove the rest. Sew close to the edges.


Continue by adding the orange, slightly overlapping on top of the red so that you won’t see any white between the colors.


Continue like this to sew down all your colors.


Place your cloud to cover up the end of the rainbow and pin. Sew close to the edge.


Step 4: Attach DIY Sunshine and Rainbows Halloween costume front and back
This is why I love fleece Halloween costumes: There are only two side seams to sew! Put the right sides together – rainbow touching sun. Sew your left and right sides together using 1/2″ seam. Turn right side out. All the other costume edges are left raw.


Place buttons on the outside of the back straps. Sew. These buttons are from one of Shane’s old suits. Groovy, eh?


Cut a buttonhole on the front strap. Start small! You can always make it bigger if you need to.


Step 5: Make DIY sunshine hat with felt rays
This free sunshine hat pattern is derived from the babies sunshine ruffled hat that I made for Elise this summer. Print out my slightly altered Halloween version and cut 4 hat pieces out of yellow felt for the outside, 4 hat pieces out of yellow fabric for the lining, plus 5 triangles from stiff felt made from recycled bottles that you can get at Joann’s – it sticks up like sunshine rays nicely on its own.
Follow my babies sunshine ruffled hat instructions to sew two felt hat pieces together. Repeat with the other two felt hat pieces. Iron seams open. Now you have two ‘hat halves’ – set one aside.


Place one ‘hat half’ right-side-up on your table. Pin the stiff felt triangle to the long curved top edge, slightly overlapping triangles. Sew.


Pin the second ‘hat-half’ on top, right sides together. Sew along the long curved top edge
Sew the lining by following my babies sunshine ruffled hat instructions. Turn the bottom edge under 1/4″ and iron.


Place the lining inside the felt hat, wrong sides together. Slip two pieces of grosgrain ribbon on the sides. Here’s a closer view:


Sew around your hat, making sure to catch the lining inside. Go back and forth a couple times over your ribbon straps so they stay secure. The inside will look like this:


And there you have an easy DIY sunshine hat!


Now head out to go trick or treating, and try to explain to your one-year-old why people are handing her these strange colorful packages…

++++++
Pin my easy DIY Sunshine and Rainbows Halloween costume idea for toddlers and kids


And be sure to check out my DIY Halloween costumes that I made for DIY Network: Watercolor Paint Box Artist DIY Halloween Costume with Giant Paintbrush, Mason Jar DIY Halloween Costume, and Bull In A China Shop DIY Halloween costume. Plus more easy Halloween DIYs!
—
Like it? Share it!
The nicest way to say you like it is to pin it on pinterest, post a comment, follow Merriment Design on Pinterest and Instagram or sign up for monthly emails. Enjoy! 🙂
Copyright stuff: You’re more than welcome to use this free project and tutorial for personal use. Contact me for commercial use and Etsy sales.
Abalorios Zamak
Thursday 15th of October 2015
Muy original!, sin duda un gran disfraz. Saludos
Kathy Beymer
Tuesday 20th of October 2015
Gracias, Abalorios!
Melanie
Wednesday 2nd of March 2011
I am sewing this costume (just the sunny side) and the hat for a play she is in this month. She's playing a sun! I was so relieved to find this "how to" so I don't have to re-invent the wheel. Thanks!
Kathy Beymer
Thursday 3rd of March 2011
@Melanie, that's great! If you could, please post a photo of your little sun in our new flickr group - http://www.flickr.com/groups/merrimentdesign/
Kat
Sunday 31st of October 2010
Wow this is awesome!!! I have a couple little girls that would just love to have a costume like this!!! :) Thank you for the awesome tutorial!!
Anne
Saturday 30th of October 2010
That's SO cute!!! I linked to your post over at Craft Gossip Sewing: http://sewing.craftgossip.com/free-pattern-sunshine-and-rainbow-costume-for-babies/2010/10/30/
--Anne
Anne
Saturday 30th of October 2010
Squeeeal! That's SO cute!!! I linked to your post over at Craft Gossip Sewing: http://sewing.craftgossip.com/free-pattern-sunshine-and-rainbow-costume-for-babies/2010/10/30/
--Anne